Want to know how to speed up your footage? Make slow motion videos and create a smooth speed ramp in Adobe Premiere Pro? Check this out.
What is a Speed Ramp?
Videos can be sped up, they can be slowed down. But a speed ramp is a technique used to combine different speeds on the same clip. This technique is used to emphasize parts of your video creating an impactful effect on your editing. It gives that extra flavor to keep your audience excited and interested.
Use MASV on Your Next Video Project
Transfer high-res footage, audio, and images in record time with MASV.
How to Control Speed in Premiere Pro?
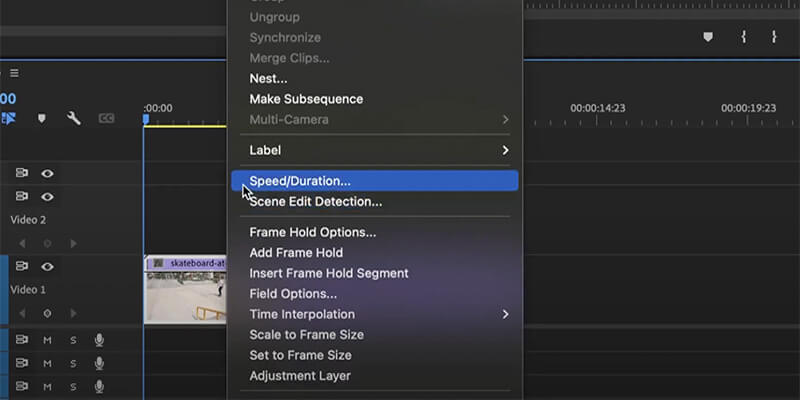
To access the speed controls, you can either right click on your clip and select the option ‘Speed/Duration’, or you can use the shortcuts ‘Command + R’ on Mac and ‘Control + R’ on Windows.
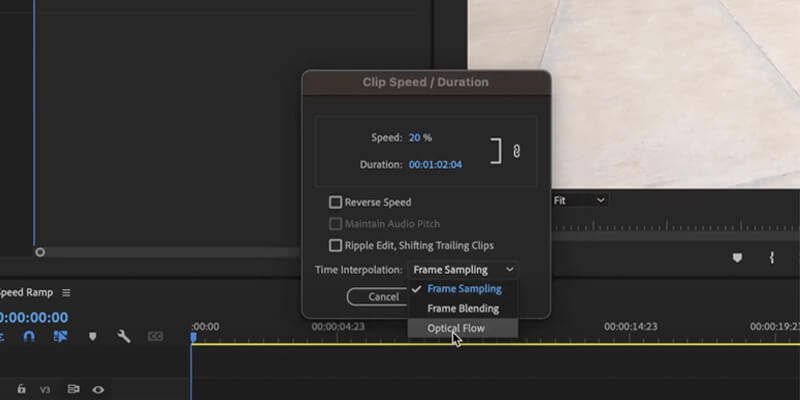
A ‘100%’ percentage represents the normal speed. The higher the number, the faster the video will play. If you put it at 50% it will slow down the video to half it’s normal speed. But, one extremely important thing to remember for slow motion. The footage that you use should be shot at a minimum of 60 frames per second.
Read More: With the MASV Panel for Adobe Premiere Pro, you can send full Premiere projects

FPS Settings
Our eyes see normal movement at 24 frames-per-second (FPS). When shooting at 60 FPS, you can easily slow it down by half without the movement looking choppy. But if you want to slow it down even further, you will need a higher FPS so you can have that smooth movement.
If you want a super slow-mo but don’t have the frames to afford it, you change the ‘Time Interpolation’ to ‘Optical Flow’ here. Also don’t forget to keep your sequence settings at 24 FPS.

Transfer 4K 60 FPS Footage
Use MASV to send large video files over the cloud.
How to Create a Speed Ramp?
To create a speed ramp, right-click on your clip and at the bottom, go to:
‘Show Clip Keyframes’ > ‘Time Remapping > Speed.
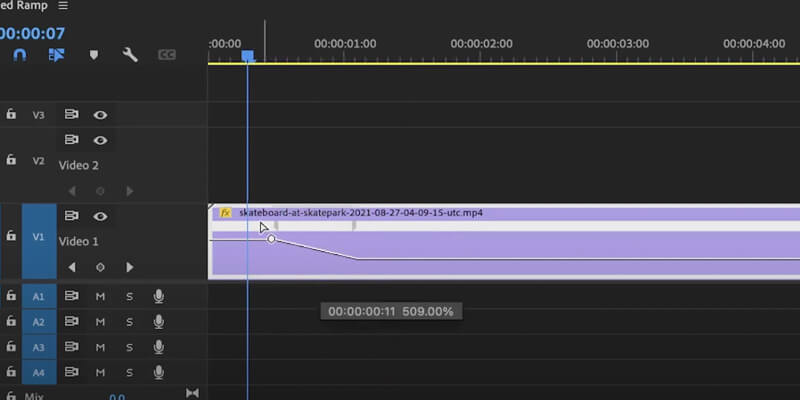
You should see a thick white line appear on your clip. When this white line is visible, it means that the bottom thinner line can be used to control and modify speed instead of opacity.
Drag it down and it will slow down the footage, drag it up and it will speed it up. To have this transition smoothly, CMND/CTRL + Click the thin white line produce a keyframe. Just grab the keyframe and drag it to the side.
This will create a physical ramp going from one speed to the other. Click on the keyframe and a blue dot with lines will appear in the middle of the ramp. If you drag it as well, you will help to smooth the steepness of the ramp.
You can keep polishing the speed ramp by moving the keyframes to adjust the duration of the transition and by trying different speeds to achieve the effect you want.

When you finish your video, use MASV to send your reviews or final deliveries to anyone anywhere in the world. This is the fastest way to deliver raw footage and all those massive media files that are occupying space in your hard drive at the moment. Sign up for MASV and you will get 20 gigabytes free to use towards your next set of transfers.
Send Large Files Today
Get 20 GB to use with the fastest, large file transfer service available today, MASV.