Connect MASV to Your Amazon EBS Storage
MASV makes it easy for you and your collaborators to ingest large files into Amazon EBS storage. Scroll down for a full tutorial on how to set it up.

빠르고 안정적인 서비스
Quickly and reliably ingest to your Amazon EBS (Elastic Block Storage) or Amazon EFS (Elastic File Storage).
Simplified Ingest
Easily connect your EBS or EFS storage through MASV’s browser interface and user-friendly upload Portal.
Always Secure
Ingest to EBS without opening ports or setting permissions, and limiting contributors to the directory you specify.
Tutorial Preparation
In the following tutorial, you’ll learn how to:
- Install the MASV 에이전트 on your Amazon EC2 (Elastic Compute Cloud) instance.
- Create a secure connection to an Amazon EBS directory in the MASV Web App.
- Use MASV Portals to ingest files from contributors directly to your Amazon EBS storage.
What you’ll need:
- A MASV 계정.
- An Amazon account with an Amazon EC2 instance that includes Amazon EBS.
Time to complete: Approx. 20 min.
💡 Note: For this tutorial, we’ll use an Amazon EC2 instance running an AMI (Amazon Machine Image) with Amazon Linux 2023. The MASV Agent is available for a range of platforms, including Docker. Visit MASV Agent Setup for details. To set up EFS storage with MASV, you can follow the same steps listed below.
Install the MASV Agent
Installing the MASV Agent is the first step. The MASV Agent lets us create a secure connection for transfers.
1. In your Amazon account, connect to an Amazon EC2 instance.
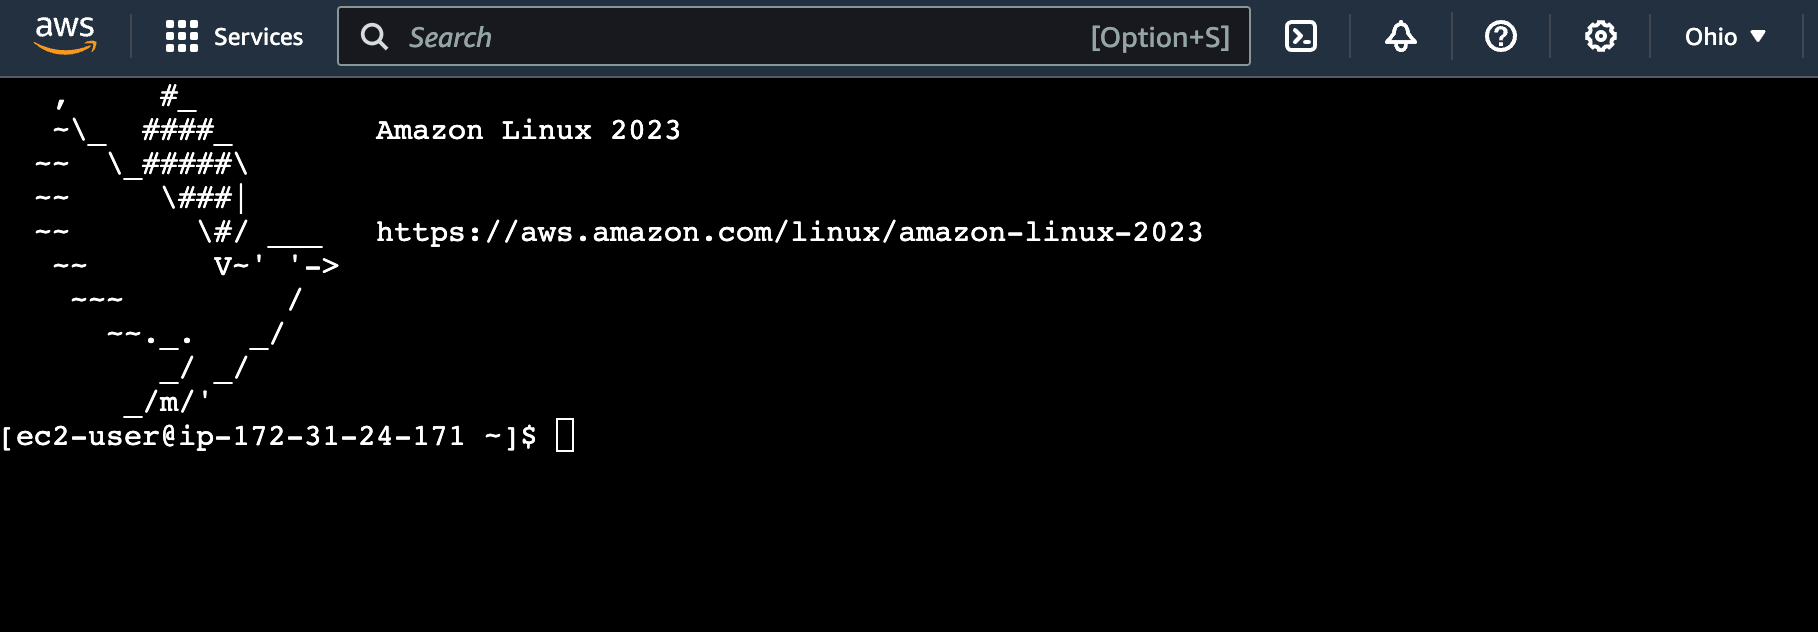
2. For Amazon Linux 2023, we’ll use the RPM-based installer. Copy the commands below and paste it in your EC2 terminal, and press Enter.
sudo tee -a /etc/yum.repos.d/masv-agent.repo > /dev/null <<EOF
[masv-agent]
name=MASV Agent
baseurl=https://dl.massive.io/agent/rpm
enabled=1
gpgcheck=1
gpgkey=https://dl.massive.io/agent/publickey.gpg
EOF
3. Copy and paste the following commands, and press Enter to run the installation:
sudo yum update
sudo yum install masv-agent
4. Type Y when prompted, and press Enter.
5. If prompted, verify that the GPG key Fingerprint displayed matches the following: 087F 5276 E175 06C4 3A5C 1A06 F400 D772 9479 7DAE, and, if so, type Y and press Enter.

6. When you see Complete!, you’re ready to set up your integrations in the MASV 웹 앱.
The installer automatically starts the MASV Agent server and configures the background service—easy, yes?
Link Your Amazon EBS Storage
Now we’ll connect MASV to the EBS storage of our Amazon EC2 instance. MASV offers a range of integration options for cloud storage, popular media apps, and media asset management software. We’ll be using the Storage Device integration.
1. Sign in to the MASV 웹 앱, and in the sidebar on the left, select 연동서비스.
2. On the 연동서비스 page, select the Available Integrations tab, and select Storage Device.
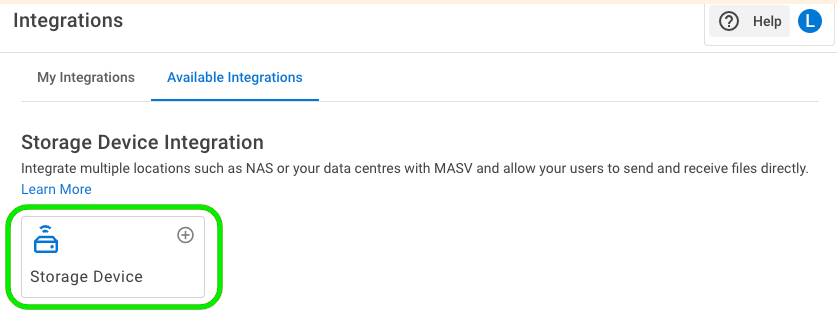
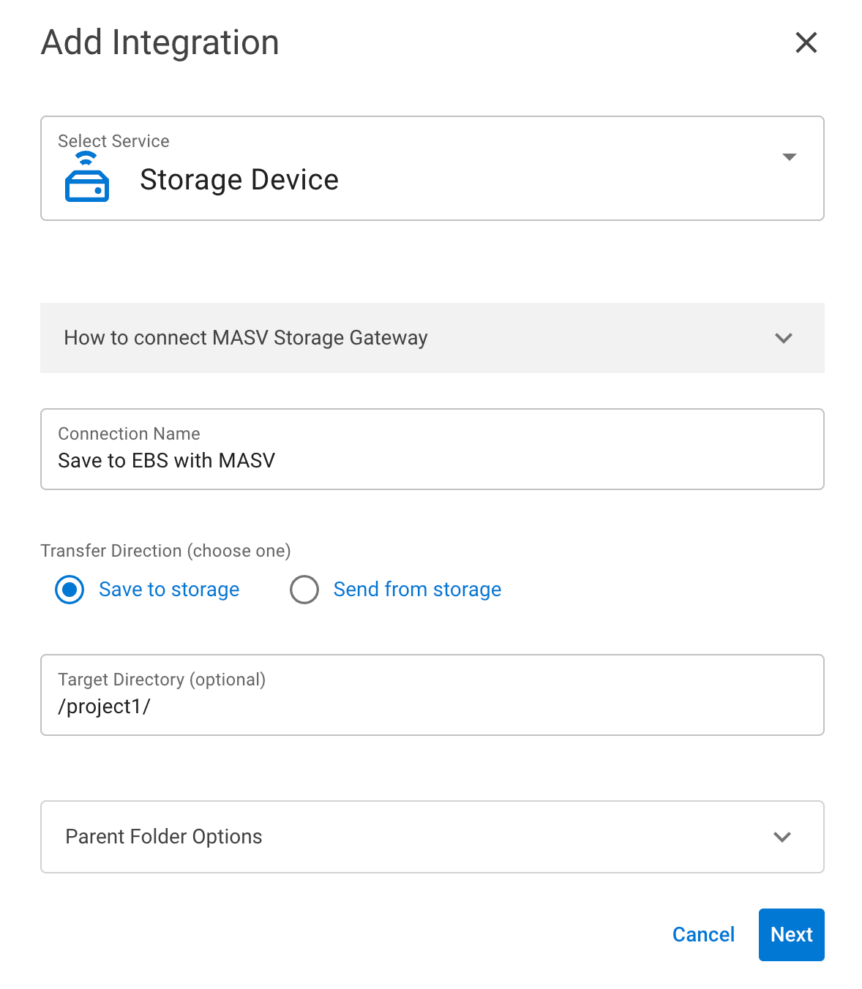
3. 3. Add Integration window, type a name in the Connection Name box, and choose a Transfer Direction. If you choose Save to storage, you have the option to set Target Directory (we’ll use project1) and Parent Folder (default is to include package name in path)—these settings are appended to the root path you set later. They are relative to the root path and can be edited within the MASV Web App as needed.
4. Select Next, and in the Register Integration window, ignore step 1 (already done). In step 2, before we continue, it’s best to copy the ID 및 Secret key to a secure location.
5. Copy the block of code from step 2 to your EC2 terminal window.
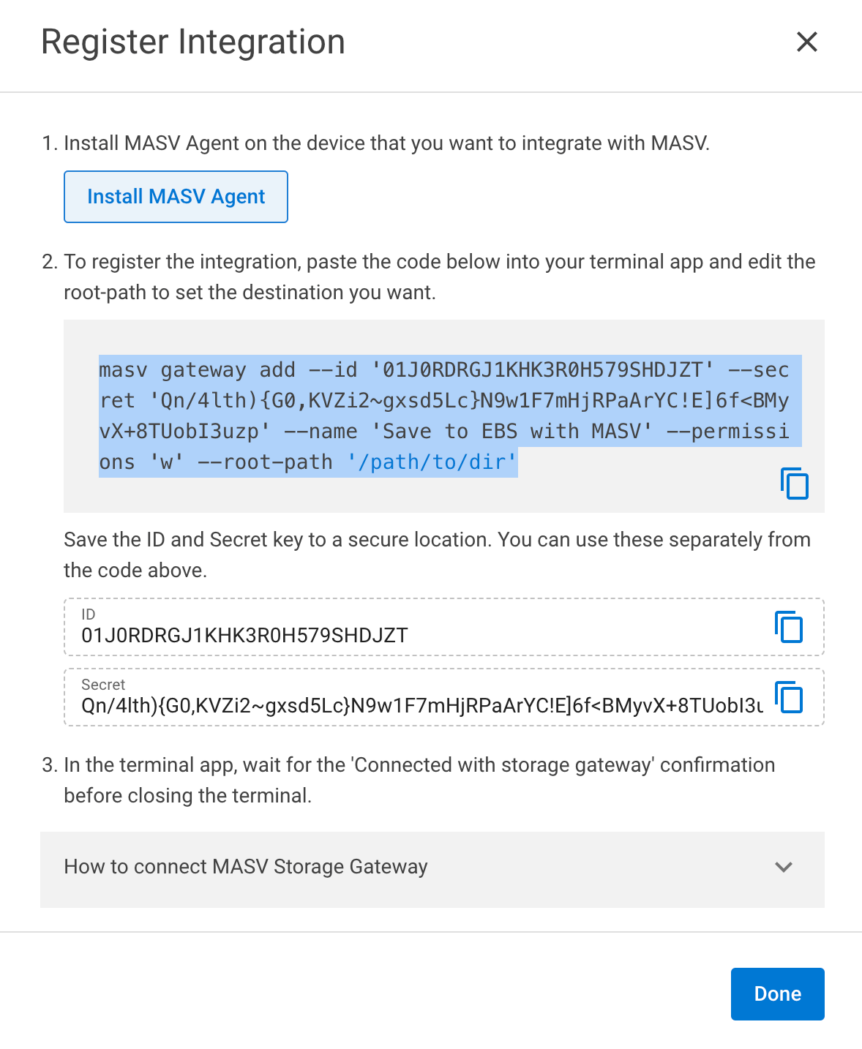
6. Edit the –root-path placeholder text to set the directory you want (must be an existing directory), in this example, we used –root path ‘/projects/2024’, and press Enter. A successful connection displays code 200.

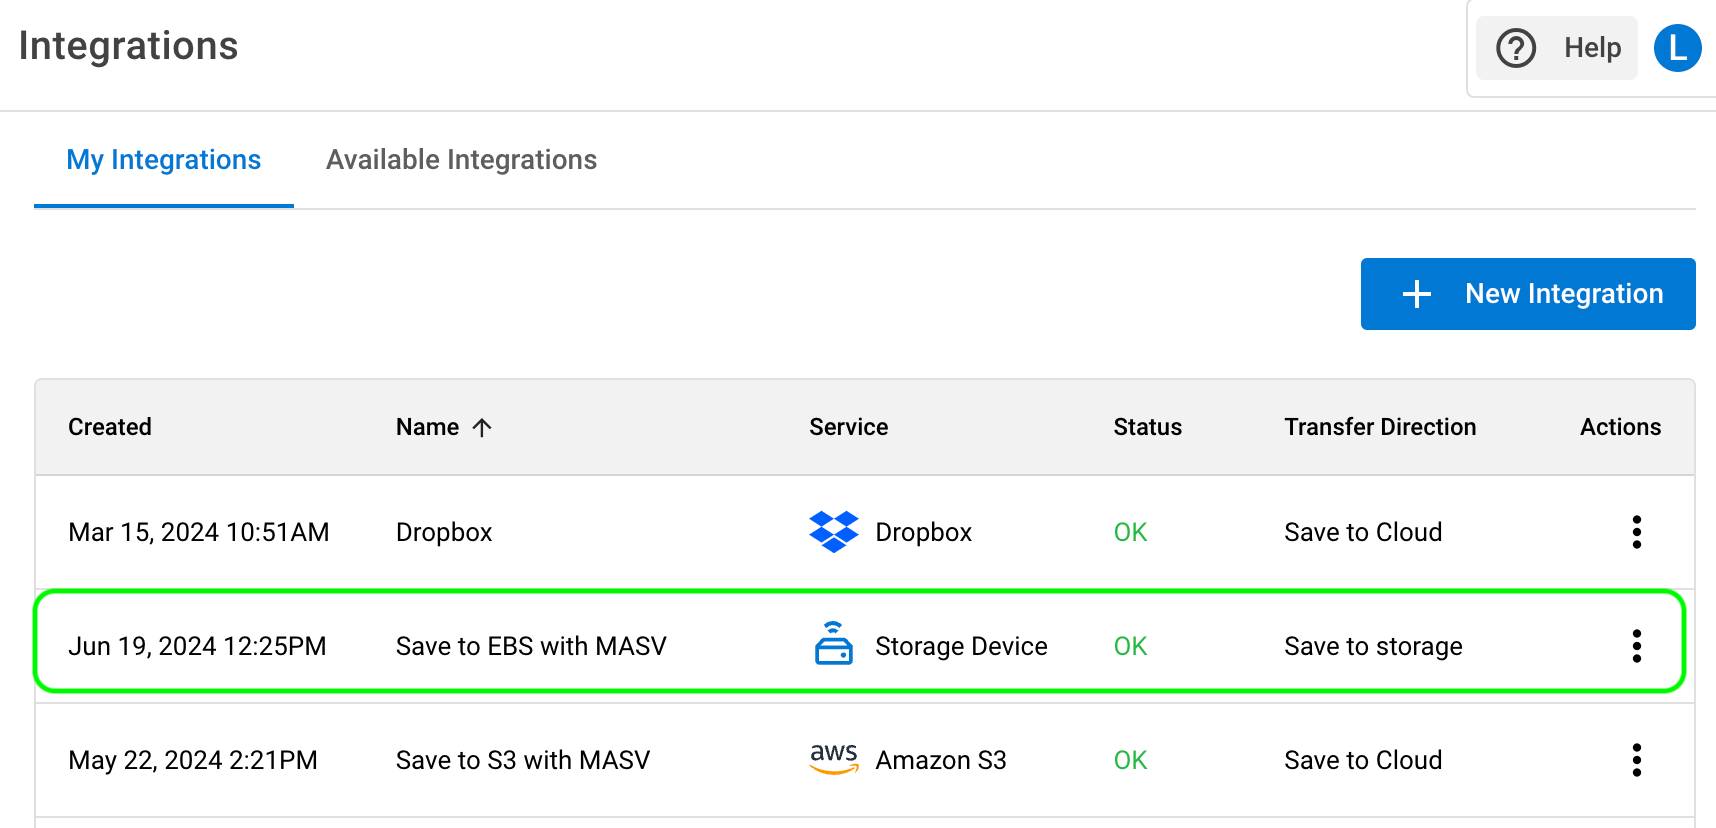
7. In the MASV 웹 앱를 선택하고 완료 to close the Register Integration window, and select the My Integrations tab to view your new integration. Refresh the browser tab to update the status for the connection.
Connect Amazon EBS storage to a MASV Portal
MASV 포털 are web uploaders that make it easy to collect files from contributors and deliver them to your storage of choice. Lets take a look at how it works with our new Amazon EBS storage integration.
You’ll need a MASV 포털. If you don’t already have one set up, you can create one in the MASV 웹 앱. Full instructions can be found in the Help: How to create, edit, or delete a Portal. You can create an Instant Portal in a couple of clicks, or create a Custom Portal (connecting a Portal to an Integration is a type of customization).
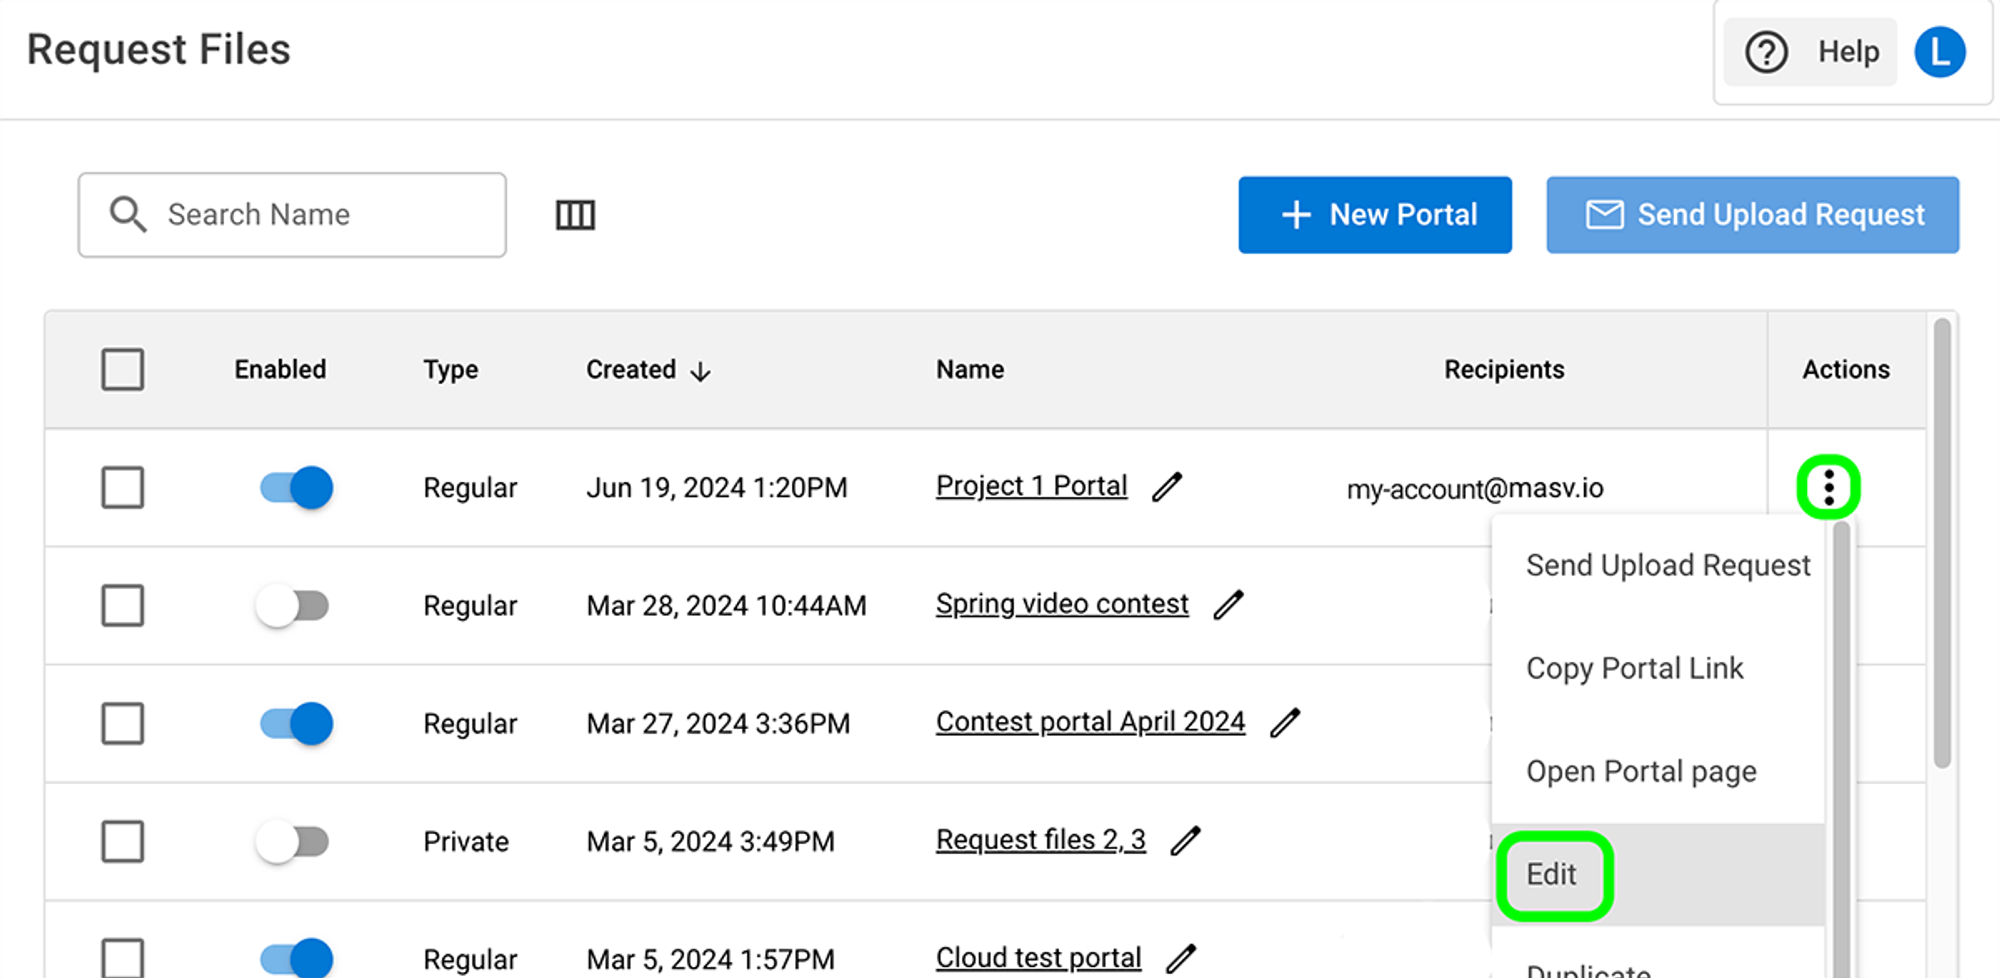
1. In the MASV 웹 앱를 선택하고 Request Files with Portals from the sidebar on the left.
2. On the Request Files page, choose a Portal, and in the Actions column, select the menu icon [three vertical dots], and select 편집.
3. On the Edit Portal page, select the 연동서비스 tab, and in the Status column, enable the toggle for your Amazon EBS integration.
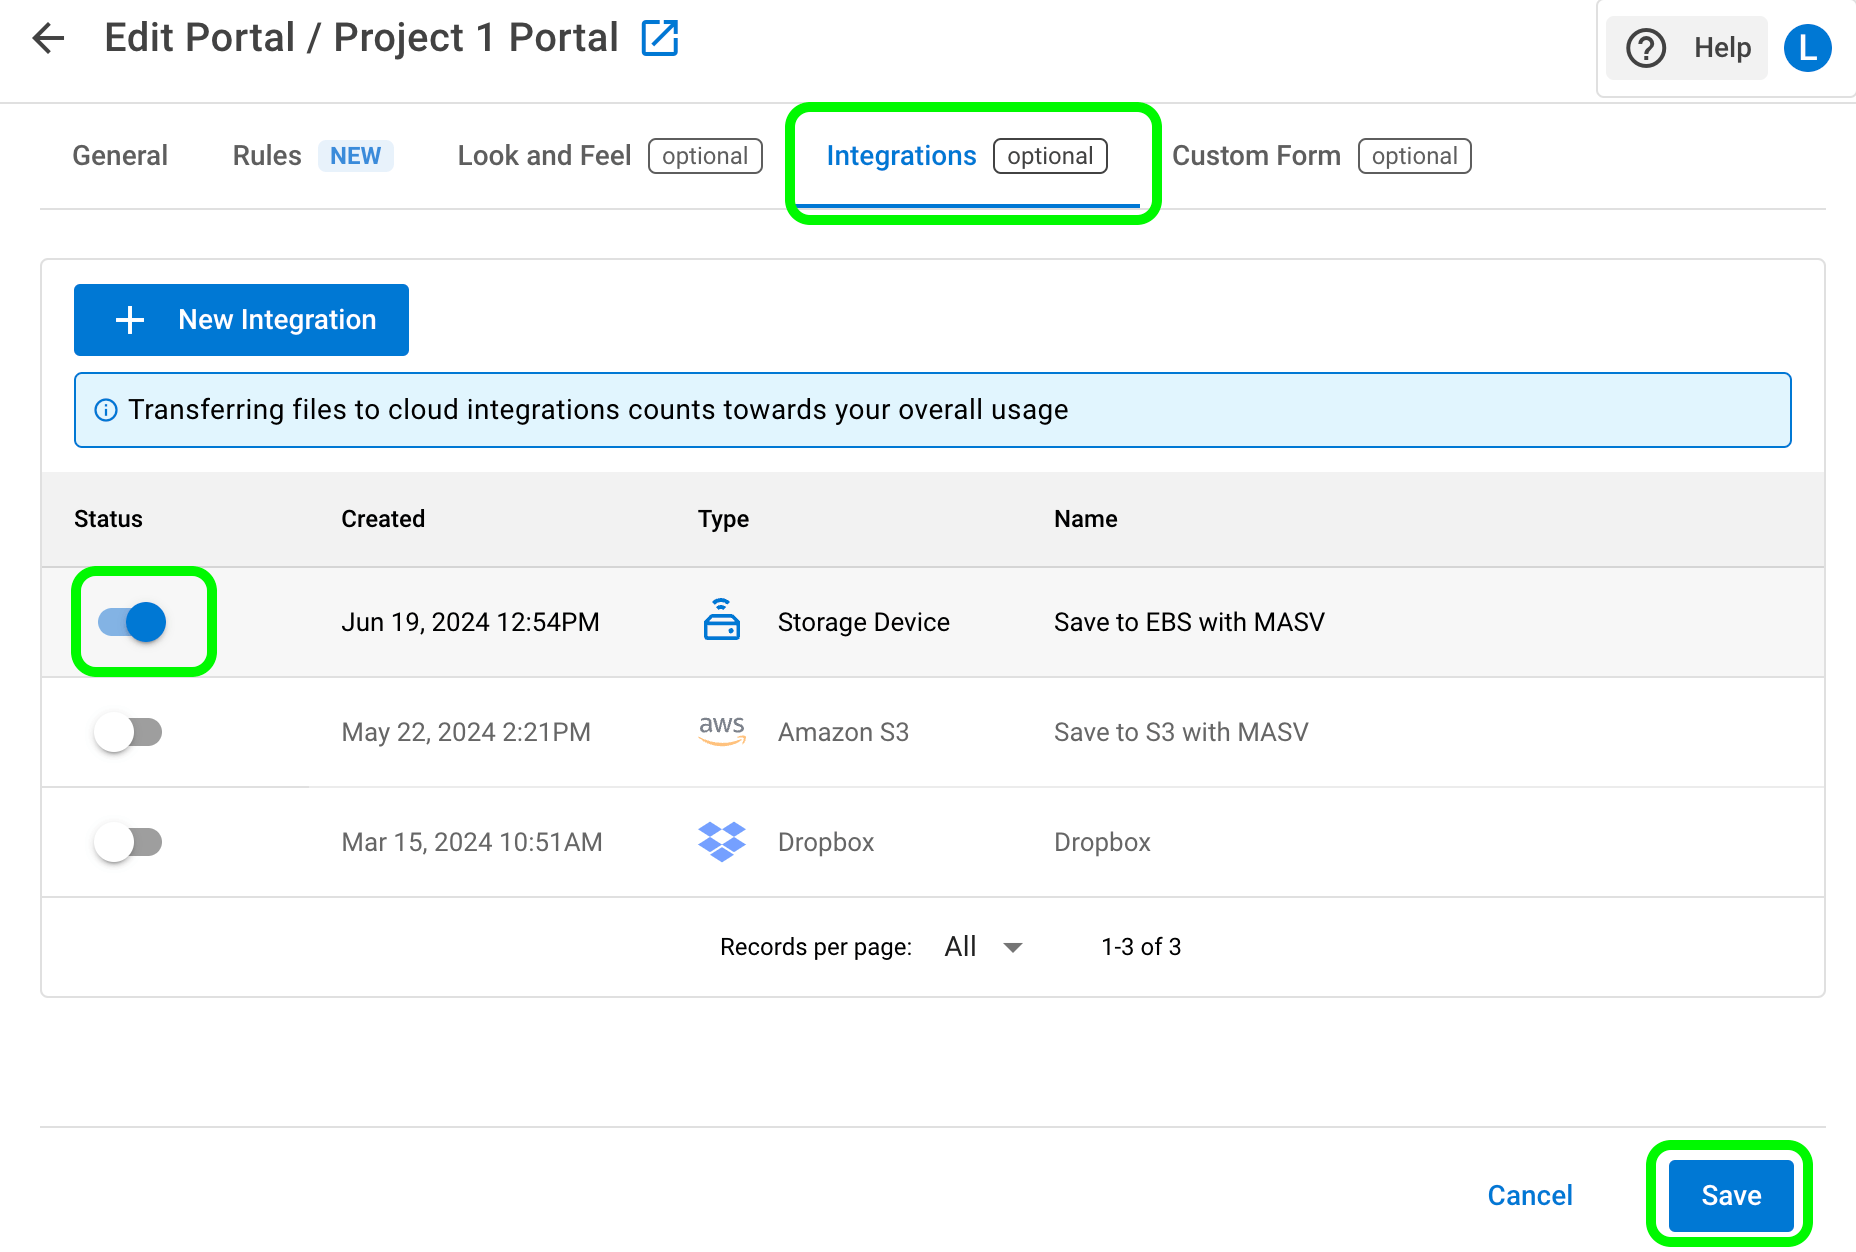
4. Select the 저장 button in the lower right corner of the page to apply the changes.
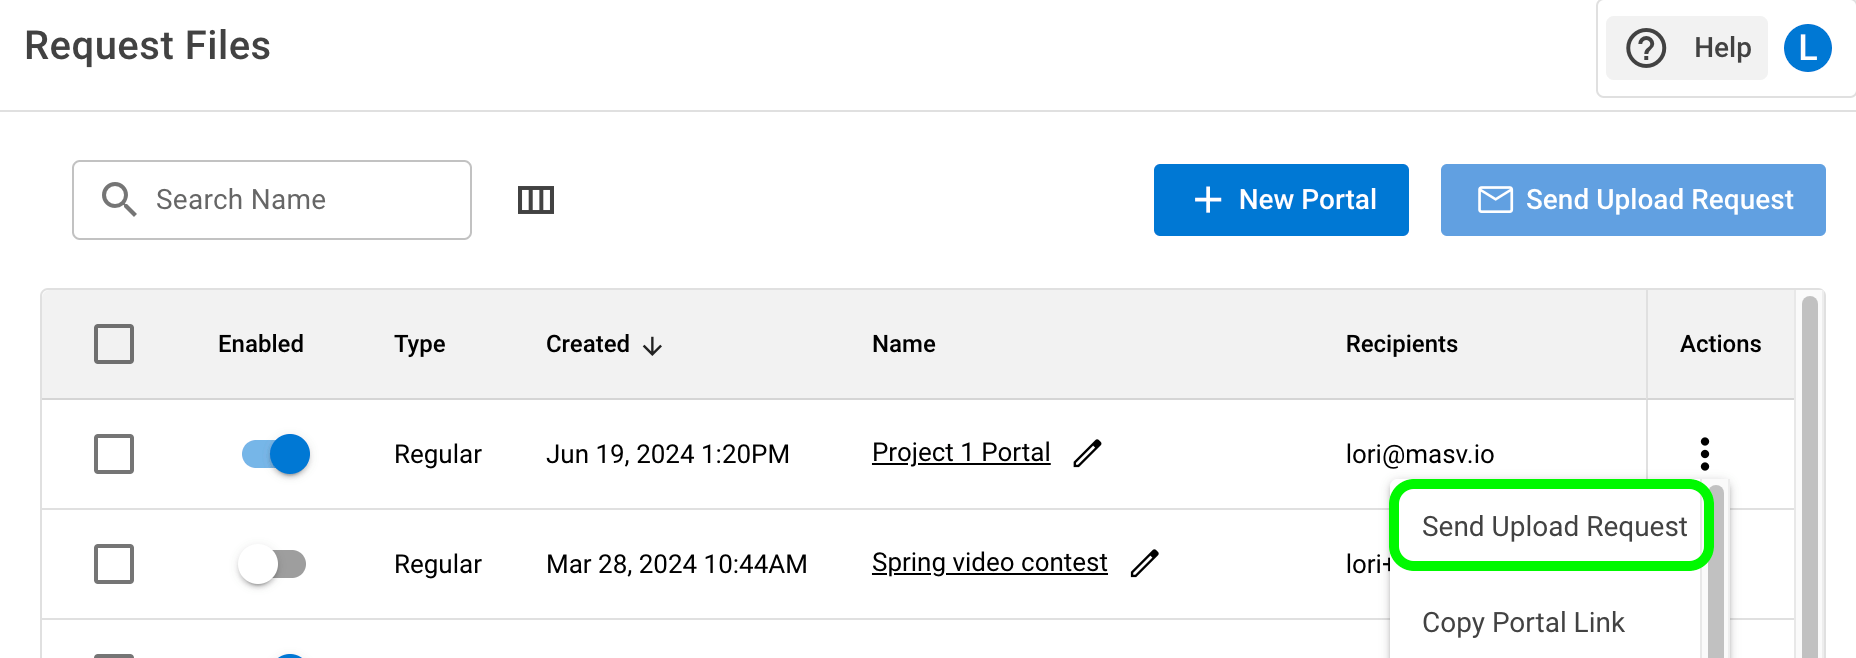
5. Return to the Request Files page. Now you’re ready to send a file request. Select the Actions menu icon for your Portal, and select Send Upload Request from the menu.
6. Fill in the Send Upload Request Via Email fields, adding the email recipients and the message that you want to appear on the Portal.
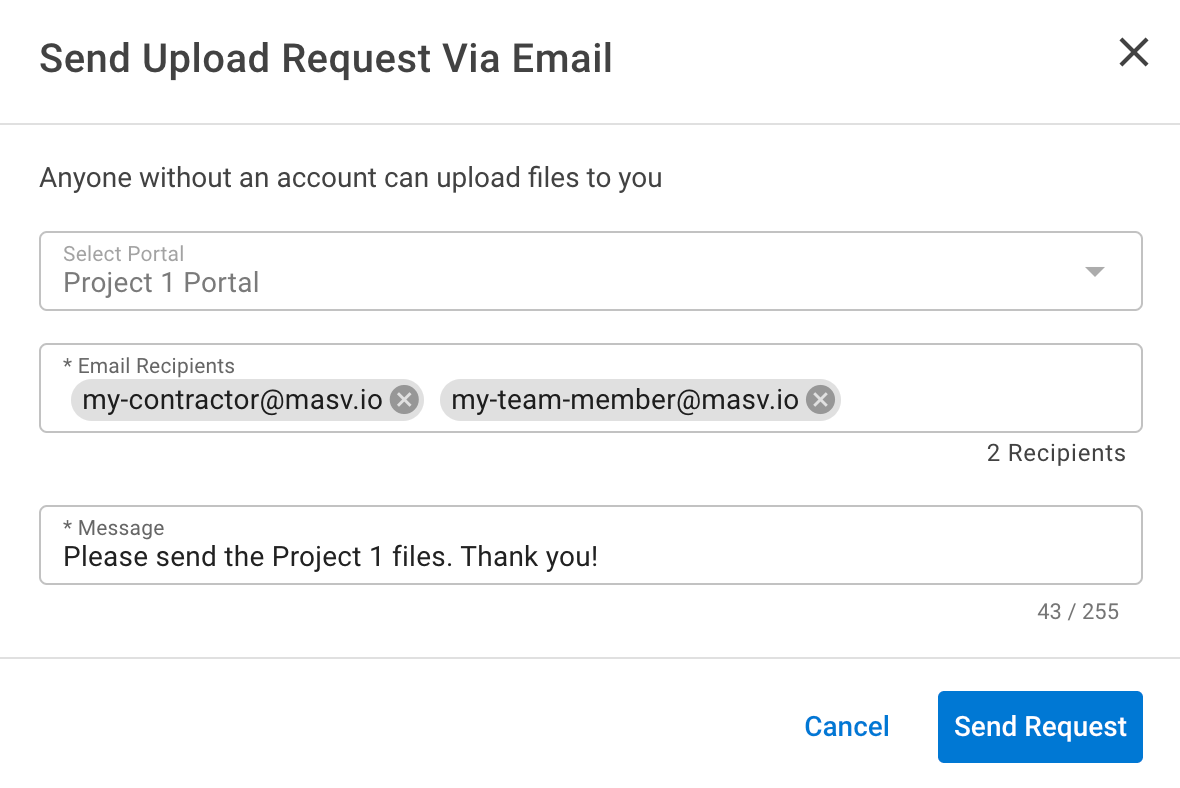
7. Select the Send Request button to close the window.
Receive Files to EBS With a Portal
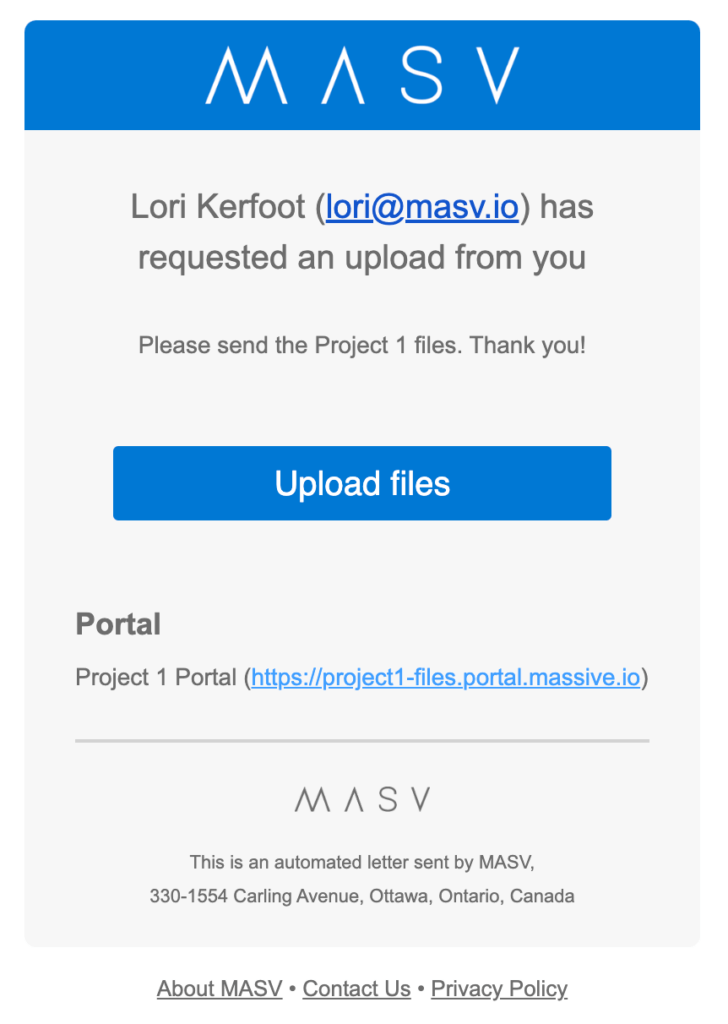
The email recipients listed will receive an email request with a link to your Portal.
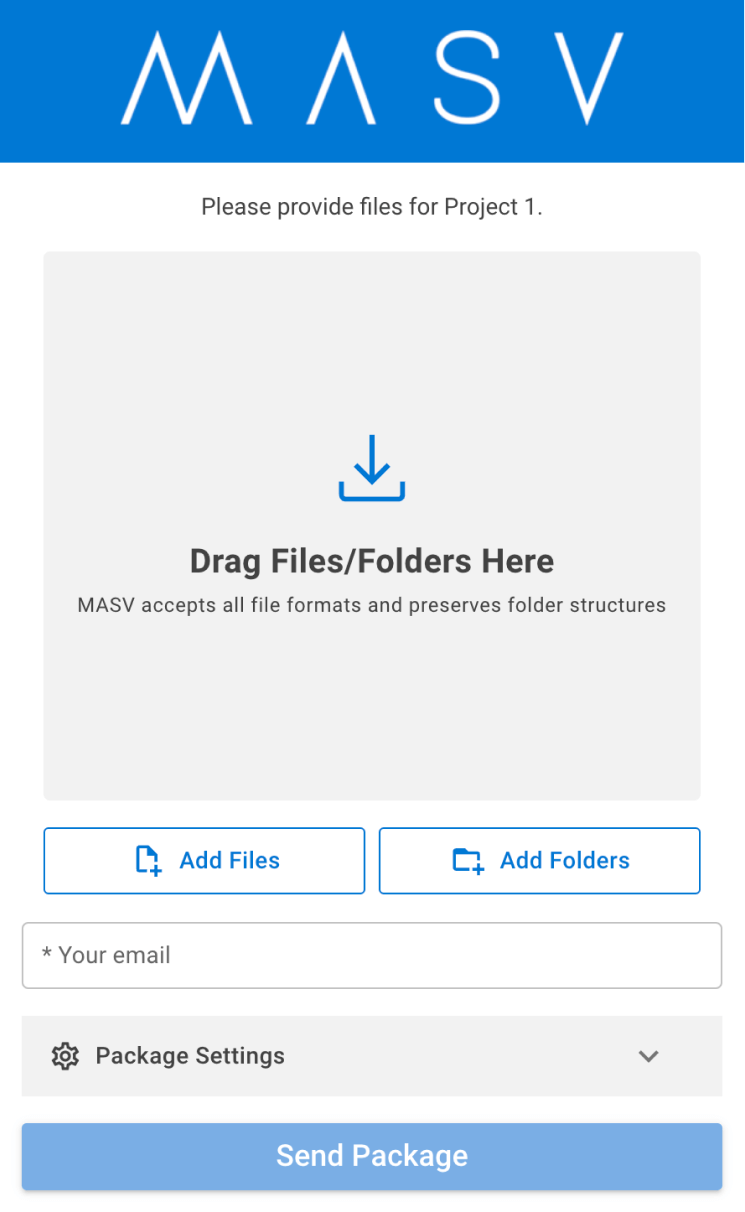
Using their web browser, the email recipient can drag and drop the files onto the Portal page and send the files as a package.
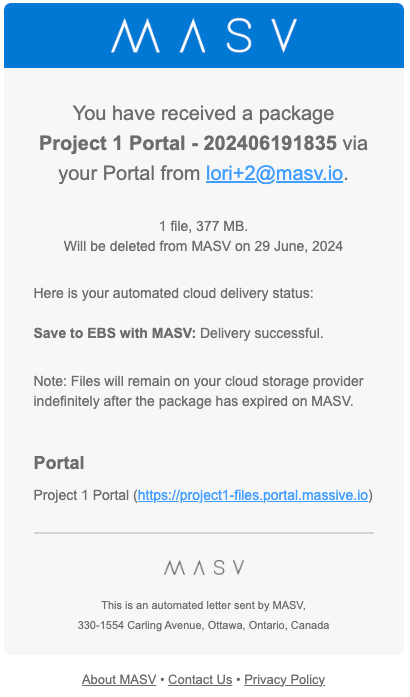
You’ll receive an email notification when the files have been delivered to your Amazon EBS storage.
Want to check? In your Amazon EC2 instance, list the files for the directory you set in your MASV Integration, you’ll find the package name for your file delivery (files are inside) or the file names, depending on what you chose for the Parent Folder option.
Congratulations! You’ve installed the MASV Agent, set up an Integration in the MASV Web App, and delivered files to your Amazon EBS storage by using a MASV Portal. You can create as many Integrations and MASV Portals as you want to help organize your file transfers, teams, and projects.
Next Steps
There are so many ways our customers build MASV into their workflows. For more information about customizations and the MASV API, visit our MASV 개발자 문서.
Try the MASV Integration with Amazon EBS Storage
Use MASV and Amazon EBS to speed up content ingest to storage workflows.
