Easy, Secure Upload to Synology NAS for Teams
Turn your Synology NAS into a collaborative hub with drag-and-drop uploads for teams and clients via the secure MASV transfer platform.
No port-forwarding. Minimal configuration. Read the full tutorial below.

Effortless Upload
Hassle-free uploads without ports, plugins, or individual permissions. Just set the destination, share a link, and you’re all set.
Easy Implementation
Set up MASV on Synology in just 15 minutes. Once set, you can track deliveries and manage access through our Web app.
Automated Transfers
Our upload feature auto-ingests files into your chosen Synology directory, freeing you up for other tasks.
チュートリアルの準備
次のチュートリアルでは、その方法を学ぶ:
- をインストールします。 MASVエージェント on a Synology NAS.
- Create a secure connection to your Synology NAS in the MASV Web App.
- Use MASV Portals to ingest files from contributors directly to your Synology storage.
必要なもの
- . MASVアカウント.
- A Synology NAS for which you have administrator privileges for the DSM (DiskStation Manager software).
For this tutorial, we’ll install the Docker image of the MASV Agent. For information about supported platforms, visit MASVエージェントのセットアップ.
Time to complete: Approx. 15 min.
注: If you’re looking for more detailed info about the MASV Agent, you’ll find commands, parameters, and more in the MASV 開発者向けドキュメント.
That’s all! Time to install the MASV Agent.
MASVエージェントのインストール
You can install the MASV Agent by using the Container Manager available in the Synology DSM. Start by importing the MASV Agent image, then create a container.
Import the MASV Agent Image
1. In your Synology DSM software, open Container Manager.
2. In the sidebar, select Image, and then select インポート > Add from URL.
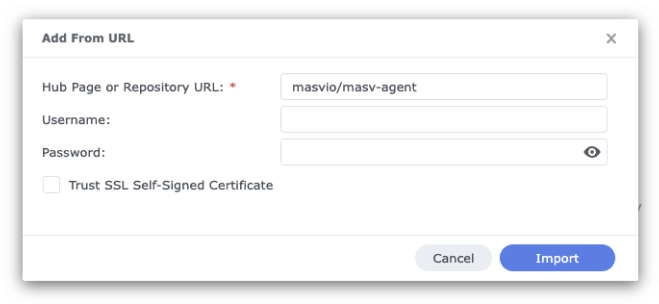
3.での Add From URL window, copy and paste the following into the Hub Page or Repository URL box:
masvio/masv-agent
注: Username and Password boxes should be blank.
4.を選択します。 インポート button, and in the Choose Tag window, select latest from the Please Choose a Tag drop-down menu.
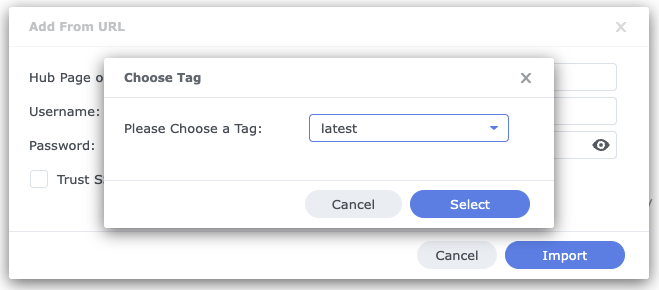
5.をクリックします。 選択, and within a few moments, the masv-agent image will display in the Image のリストを作成します。

Create a container
1.1. Container Managerを選択します。 Container from the sidebar, and select the . のボタンを押します。
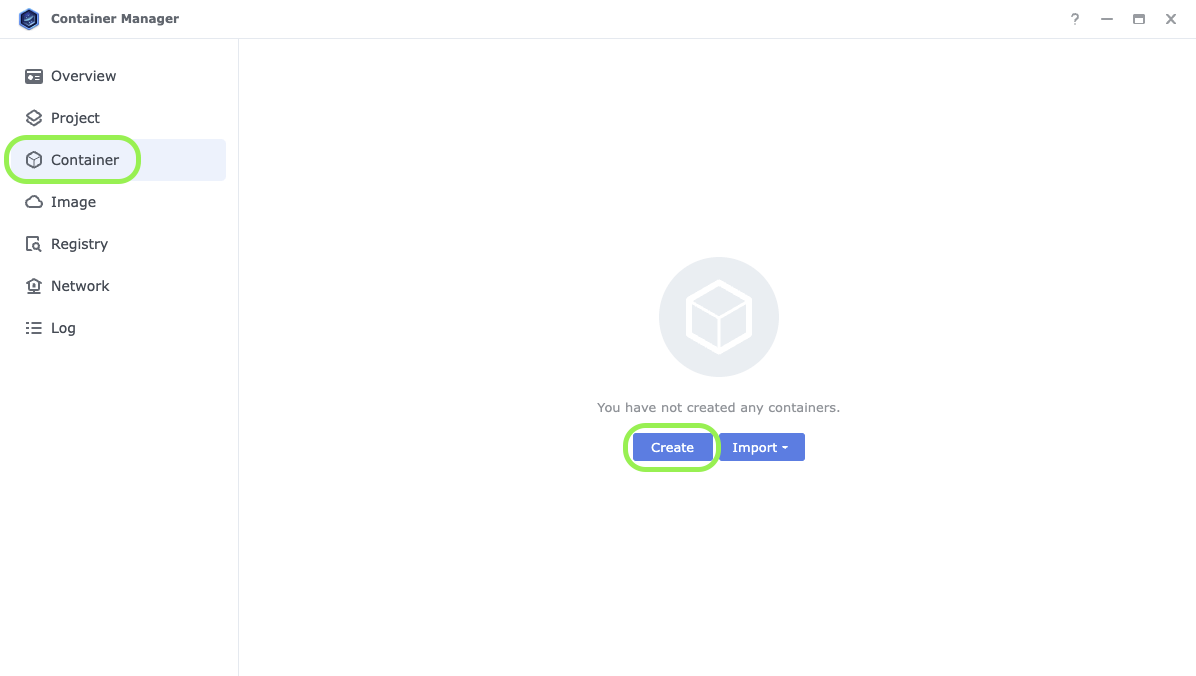
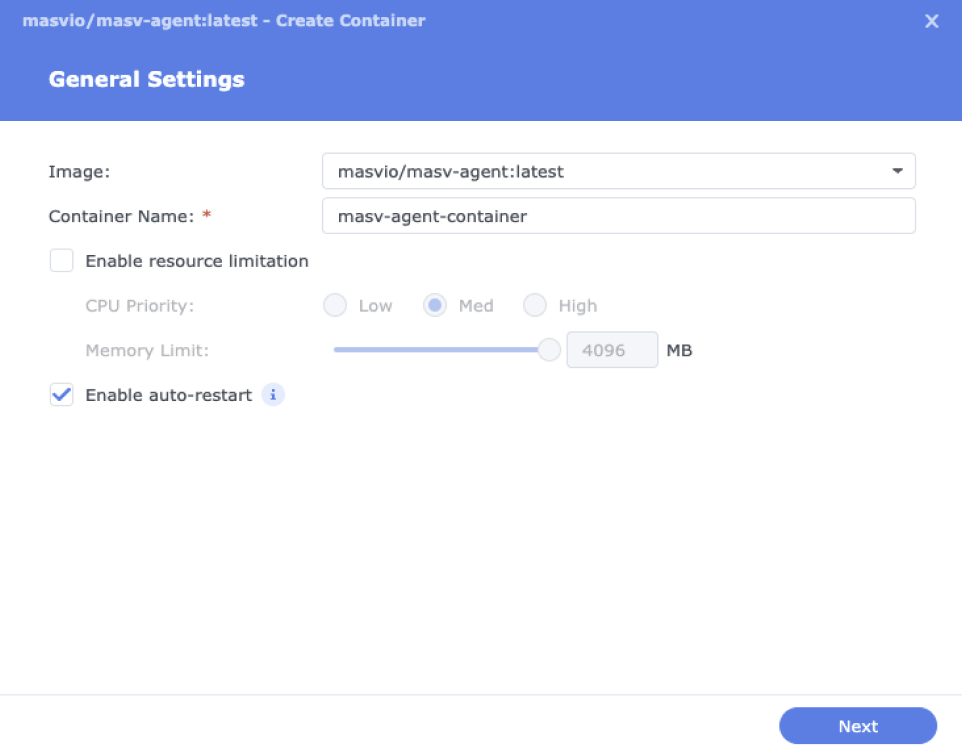
2.2. General Settings page, from the Image drop-down menu, select masvio/masv-agent:latest.
3.での Container Name box, type a container name. For example, masv-agent-container.
4. (Optional) If you want to set resource limitations, select the Enable resource limitation checkbox and choose the settings you want.
5. Select Enable auto-restartを選択し、次に 次のページ.
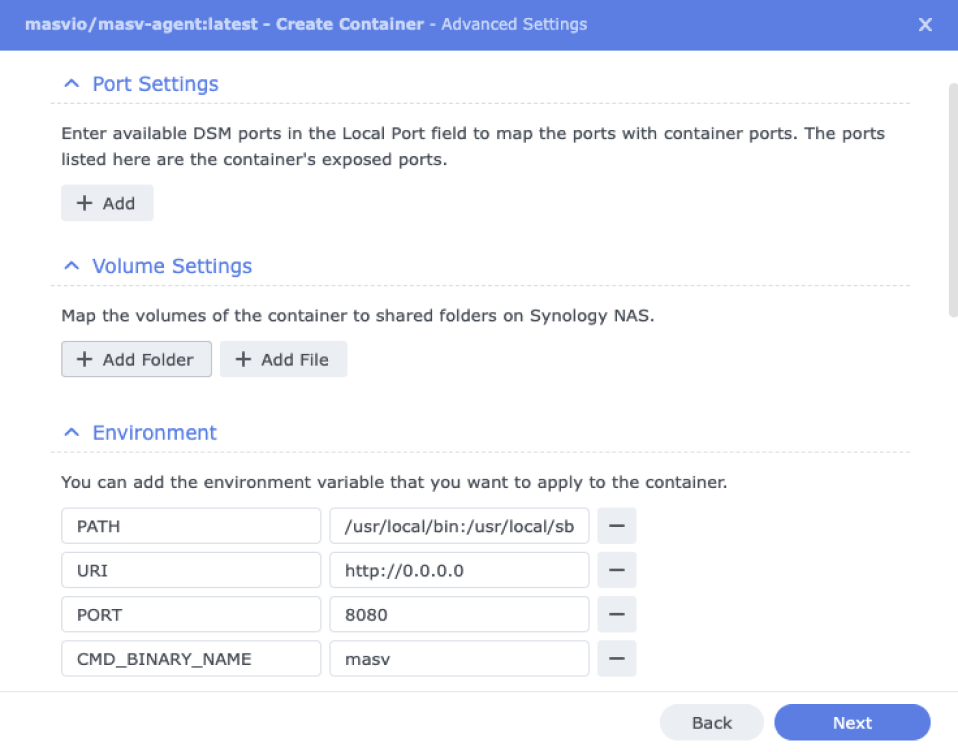
6. On the 詳細設定 page, open the Volume Settings area. This is where we will map the volumes of the container to shared folders on your Synology device.
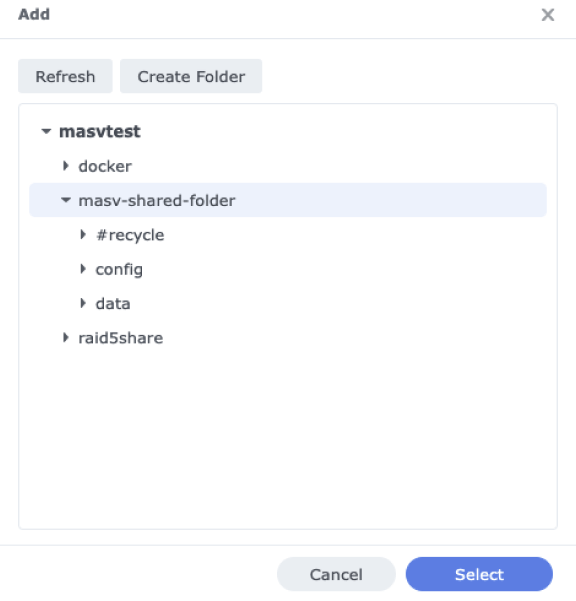
7.を選択する。 Add Folder button, and in the 追加 window, create or select the shared folders you want to use. MASV Agent uses the default folders /config や /data. For simplicity, we’ll create a folder (masv-shared-folder) with config や data subfolders.
8. Click the 選択 button to choose the first folder you want, then repeat the process for the second folder.
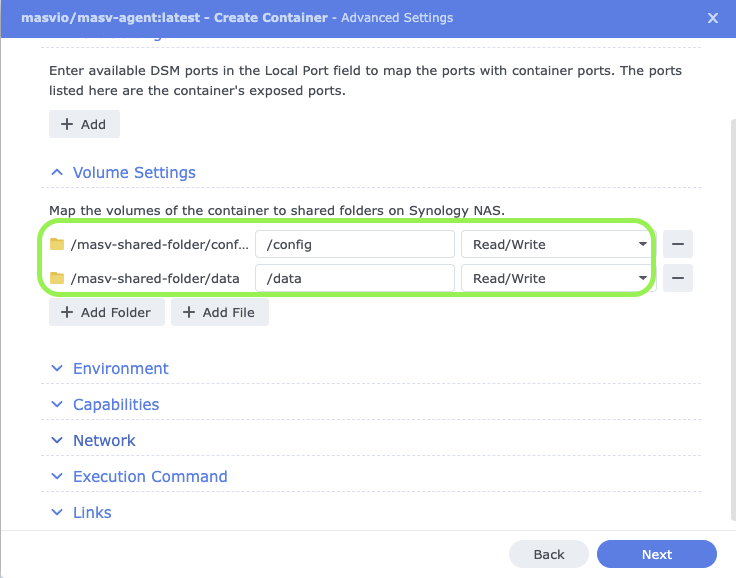
9. In the Volume Settings area, map the folders you selected to /config や /data, and choose Read/Write to allow MASV to send files to your Synology device.
10. Select 次のページ, review the 概要 page, and select 完了.
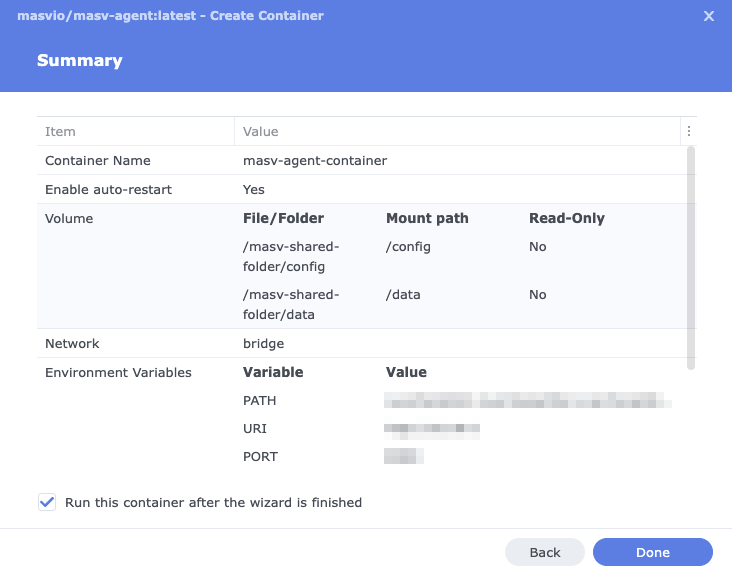
11. Verify that the container and MASV Agent installation are working by selecting Log in the sidebar on the left and checking the Log list. You should see the following event: “Start container [your MASV container name].”

You’re now ready to create a secure connection between your Synology device and the MASV Web App.
Create a Secure Connection to your Synology NAS in the MASV Web App
MASV offers a range of integration options for cloud storage, popular media apps, and media asset management software. When setting up the Synology integration, we need to choose a direction (ストレージに保存 と Send from storage). We’ll set up a ストレージに保存 integration, but you can easily repeat the process to set up a Send from storage integration as well.
1.にサインインする。 MASVウェブアプリを選択し、左側のサイドバーで 統合.
2.2. 統合 ページで 利用可能な統合 タブを選択し Synology.

3.での 統合の追加 ウィンドウで 接続名 ボックスを使用します。
4. For the 移籍の方向性 option, select ストレージに保存 to allow MASV to send files to your Synology device.
メモ: When you choose ストレージに保存, you have the option to set a Target Directory (must be an existing folder) and Parent Folder Options (package name used to create a folder). These are relative to the root path and are appended as shown in the following example: /data/{target directory}/{package name}/{transferred files or folders}
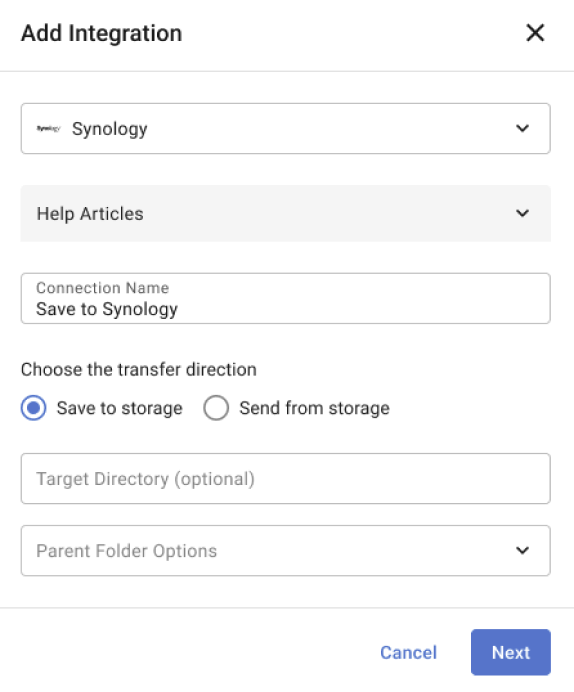
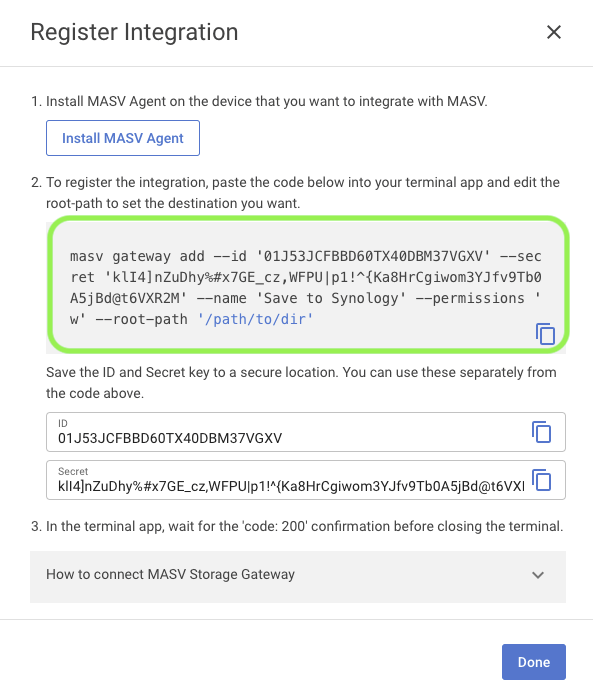
5. Select 次のページそして 登録統合 window, ignore step 1 (MASV Agent installation is already done). In step 2, before we continue, it’s best to copy the 身分証明書 や シークレット キーを安全な場所に保管する。
6. Copy the block of code provided as evidenced in step 2 of the following image.
7. In the Synology Container Managerを選択します。 Container in the sidebar.
8. Select the MASV container name (masv-agent-container), and on the page that opens, select Action menu, Open terminal.

9. On the Terminal page, select .. A new Terminal window called bash is created. Select bash, and you will see root@masv-agent:/# in the window.
メモ: If at any point the Terminal window becomes inactive, close the Terminal window, reopen it, and select . again.
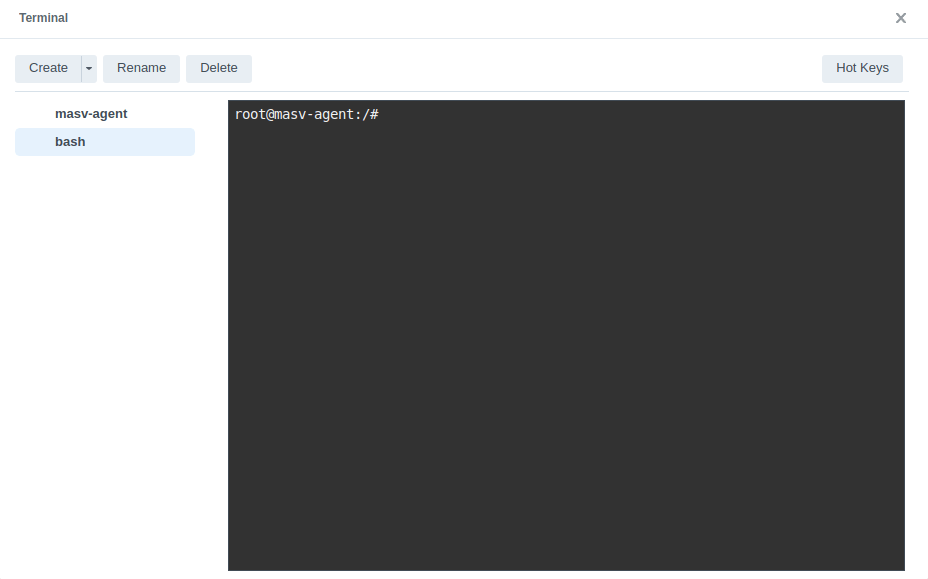
10. Paste the code that you copied from the MASV Web App into the Terminal ウィンドウが表示されます。
メモ: If you run into issues pasting the code, try right-clicking with your mouse and selecting Paste from the context menu. You can also click the Hot Keys button in he upper-right corner of the Terminal window and follow the instructions for pasting.

11. In the Terminal window, edit the –root-path placeholder text to set the directory to data, for example –root-path ‘/data/’を押す。 入る. A successful connection displays “code”: 200.

12. In the MASVウェブアプリ, in the 登録統合 window, select 完了.
13. On the 統合 page select the 私の統合 tab, refresh the browser page, and confirm that the ステータス column for the Synology NAS displays よっしゃー.

Save Files to Your Synology NAS with MASV Portals
MASV Portals are web uploaders that make it easy to collect files from contributors and deliver them to your storage of choice. Lets take a look at how this process works with our new Synology storage integration.
You’ll first need a MASV Portal.まだ設定していない場合は MASVウェブアプリ.詳しい説明はヘルプをご覧ください: ポータルの作成、編集、削除方法. You can create an Instant Portal in a couple of clicks, or create a Custom Portal that is brandable, sets file requirements, and collects metadata.
1.1. MASVウェブアプリを選択します。 ポータルでファイルをリクエスト 左のサイドバーから。
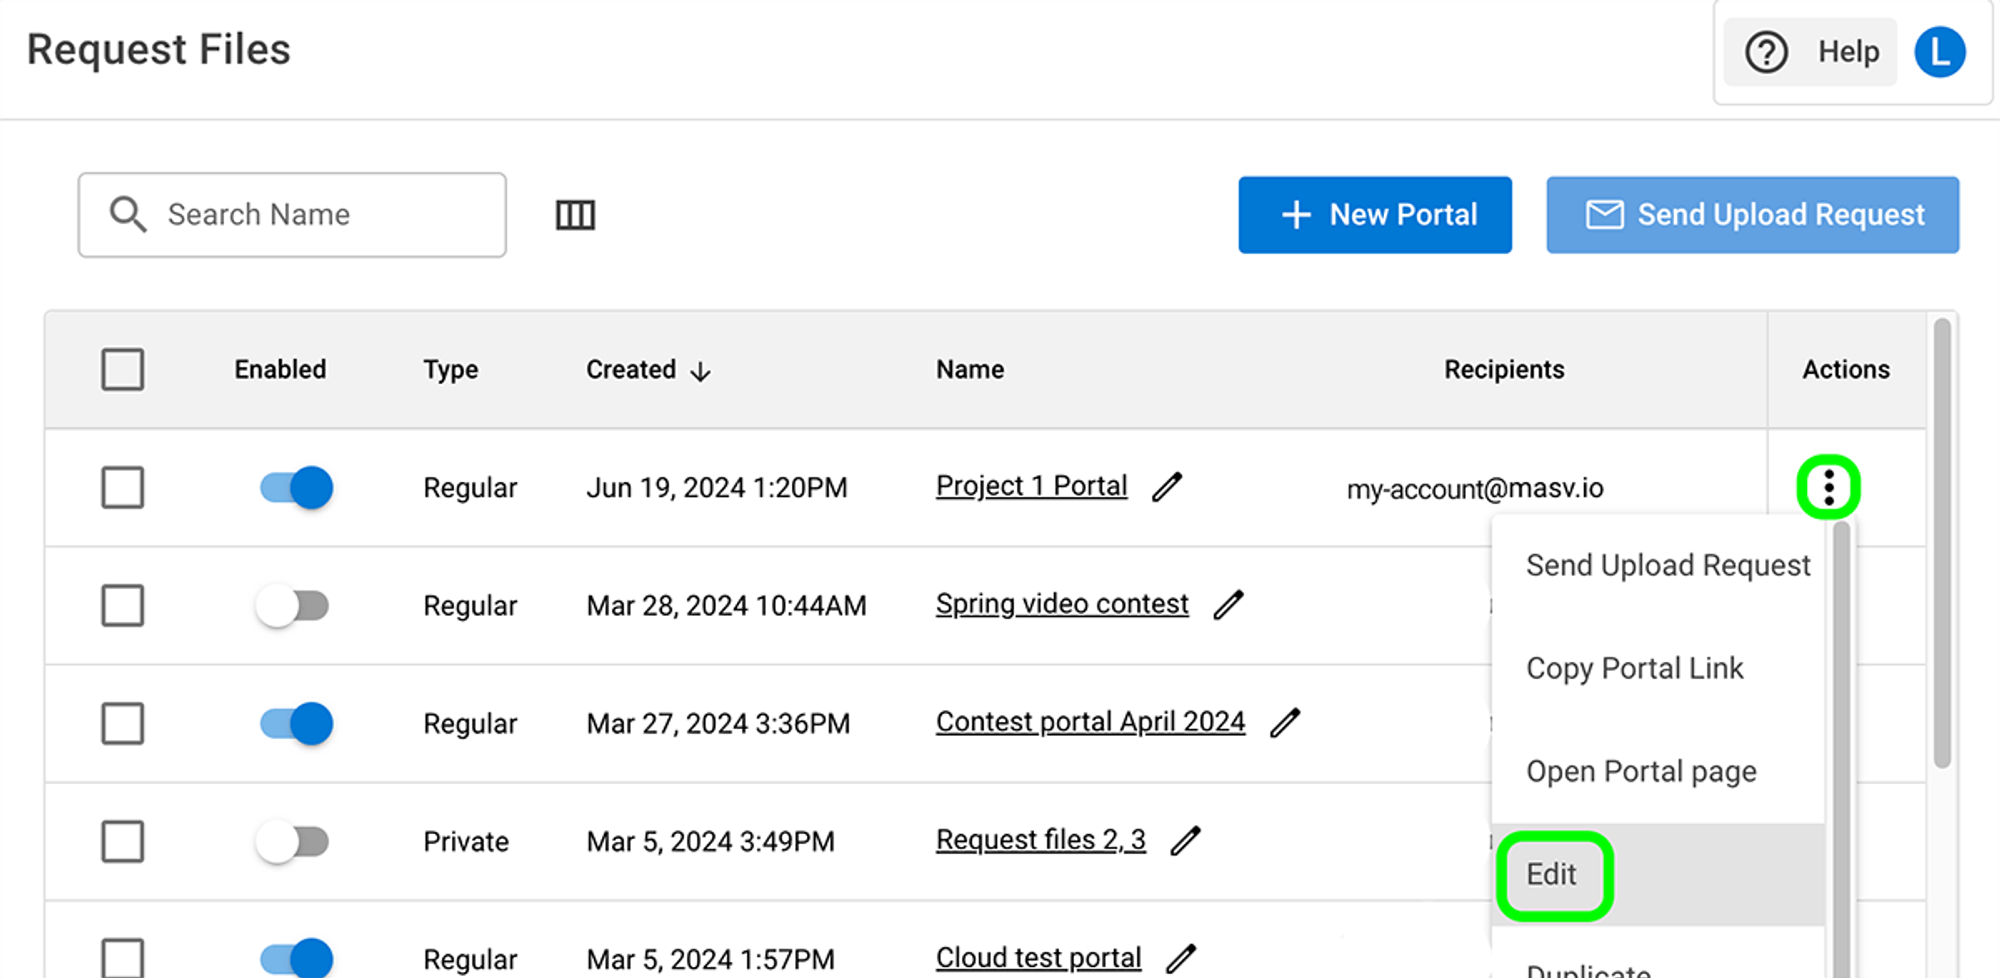
2.2. ポータルでファイルをリクエスト ページで、ポータルを選択します。 行動 列でメニューアイコン[縦に3つ並んだ点]を選択し 編集.
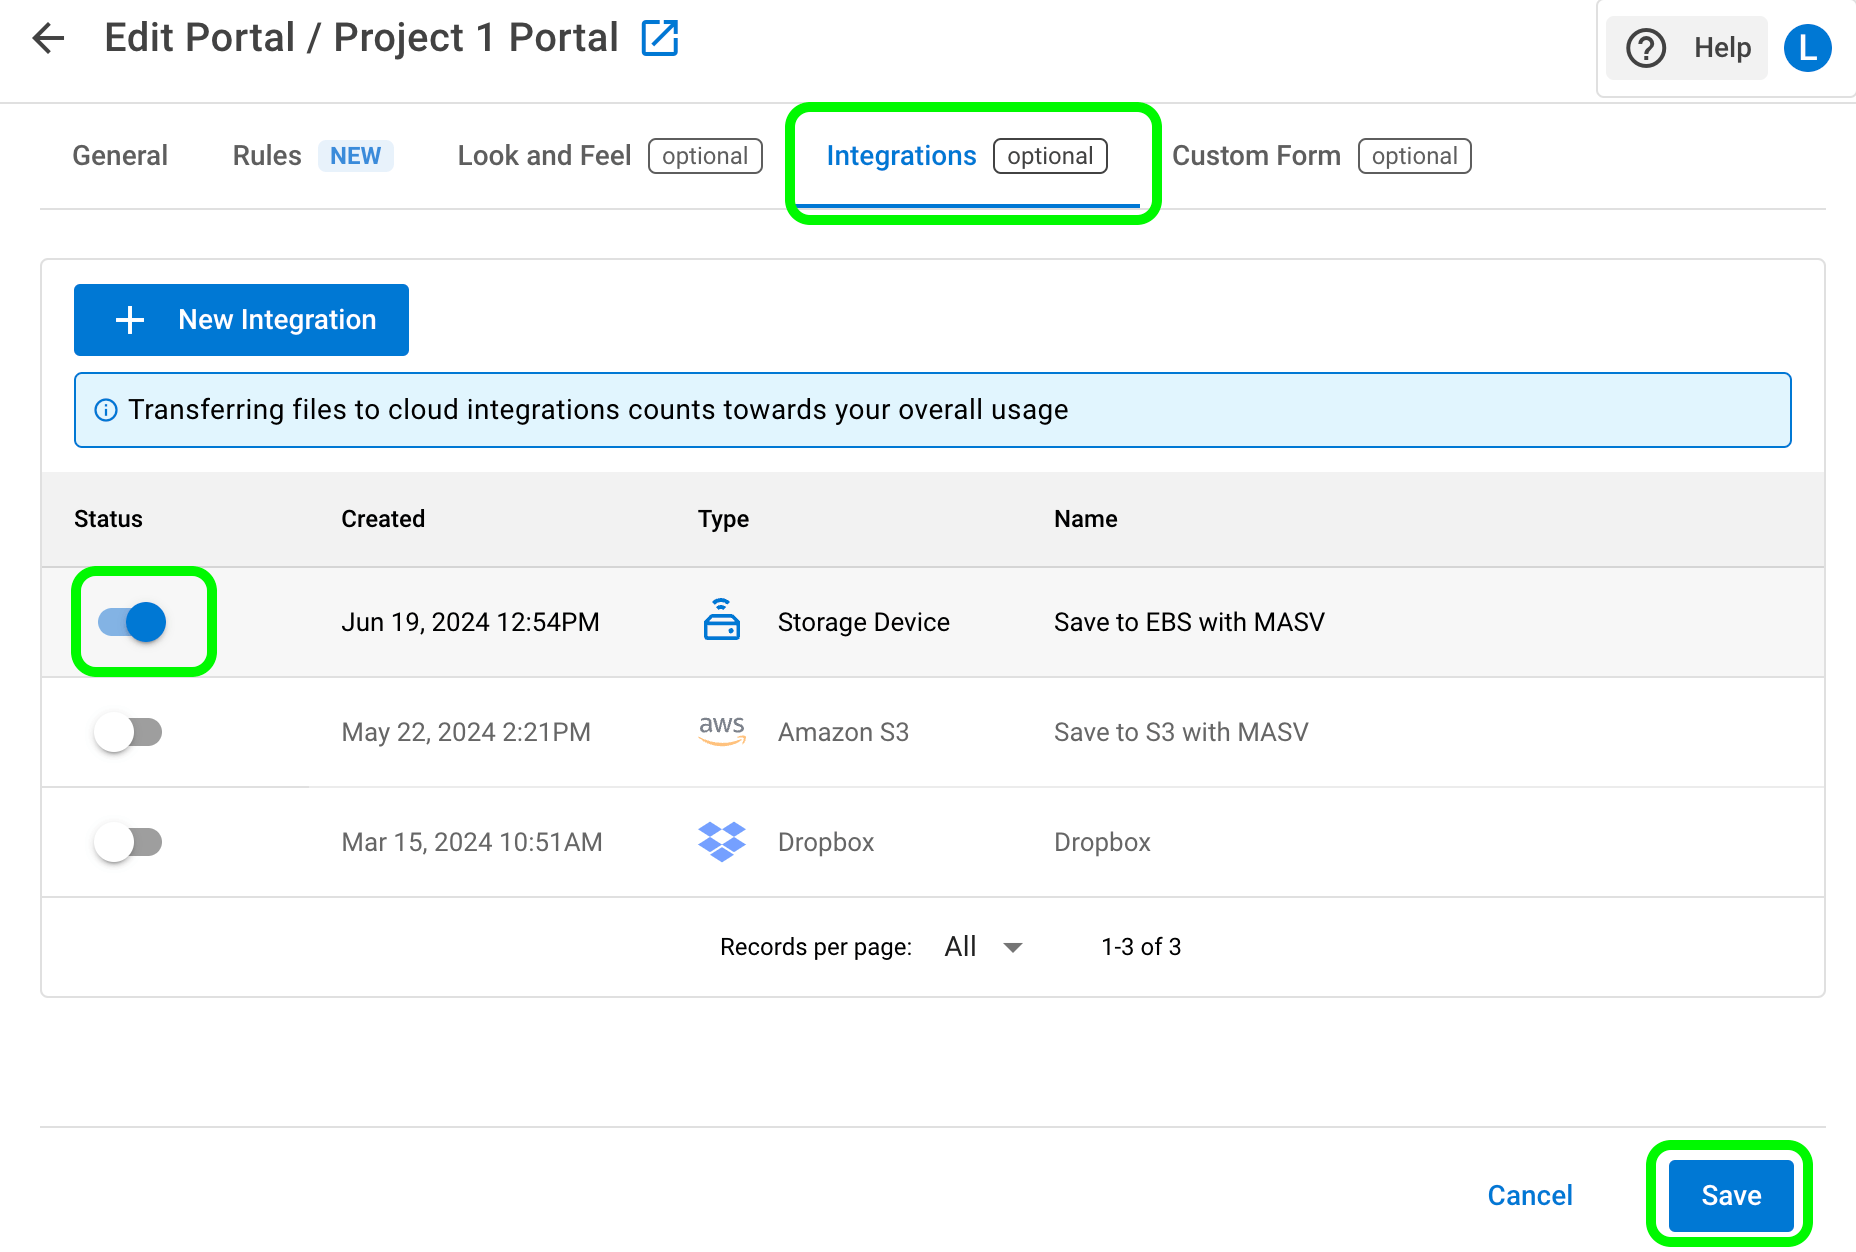
3.3. ポータルの編集 ページで 統合 タブで ステータス column, enable the toggle for your Synology integration.
4.を選択します。 保存 ボタンをクリックして変更を適用します。
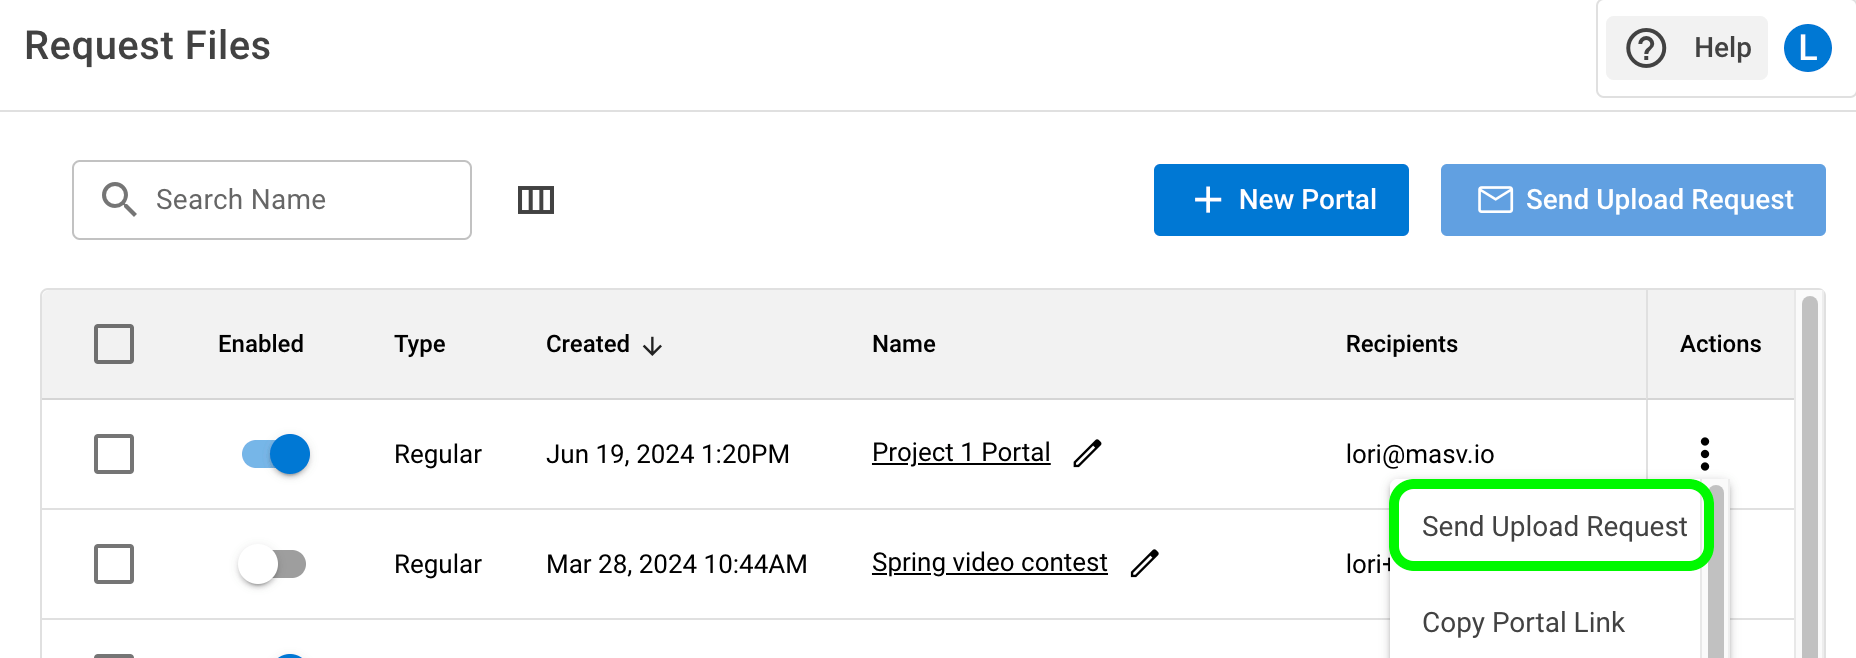
5.に戻る。 ポータルでファイルをリクエスト ページをご覧ください。これでファイルリクエストを送信する準備ができました。を選択してください。 行動 メニューアイコンから アップロードリクエストの送信 メニューから
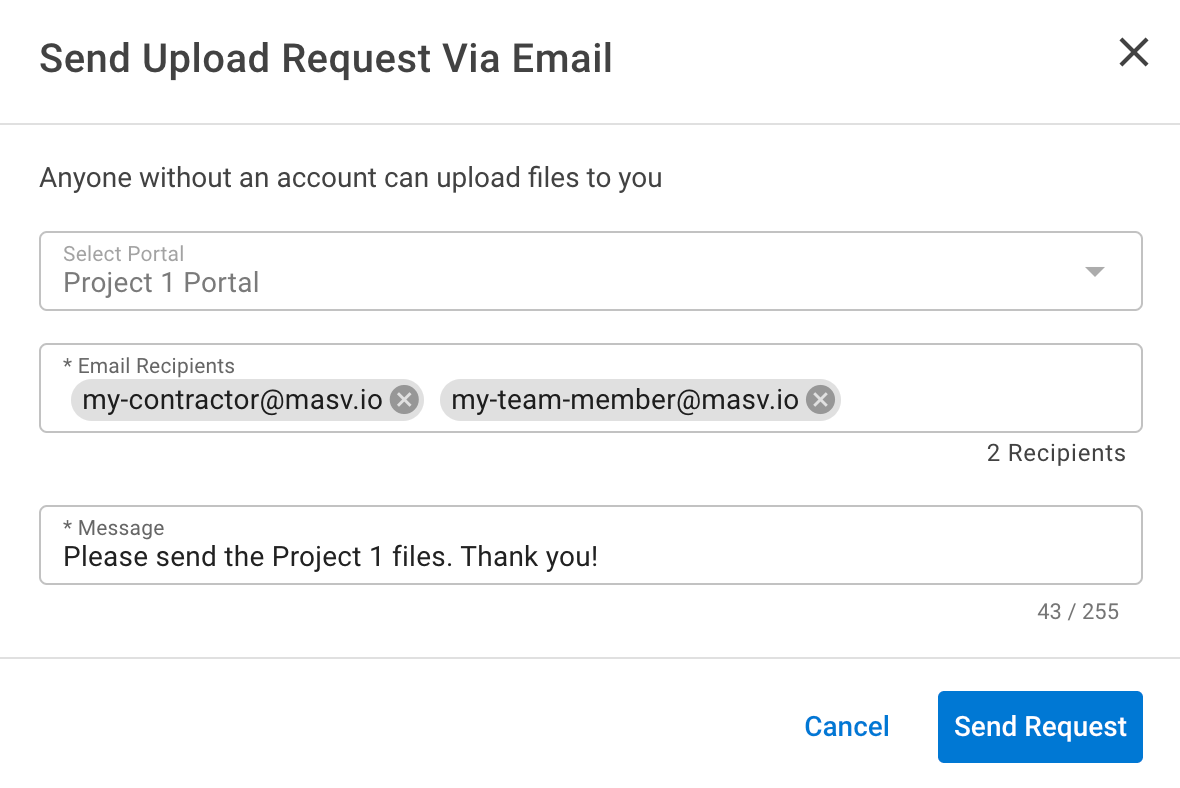
6.を記入する。 Send Upload Request Via Email fields, adding the email recipients and the message that you want to send.
7.を選択する。 リクエストを送信 ボタンをクリックしてウィンドウを閉じる。
What Happens Next?
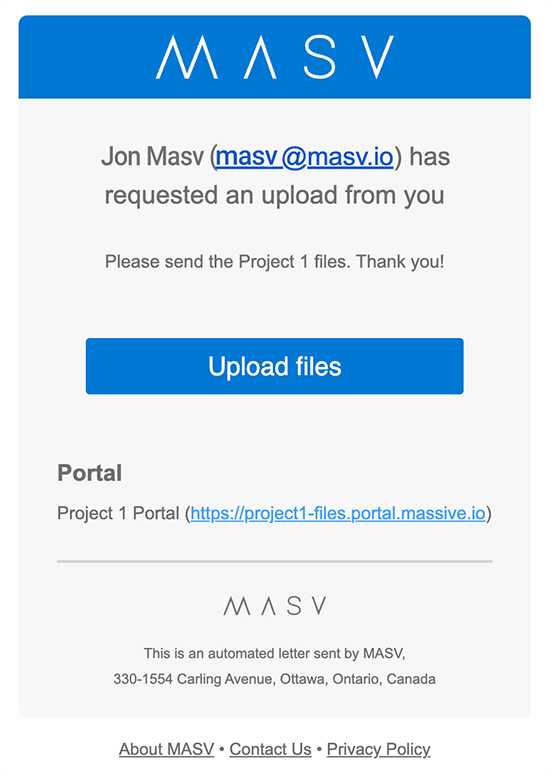
The email recipients listed in your upload request receive an email with a link to your Portal.
1. The email recipients listed in your upload request receive an email with a link to your Portal.
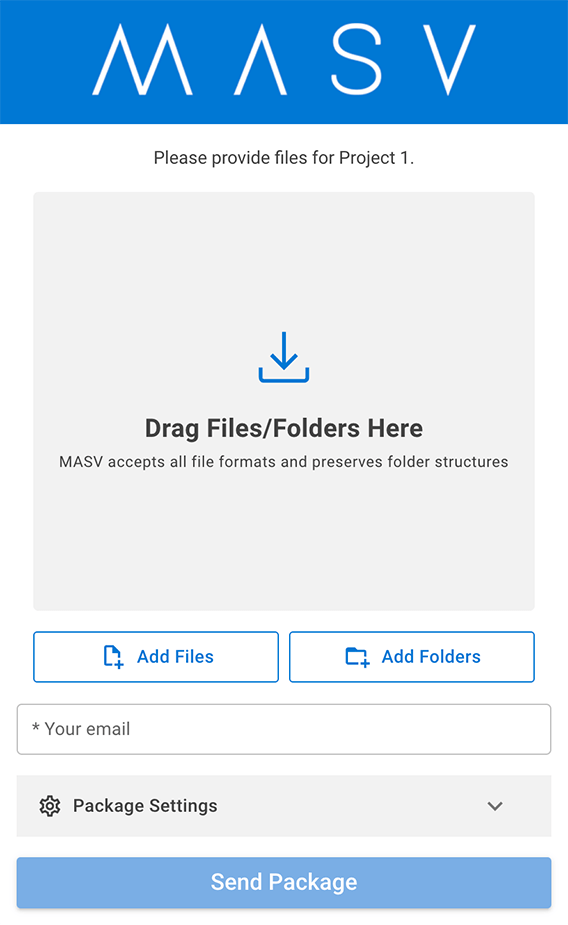
2. Using their web browser, the email recipient can drag and drop the files onto the Portal page and send the files as a package.
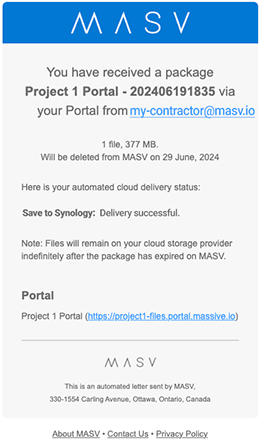
4. As the Portal owner, in addition to a package notification email, you’ll receive an email notification when the files have been delivered to your Synology storage.
💡 Tip: Monitor all sent or received packages efficiently using the MASV Web App. Navigate to 転送履歴, access the Received tab to view a detailed delivery log of received packages. From here, you can also send active packages to your Integrations like Synology by selecting the package, choosing Send Package to Cloud, and confirming your desired Integration.
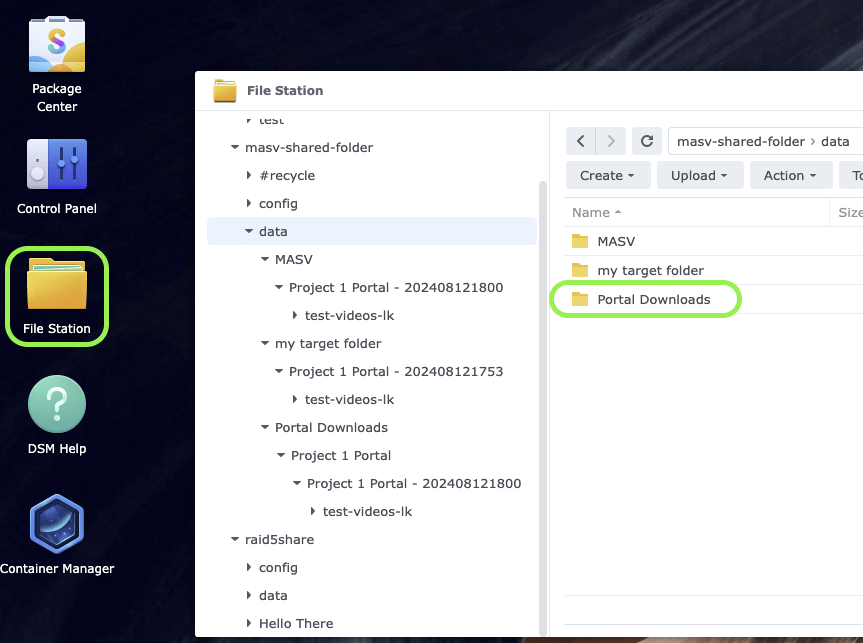
5. On your Synology device, open File Station, and navigate to your mapped folder. If you didn’t set an optional Target Directory, your files are saved to the following default location: Portal Downloads > [Portal name] > [Package name].
おめでとう! You’ve installed the MASV Agent, set up an Integration in the MASVウェブアプリ, and delivered files to your Synology storage by using a MASV Portal. You can create as many Integrations and MASV Portals as you need to help organize your file transfers, teams, and projects.
次のステップ
There are so many ways our customers build MASV into their workflows, including using the MASVデスクトップアプリ to set up upload and download automations. You can also build custom workflows by tapping into the MASV API. For more information about the MASV API, visit our MASV開発者向けドキュメント.
Try the MASV Integration with Synology NAS
Use MASV and Synology storage to speed up content ingest to storage workflows.