While Squarespace gives you the option to access and edit the code of your website, the appeal for many is that you can build a beautiful website without ever having to touch the code.
While the website builder is optimized for code-averse people, if you have a Squarespace website and would like to invite collaborators to upload files to your site, you do need to do some, albeit minimal, coding. The process might seem daunting at first, but we’re here to make it as easy as possible. Here are three ways of collecting files through Squarespace:
Table of Contents
Uploading Large Files Made Easy
With MASV Portals, collecting large video files into your Squarespace site is a breeze.
1. Add FTP (File Transfer Protocol)
Implementing FTP in Squarespace can be a bit challenging if you’re not an IT pro. But if you want to go this route, you need to enable Developer Mode.
Go to Home > Settings > Advanced > Developer Mode and turn it on.
We recommend reading this guide to fully understand Developer Mode and if you really need it because it’s not something you should do lightly. Once you’re in Developer Mode, you’ll be able to see your FTP credentials.
Now that you have that information, you’ll need to install an FTP client on your computer. There are many free and paid options to choose from. Once you’ve done that, you’ll need to connect to your Squarespace account using the FTP credentials provided in your account settings. Once connected, you can upload files from your computer to your website.
2. Add a Custom Form Builder
Wondering if there’s a Squarespace file upload form? Unfortunately, Squarespace’s form feature doesn’t currently support file uploads from external users, but they suggest using Wufoo, a third-party service, to facilitate this. Wufoo allows users to upload up to 100 MB of files per form.
Please note that you’ll need to have a Squarespace Business or Commerce plan to use this method.
Once you’ve created your Wufoo account, follow these steps to set it up:
Uploading Large Files Made Easy
With MASV Portals, collecting large video files into your Squarespace site is a breeze.
Step 1. Create a Wufoo form
Create a form in your Wufoo account. File storage is only allowed on paid Wufoo accounts.
Step 2. Create the Wufoo code
In the Wufoo Form Manager, click Share in the menu for the form you want to embed.

Scroll down to Advanced Sharing Methods and copy the iframe Embed Code.
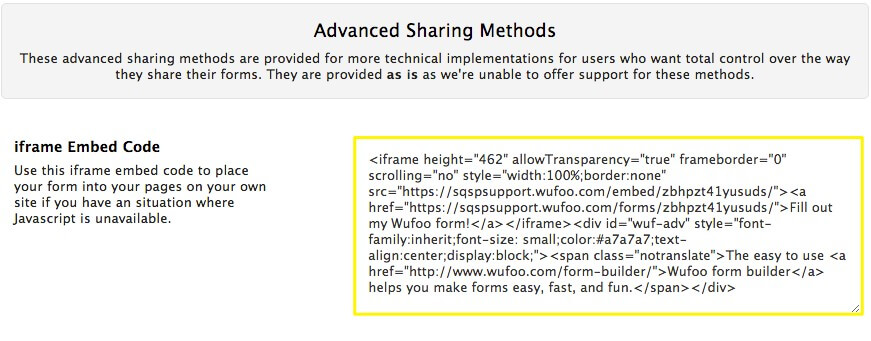
Step 3. Add the Wufoo code to your Squarespace website
On your Squarespace site, open the editor and go to the page or post where you’d like your form to appear. Click an insert point and select Code to add a code block. Paste the Wufoo code into the Code field.
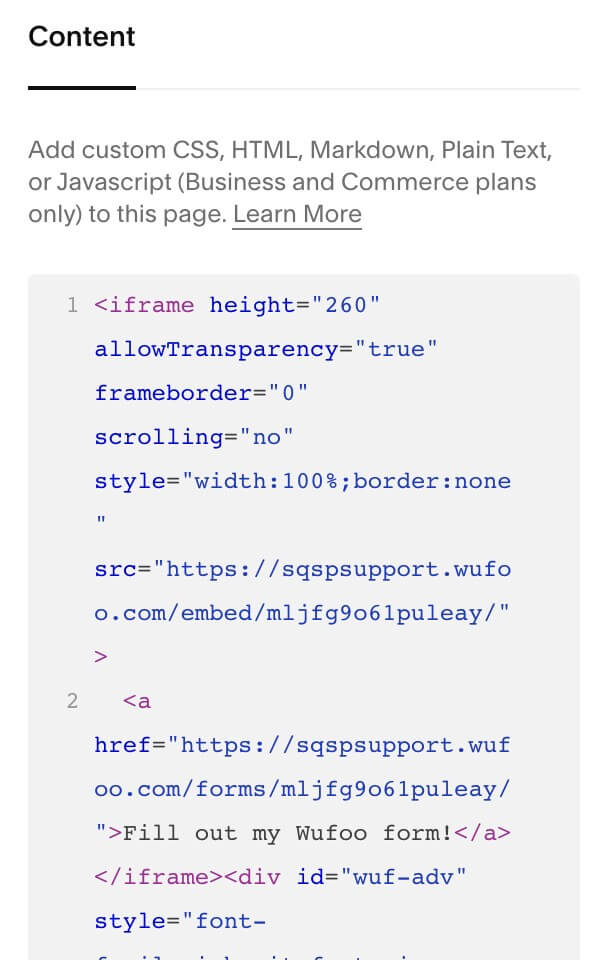
This is an easy way to allow collaborators, clients, and team members to upload files to your Squarespace website. However, 100 MB might not be enough if you’re working with large video files.
A Note about Squarespace 5
For those who are still using Squarespace 5 (launched in 2008), you can use a feature called Drop Box (not to be confused with Dropbox, the file-sharing service). You can plug in Drop Box easily, but this feature limits uploads to 20 MB, making it unsuitable for sharing video and other large digital media content or even collections of files. We highly recommend upgrading to the latest version, Squarespace 7.1, as Squarespace 5 is quite outdated in terms of capabilities and features.
Upload Large Files to Squarespace
Receive large video files through your Squarespace site from anyone, anywhere.
3. Use MASV Portals
MASV provides a useful tool called Portals which provides a fast, uncapped alternative to FTP. It also happens to be a super easy way to install and receive large files – not to mention the fact that you can get started for free.
First, we’ll walk you through creating a MASV Portal and adding it to your Squarespace site.
Please note that you will only be able to embed a MASV Portal onto your site if you’re on a Squarespace Business or Commerce Plan.
How to Add MASV Portals to Your Squarespace Site
Step 1. Sign up for MASV Portals
Create an account with MASV – we only need your name and email address to get you set up.
Step 2. Create your Portal
Once you’ve signed up, click on the burger menu in the top left-hand corner of the dashboard, then select Portals.
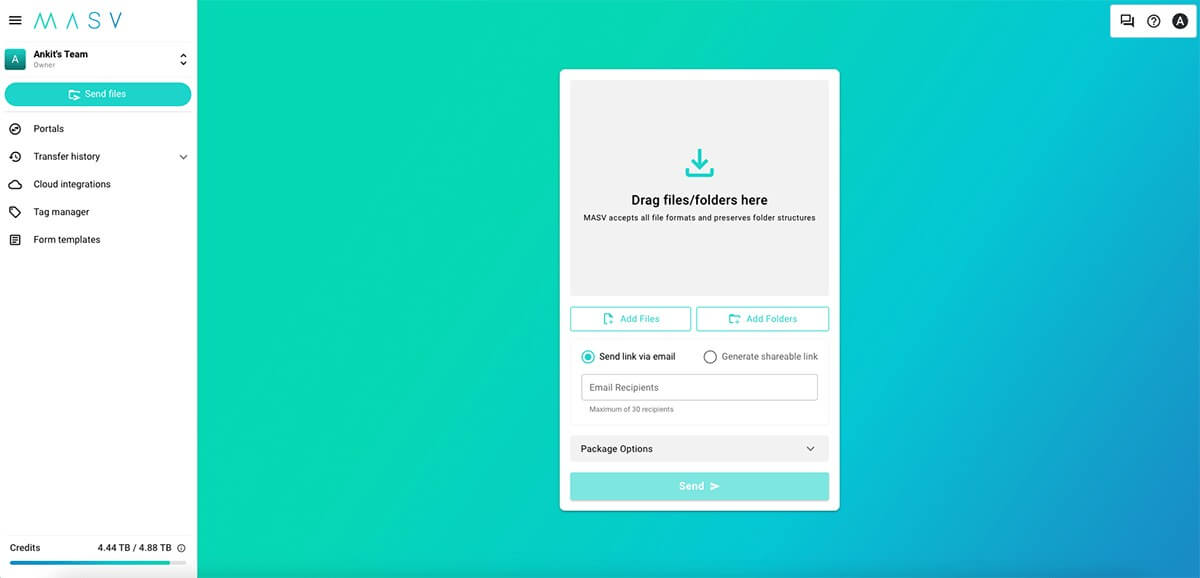
Click the button Create New Portal in the top right corner. You’ll see this screen:
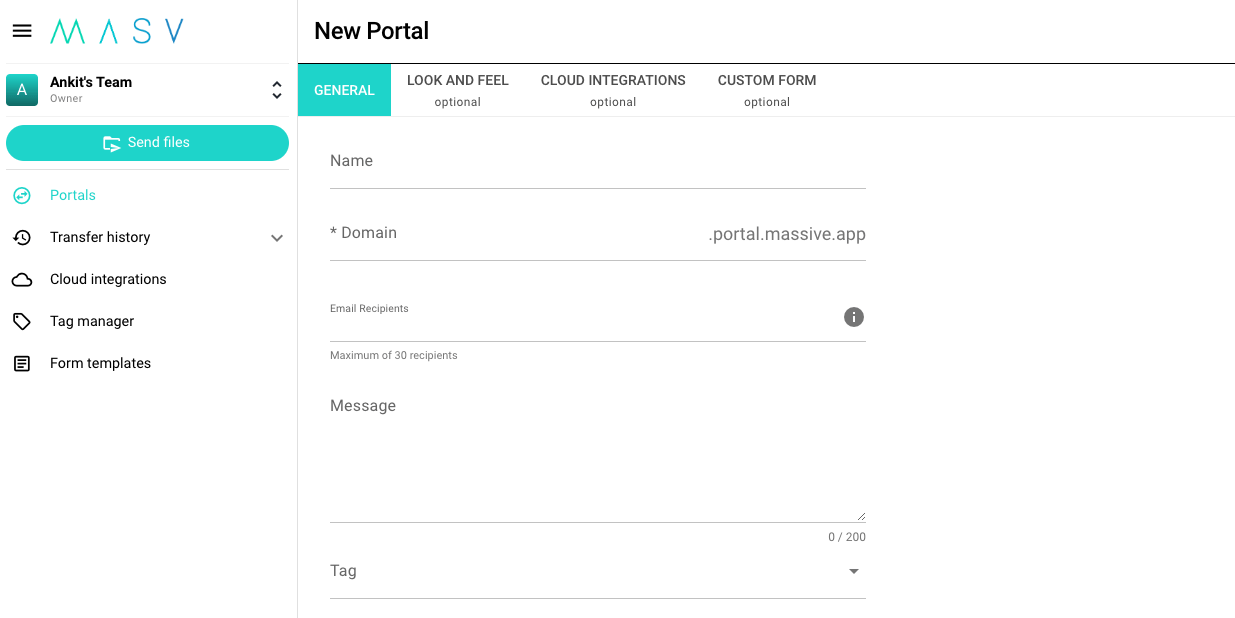
Add your own information into these fields, and note that you have the option to password-protect your Portal if you wish. Make the Portal your own by adding your own image or logo, and by choosing an accent color.
Take a look at our guide to creating a Portal for a full breakdown.
Once you’re done, hit Create Portal.
Uploading Large Files Made Easy
With MASV Portals, collecting large video files into your Squarespace site is a breeze.
3. Create an embed link for your Portal
You’ll now see your new Portal listed on your dashboard like so:
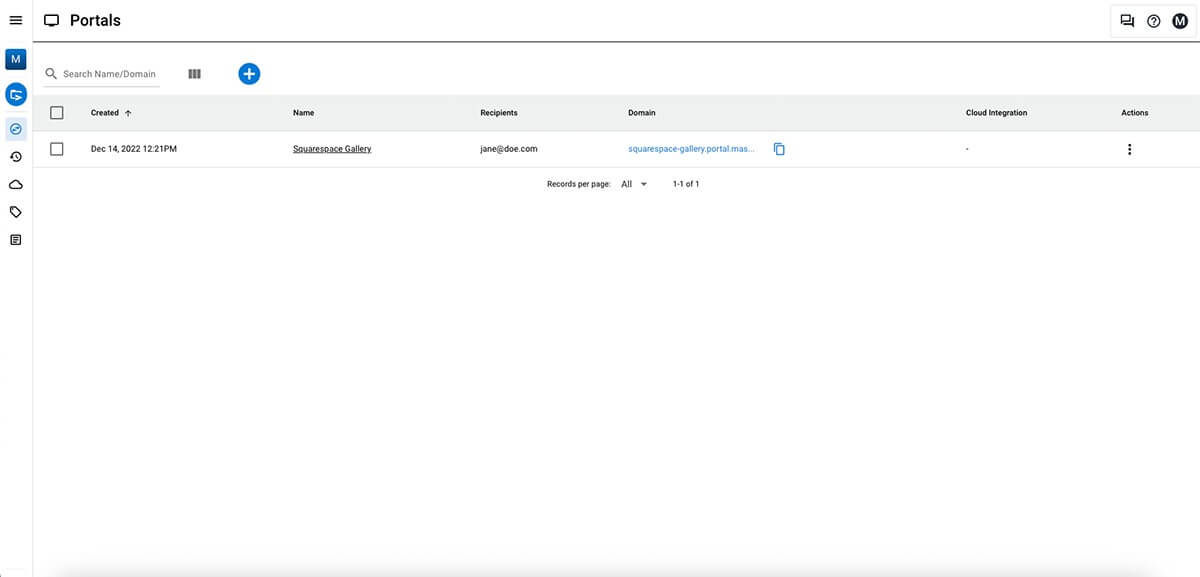
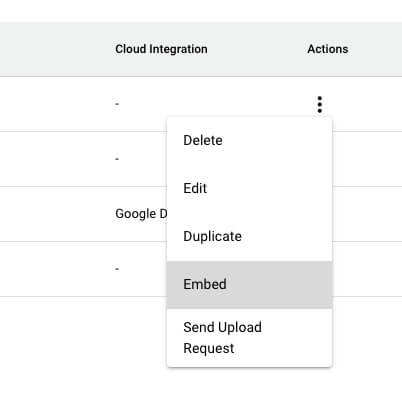
Now we’ll generate an embed link to copy across to your Squarespace site. Click on the three vertical dots situated on the far right of your Portal name and click ‘Embed’:
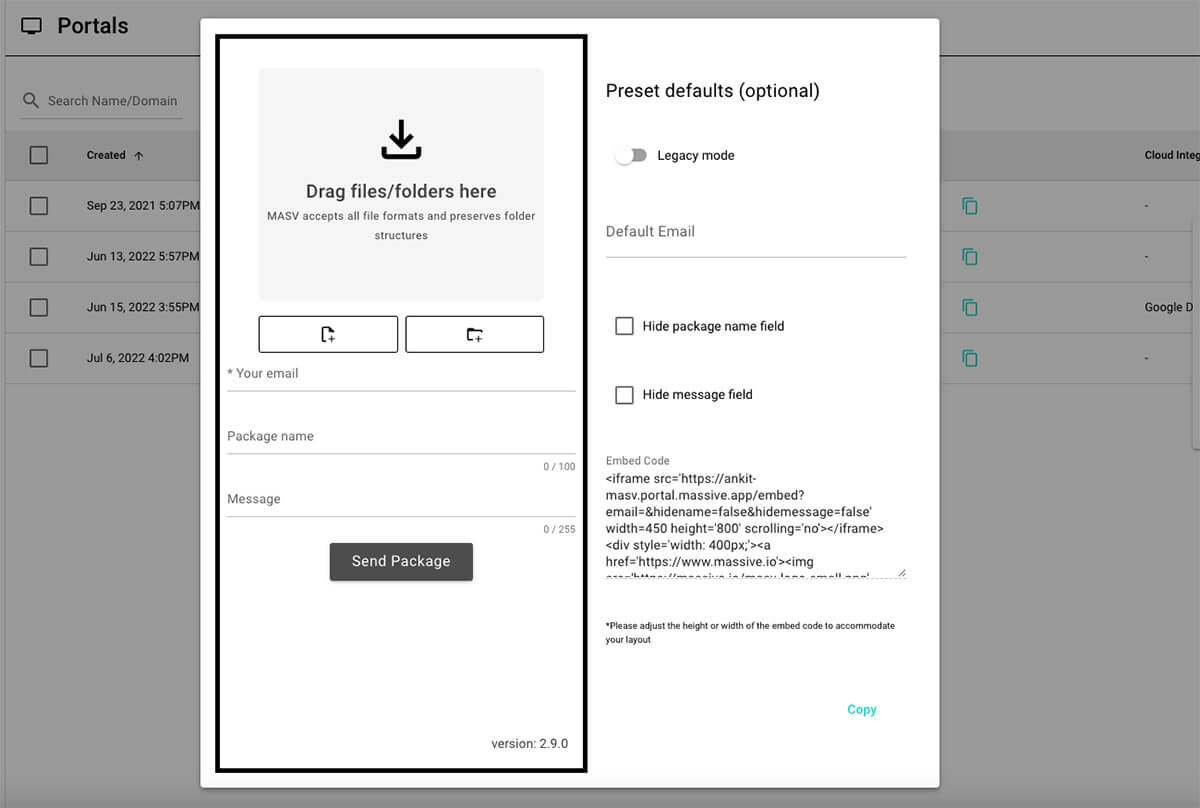
Step 4. Add a Code Block to your Squarespace page
Log in to the backend of your Squarespace site and go to the page you’d like to add your MASV Portal to.
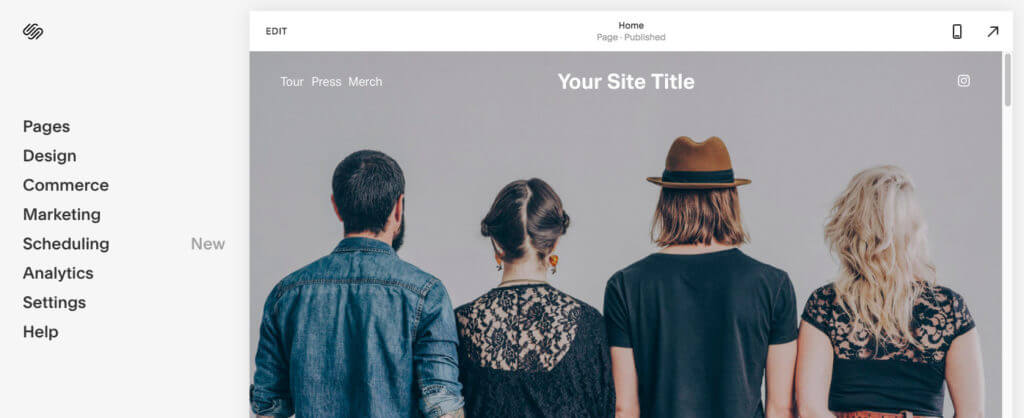
In this example, we’ll add one to the homepage, which shows up first by default. To reach any other page on your site, click Pages on the left-hand side, and then select your page of choice
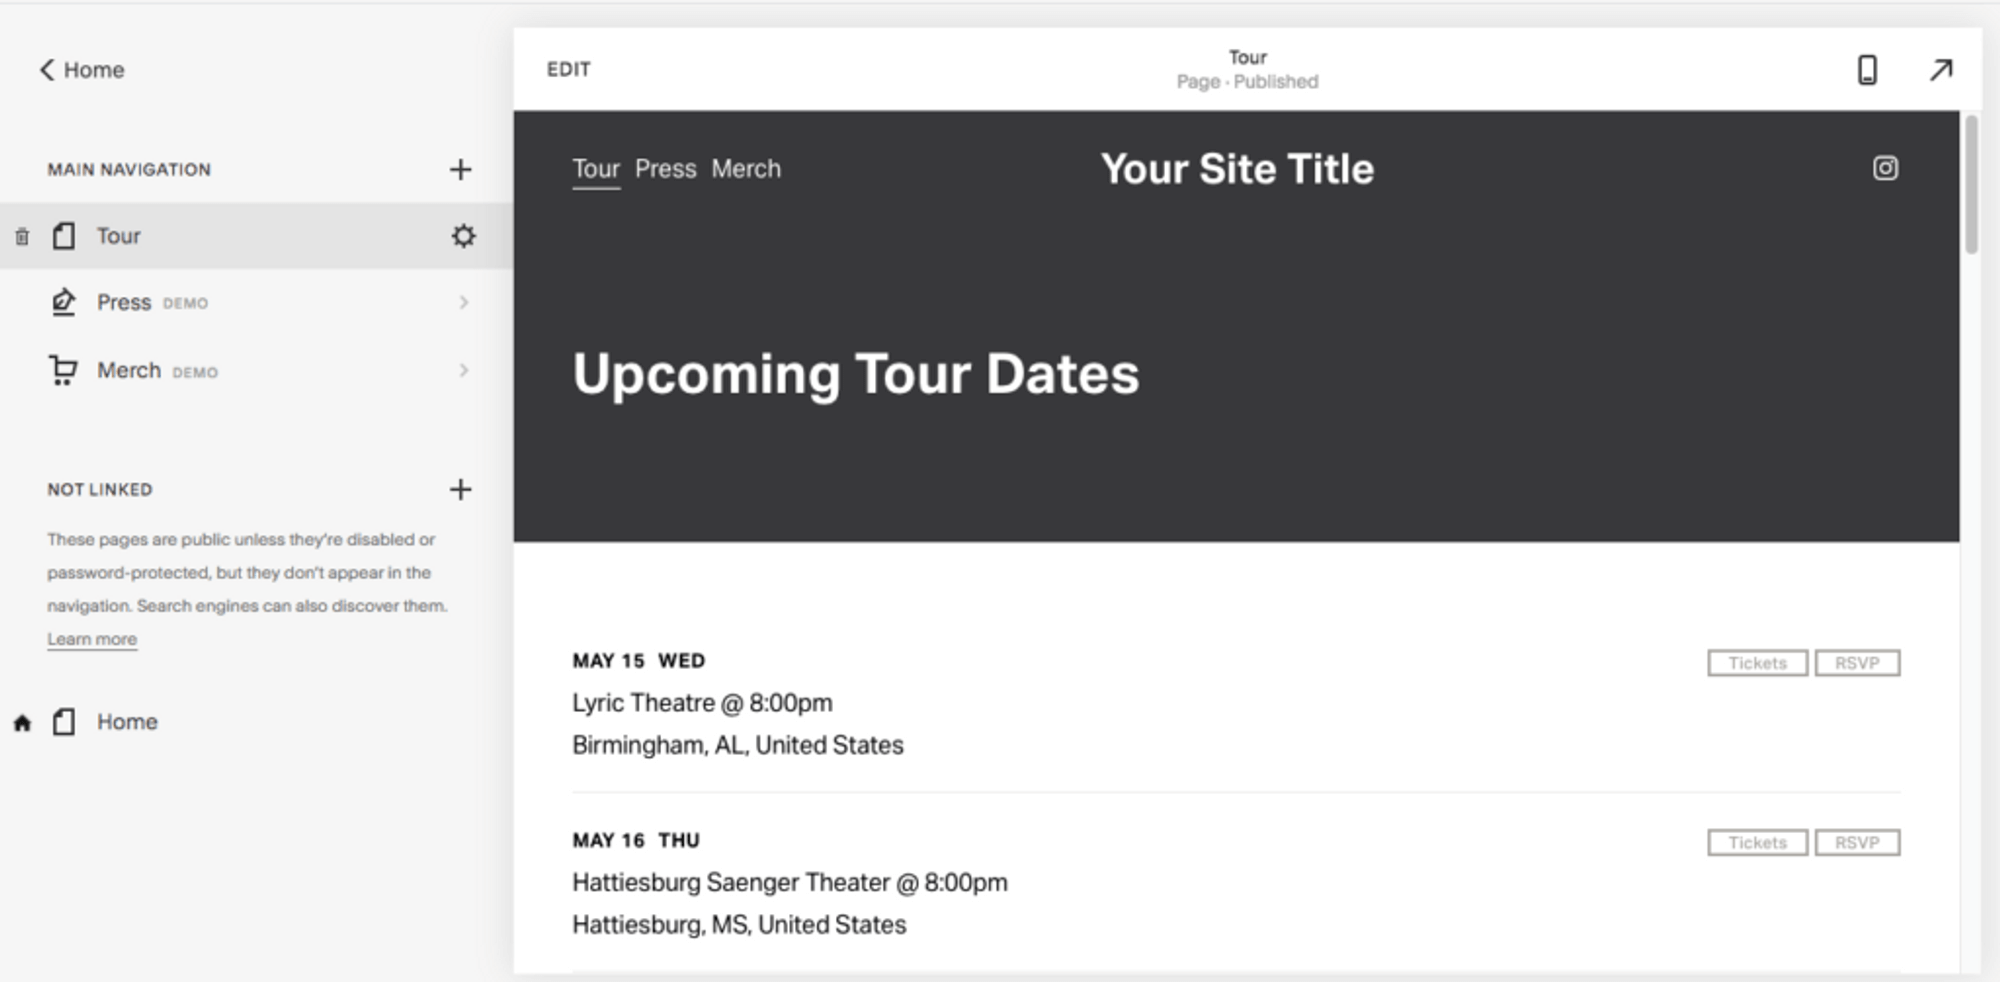
Once you’re on the page you’d like to add the Portal to, click EDIT in the top left-hand corner.
Of course, you can also start a fresh new page to house your Portal. If that’s your preferred choice, hit the + next to Main Navigation and get started with a Blank Page, or pick another suggested layout.
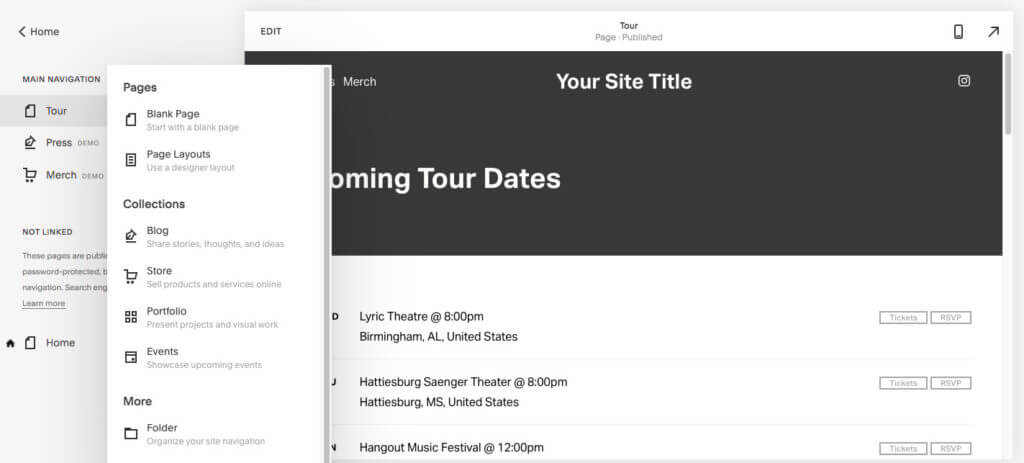
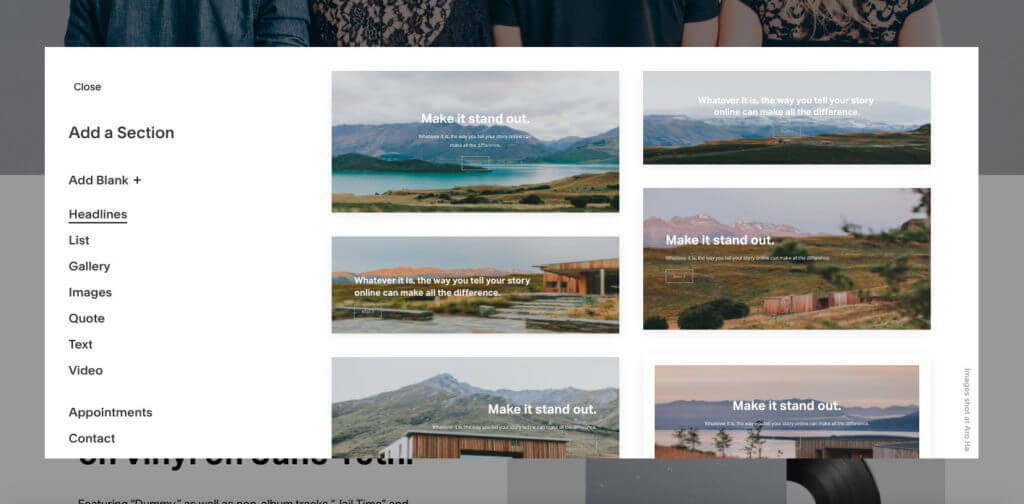
Whichever page you choose to add your Portal to, we recommend you add it to a blank new section. Scroll down to where you’d like the portal to sit and click on one of the section breaker + symbols:

This will produce the menu shown below. Select Add Blank +.
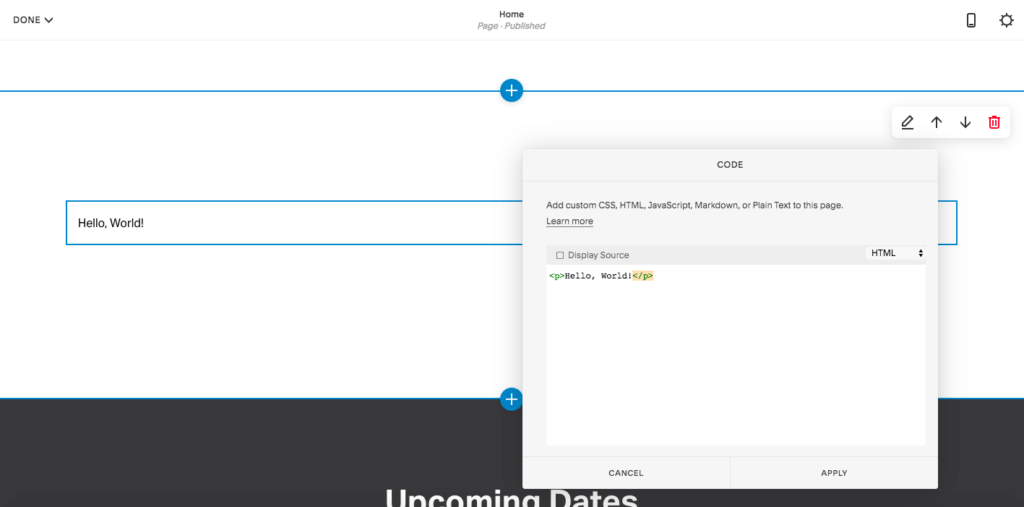
Once you have your new blank section, click one of the black insert points and select Code, which is filed under More.

Step 5. Adjust the size and position of your portal
You should have the code for the Portal already copied from your MASV dashboard. Clear the placeholder content “Hello, World” (see the image below), and paste it here. Leave the option Display Source unchecked, then hit Apply.
You should now see your portal embedded in your site page, and it will look something like this:
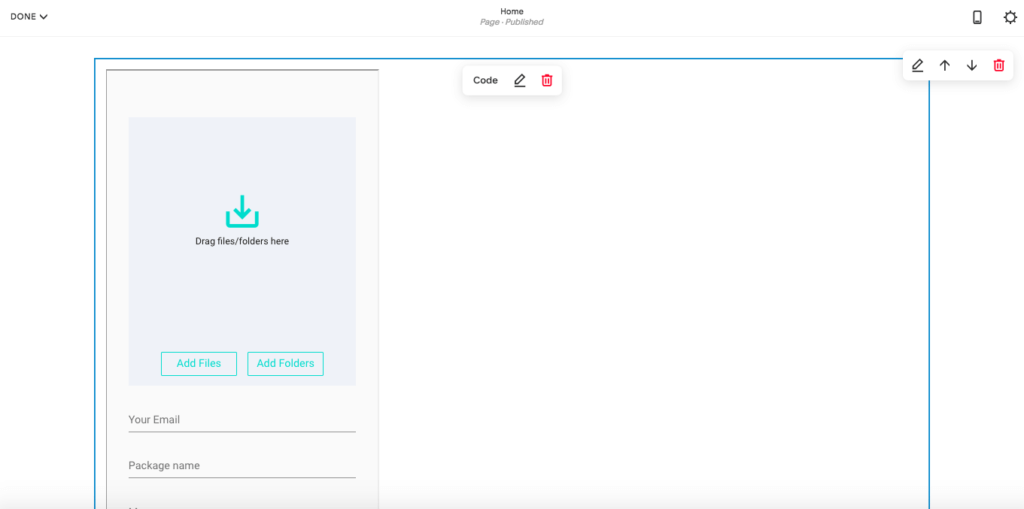
Step 6. Adjust the look and formatting of your portal
Now it’s time to adjust the look and position of your embedded portal.
We’ve left this one uncustomized, but at this point, you might want to go back into your MASV Portals dashboard and play around with adding your own custom image/logo and color if you haven’t already. To do this, click the pen-shaped Edit button next to the name of your portal to make these edits, then re-copy the code and paste it over the original one on your Squarespace site.
To adjust the size and position of this code, you’ll need to go in and make manual edits to the link on your Squarespace site. But don’t worry, this is super simple.
MASV Portals will left-align on your Squarespace site by default when added to a blank section. To center align your Portal, add a center HTML style to the link.
Portals are automatically set to be 400px wide and 640px high, but again you can edit these measurements easily within the link itself. Find the part that says width=’400’ height=’640’ and adjust these numbers to find your ideal size.
Once you’re happy with the formatting, don’t forget to go to Done in the top left corner, and then hit Save to update the live version of your site.
And that’s it! Your Portal is now live and waiting for its first upload. Remember you can always head back to your MASV Portals dashboard to make any changes to your site, and you’ll be notified when any content is uploaded at the email address you entered in the Recipient field.
MASV ❤️ Squarespace
Take advantage of fast, secure large file transfer.
MASV is the Easiest Way to Upload Files to Your Squarespace Site
We may be a little biased but we think a MASV Portal is the best way to upload large files to your Squarespace site. Why?
- It’s super easy to implement
- You can customize the look and feel to match your branding
- Secure transfers of all sizes
- Unlimited speeds
And if you sign up for MASV, you’ll get some free transfer credits monthly. Give it a try today!
MASV File Transfer
Use the fastest, largest file transfer service available today, MASV.