What Is a 3D Glitch Text Animation?
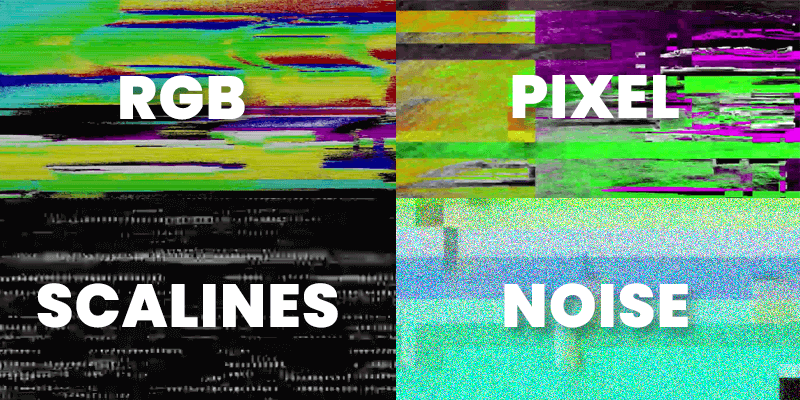
A glitch effect mimics the distortion of playback errors from the video technology of yesterday. There are different kinds of glitches but in general, they have these elements:
- An RGB distortion
- Pixel errors
- Scanlines
- Digital noise

What once used to be a grave error has become a useful tool to create an interesting dynamic and stylized edit that keeps the audience’s attention. It can be used as a video layer or as a text effect.
Want to learn how to create your own 3D glitch text animation in Premiere Pro? Check out our latest tutorial.
Tutorial: Create a 3D Glitch Text Animation Using Premiere Pro
Format Text
Use the ‘Text’ tool to create text or click Command + T on Mac and Ctrl + T for Windows. Put this on the ‘V1’ track of your Premiere Pro sequence.
Modify your texts with the style you want. Ideally, you want to select a bold blocky font to see the effect better. Make sure to increase the font size on the screen as well.
Duplicate Text
Once you’re happy with the look of the font, make a copy and place it above your existing track (on ‘V2’). This will give you two layers to play with and get that nice, jittery glitch effect.
Send Large Files Today
Use with the fastest, largest file transfer service available today, MASV.
Wave Warp Effect
Go to the ‘Effects’ tab and look for the ‘Wave Warp’. Add this effect to the clip on the first track. From here, you can warp your text based on a number of different parameters. You can change the ‘Type’, ‘Height’, ‘Width’, ‘Direction’ and ‘Speed’.
For this demo, do the following:
- Type: square
- Height: 150
- Width: 160
- Direction: 94
- Speed: 10
Cutting Frames
Next, use the razor tool in Premiere to cut up the two text tracks. As mentioned above, playing with these two tracks provides a jitter effect which is key to any good glitch animation.
The best way to do this is to use the left and right arrow keys to jump between frames and cut parts out frame-by-frame (every 3 frames, 5 frames, etc.). You can also move the different tracks left and right to change the length of playback.
I recommend cutting up V1 more than V2 so your text is still legible on top.
RGB Tint Effect
From here, go back to the ‘Effects’ tab and look up ‘Tint’. Drag and drop this effect to the chopped up clips in V1. From there, change the different frames to different colors (one red, the other blue, followed by green, etc.). You can use any color that you want but RGB is the standard.
Noise and Grain
Lastly, to add that extra bit of glitch distortion, you should add some noise and grain effects. Look up two different effects in the ‘Effects’ tab: ‘Noise’ and ‘VR Digital Glitch’. Drag and drop these onto V1 and set your desired intensity. I use:
- Noise ‘Intensity’: 100
- VR Digital Glitch ‘Master Amplitude’: 25
3D Effect
Now that you’ve created the glitch text animation, make it pop with a 3D effect. To do this:
- Highlight all your clips
- Right-click and select ‘Nest’
- Rename your new nested sequence
- Apply the ‘Basic 3D’ effect to the new sequence
- Play around with the controls to get your desired look
- Add a ‘Drop Shadow’ effect to the nested sequence to make the titles pop
Share Your Video
When you finish your video, use MASV to send your reviews or final deliveries to anyone, anywhere in the world. This is the fastest way to deliver raw footage and all those massive media files when you’re working against the clock. Sign up for MASV.
Send Large Files Today
Use the fastest, largest file transfer service available today, MASV.