Downloading music videos through Frame.io. Sifting through Google Drive links. Downloading corrupted OneDrive files. Sifting through several files with different naming conventions and file formats.
Juggling different platforms and multiple clients can be such a pain. But for busy film, video, and post-production teams, a smooth workflow to receive files from clients, partners, collaborators, and other users is critical to doing your best work.
Whether you’re a remote editor, colorist, VFX artist, sound engineer, or other professional who works with large files, you need a simple and efficient way to receive files securely. Let’s learn how.
Table of Contents
A Universal File Uploader for Every Workflow
Make it easy for your clients to send files. Make it easy for your team to receive them.
What is a MASV Portal?
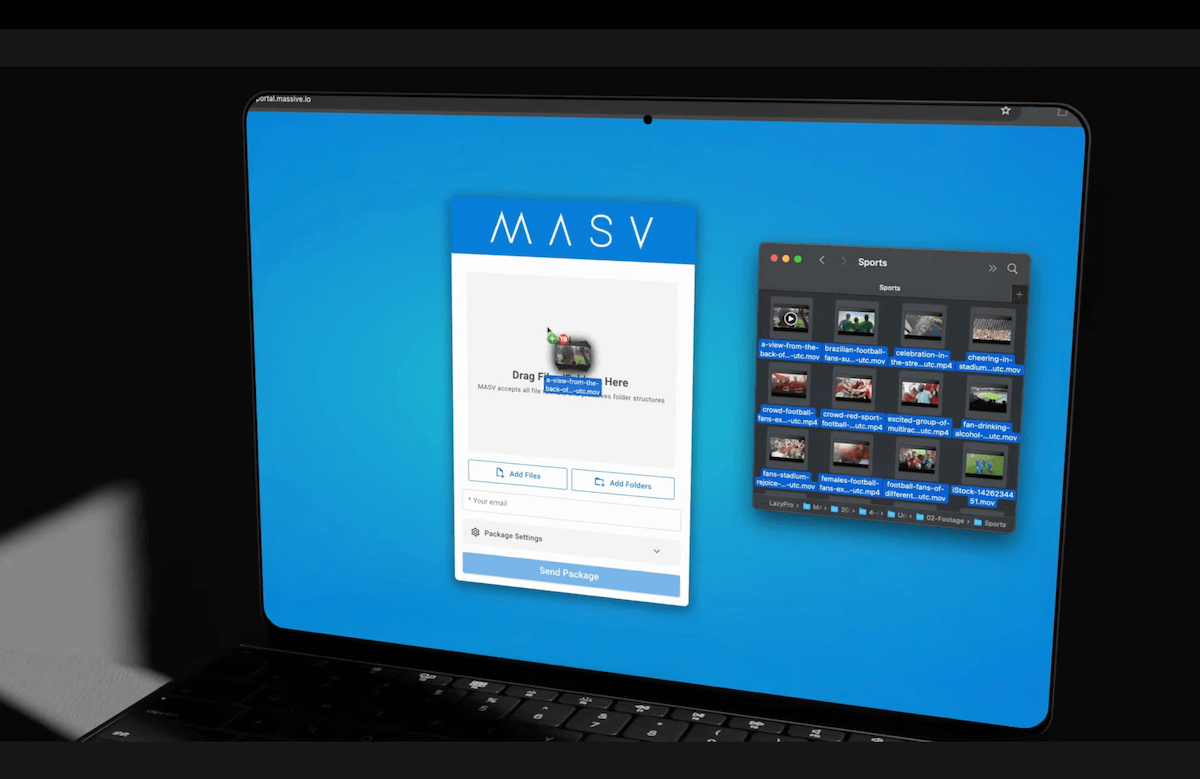
A MASV Portal is a centralized location to receive and download all your files that can be embedded practically anywhere—and best of all, it can handle unlimited file package sizes (or individual files up to 15 TB) and is the fastest universal file uploader you can use.
It works great for any kind of media workflow:
- For film production companies and TV stations, the on-site camera team can use a MASV Portal to send footage to the editorial team so they can start working immediately.
- If you’re running an online contest, participants can send their submissions to one place, with the ability to implement upload rules around file sizes, naming conventions, and formats.
- If you’re responsible for marketing for a sports team and want videos or pictures from your fans, you can embed the Portal right on your webpage so anyone can submit their user-generated content and UGC video.
💡 Read More: How to Create File Upload Forms for Any Website
How to Create a Personalized MASV Portal
First, if you haven’t done so already, you need a MASV account. It only takes a few minutes to sign up for our Free Tier, which gives you 10 GB of free transfer credits every month! Additional usage is charged on a pay-as-you-go basis.
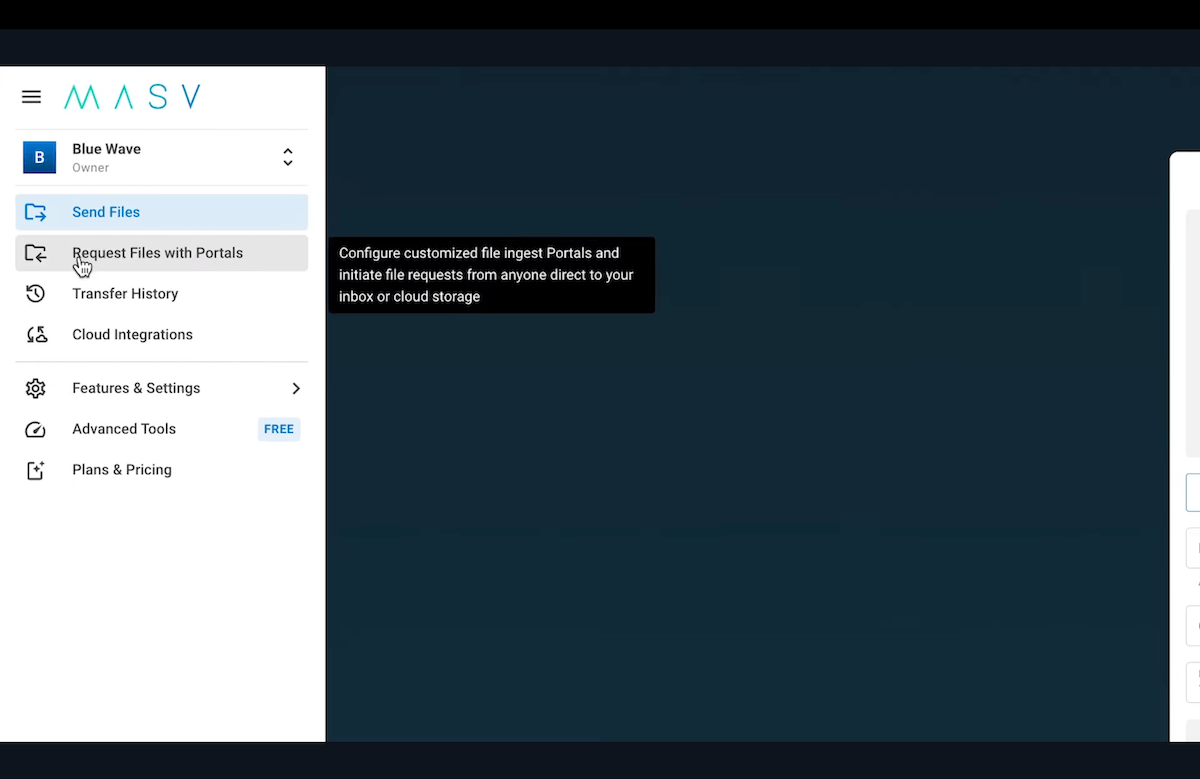
On the main page of your MASV account, navigate to Request Files with Portals in the menu on the left-hand side.
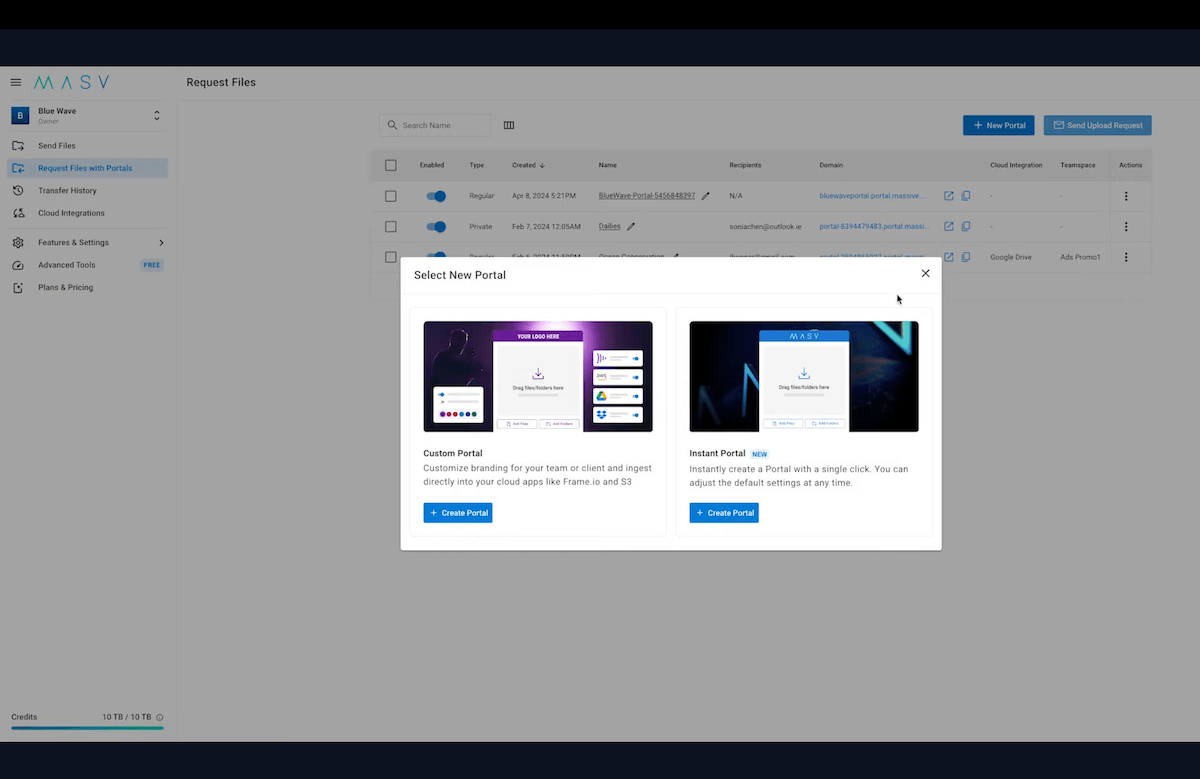
Click on the button labeled New Portal and a new window will appear.
Select Instant Portal, which will create a default Portal you can start using immediately.
Or you can select Custom Portal, which allows you to customize your Portal so you can add your branding and specific file upload rules (such as only allowing specific naming conventions, or disallowing .exe files for cybersecurity reasons).
Let’s select Custom Portal.
General Tab
In the General section of your Portal, you’ll see several fields you can fill out.
First, we have the Domain. This is the web address and link you’ll send to your clients and any other collaborators who need to upload files to your Portal (they can do so without needing a MASV account). You can leave it like that, or add your company name, or your name. Let’s write “Galactic Productions.”
The second field is Name. This is the Portal name that will appear on your MASV account. If you use multiple Portals for different projects or clients, this helps you easily recognize which one is for which purpose. I will name this one Film Dailies.
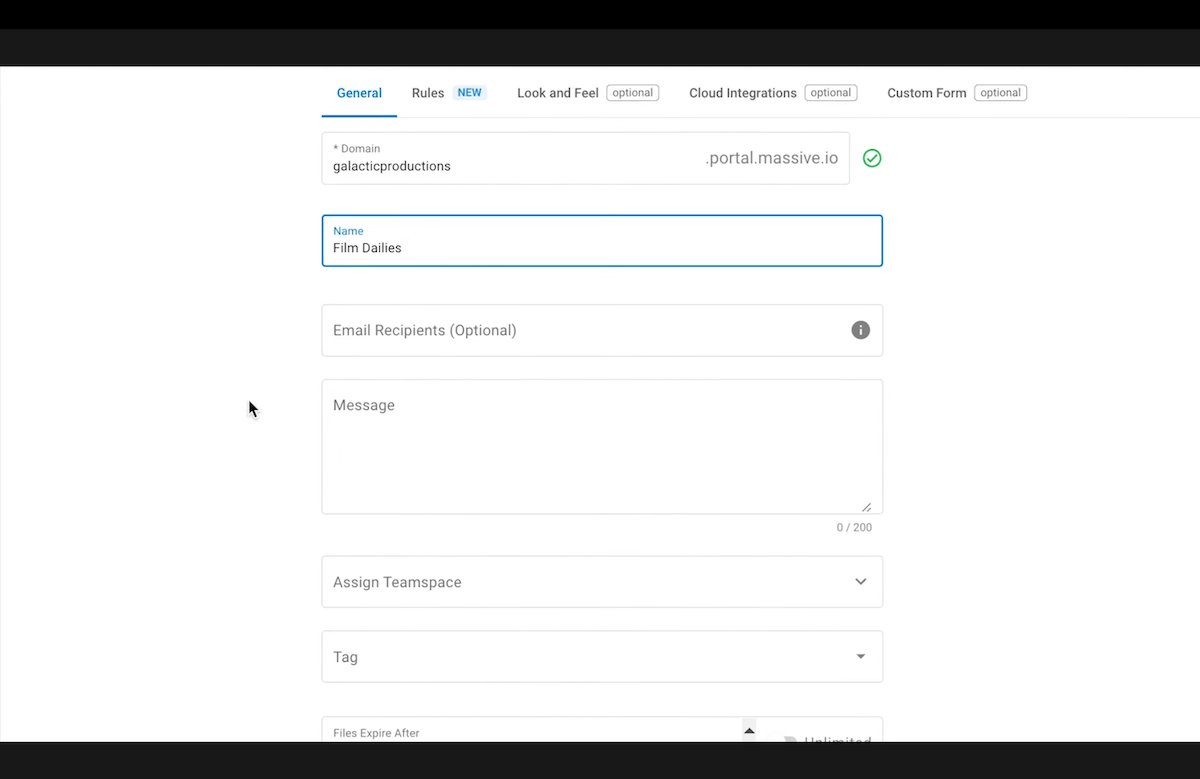
Next, we have Email Recipients, which is optional. Everyone added here will be notified when someone uploads data to this Portal. They’ll also be able to download the files.
Below that we have Message. This is is a message shown at the top of the Portal for your collaborators, and it’s also optional. You can add your company tagline or just a simple “Welcome! Please upload your files below.”
Next, we can assign a Teamspace. You can create Teamspaces for specific projects and add collaborators to a team. If you assign a Teamspace to your Portal, all members that belong to it will receive a notification and be able to download files uploaded to the Portal.
After Teamspaces we have Tags, which can be assigned to facilitate better package tracking and file transfer visibility. You can create them in the MASV app or right here in the browser.
Let’s add the tag “Films.”
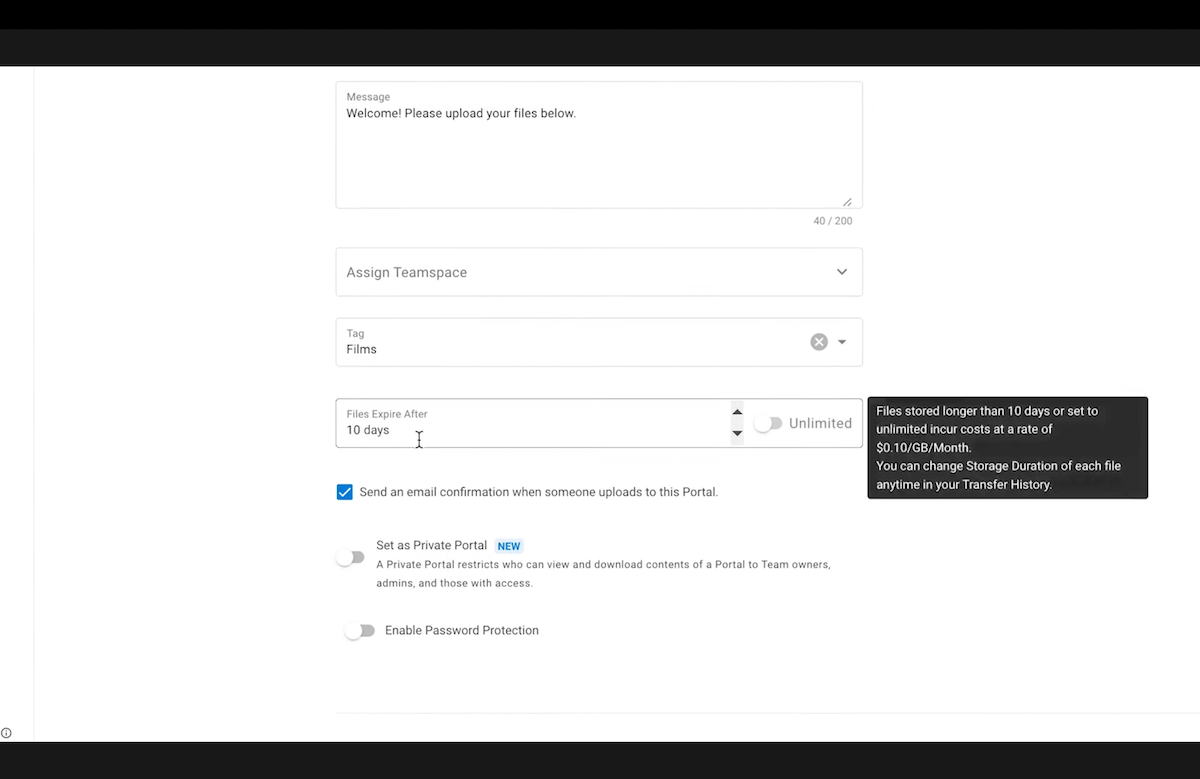
In the next field, you can specify the maximum number of days the files will be stored in the Portal before being deleted.
Next, you can choose whether to receive email confirmations when someone uploads files to this Portal. Let’s leave it checked.
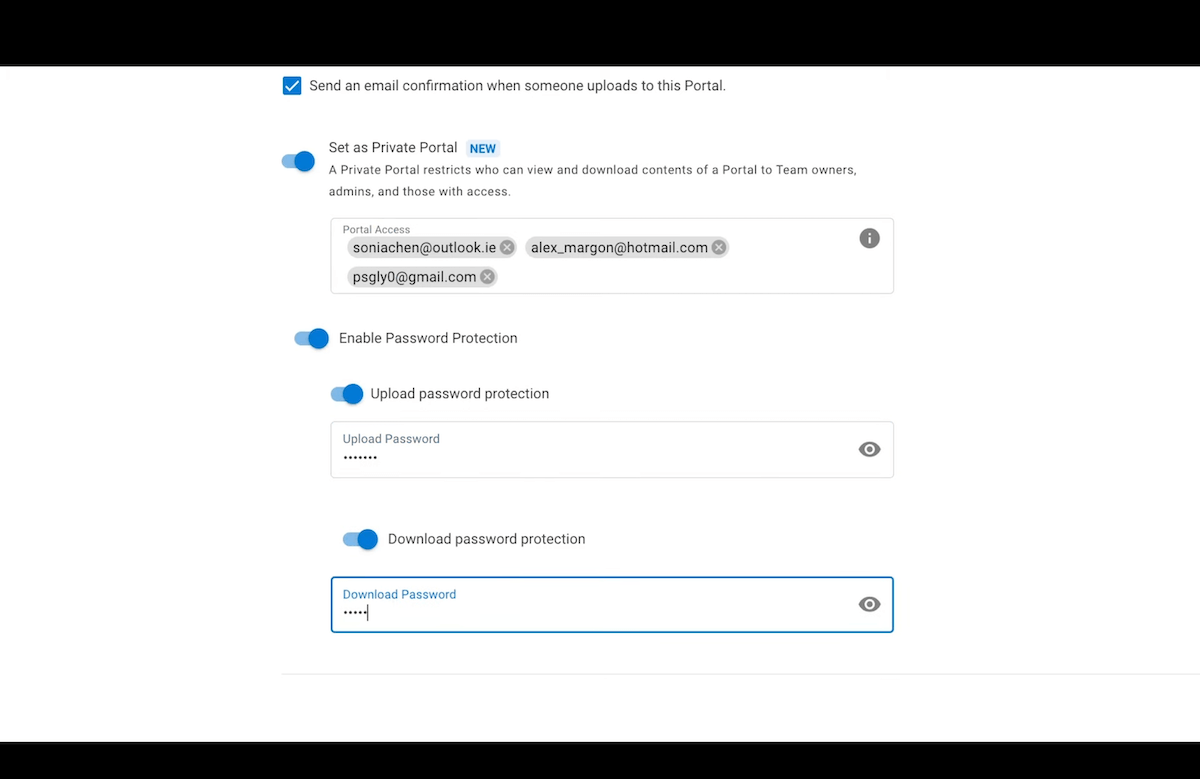
To finish, for an extra layer of security, you can set up the Portal as private and enable password protection for uploads and downloads.
In a Private Portal, you can specify who is able to view and download its contents.
Rules Tab
Under the Rules tab you can set up specific parameters your collaborators have to follow to successfully upload files to your Portal.
First, we have Terms of Service. Here you can add a legal agreement, a disclaimer, or ask users to give you their permission to use their uploaded videos.
In the Title field, Iet’s write “Copyright Permission.”
In the Description box below that, I’ll add a summary. Then, in the Label field, I’ll write: “I accept.”
This is the text that will appear next to the checkbox users must check to agree to the terms.
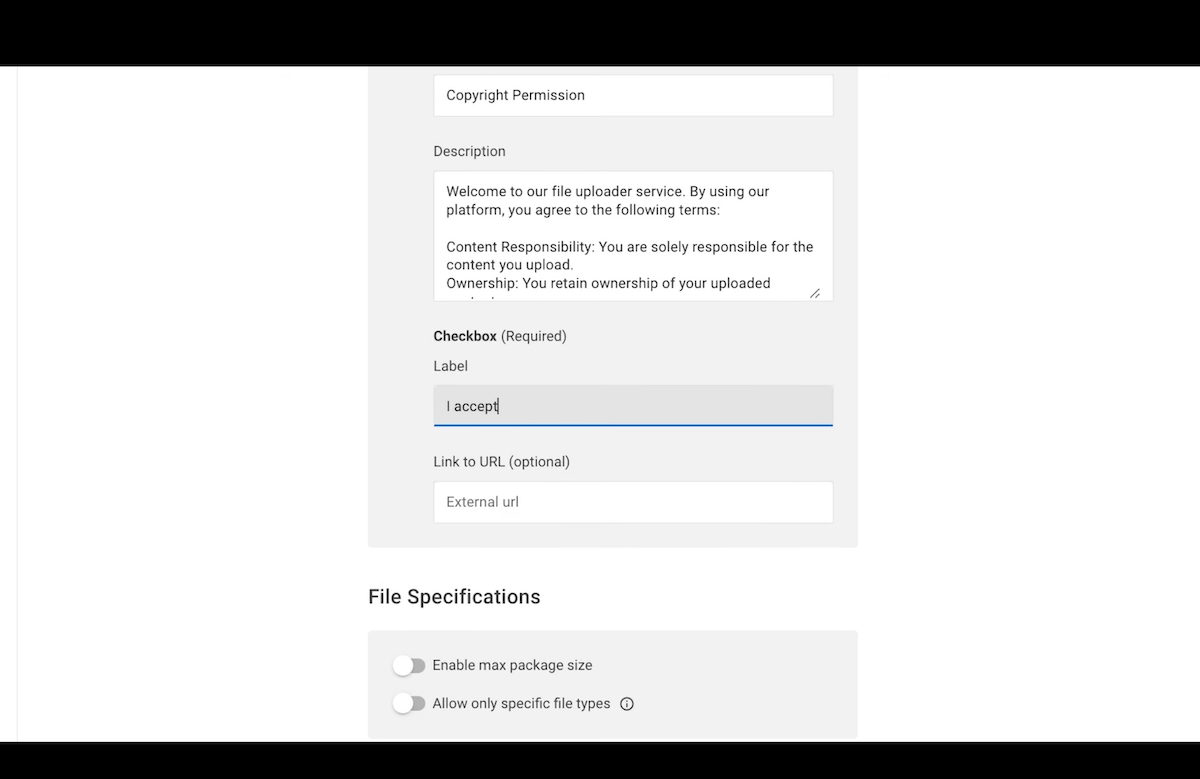
You also have the option to add a link to the full legal agreement or more information for your collaborators.
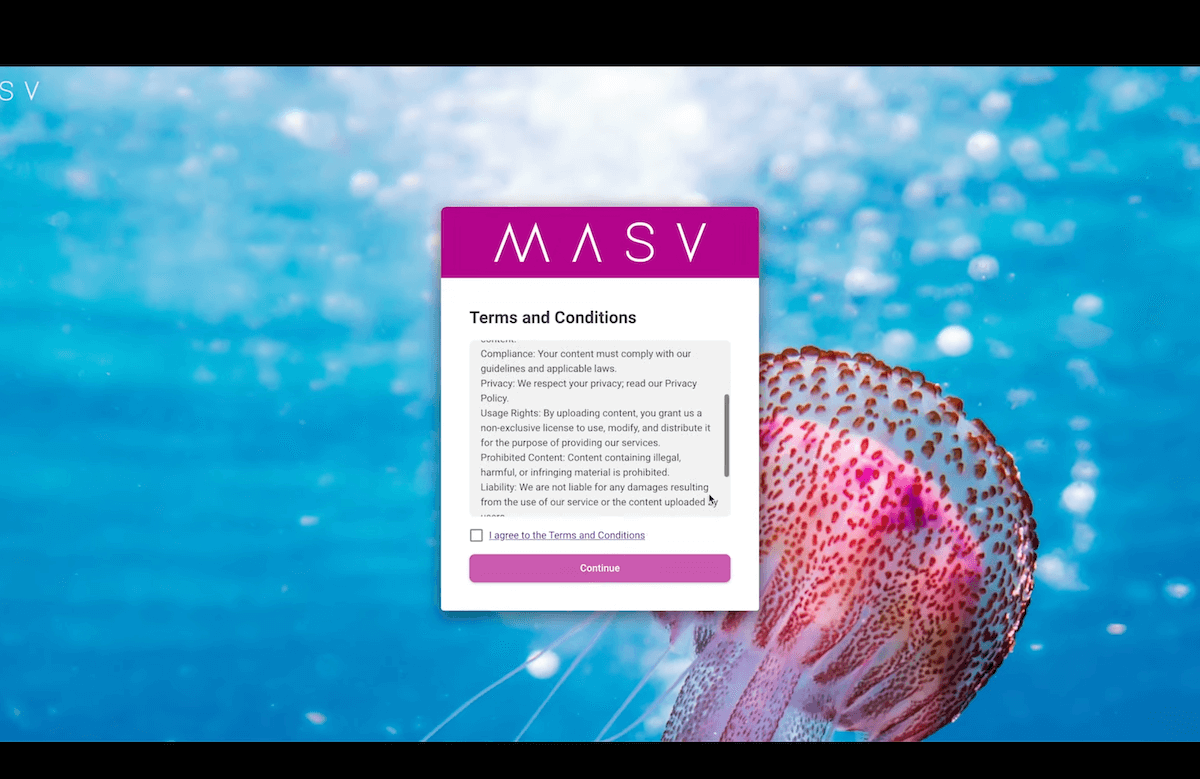
The Terms and Conditions will appear before users can access the Portal, and when activated, users must agree to the terms to get access.
Next, we have File Specifications.
You can use this tool to enable a maximum package size, which sets an upload limit for the whole package. You can set a limit in megabytes, gigabytes, or terabytes. Just remember the maximum size is for the whole package, and not for each file.
You can also set the specific file types to be accepted for uploading. Add a period and then the file format. The Portal will now only allow these file formats to be uploaded.
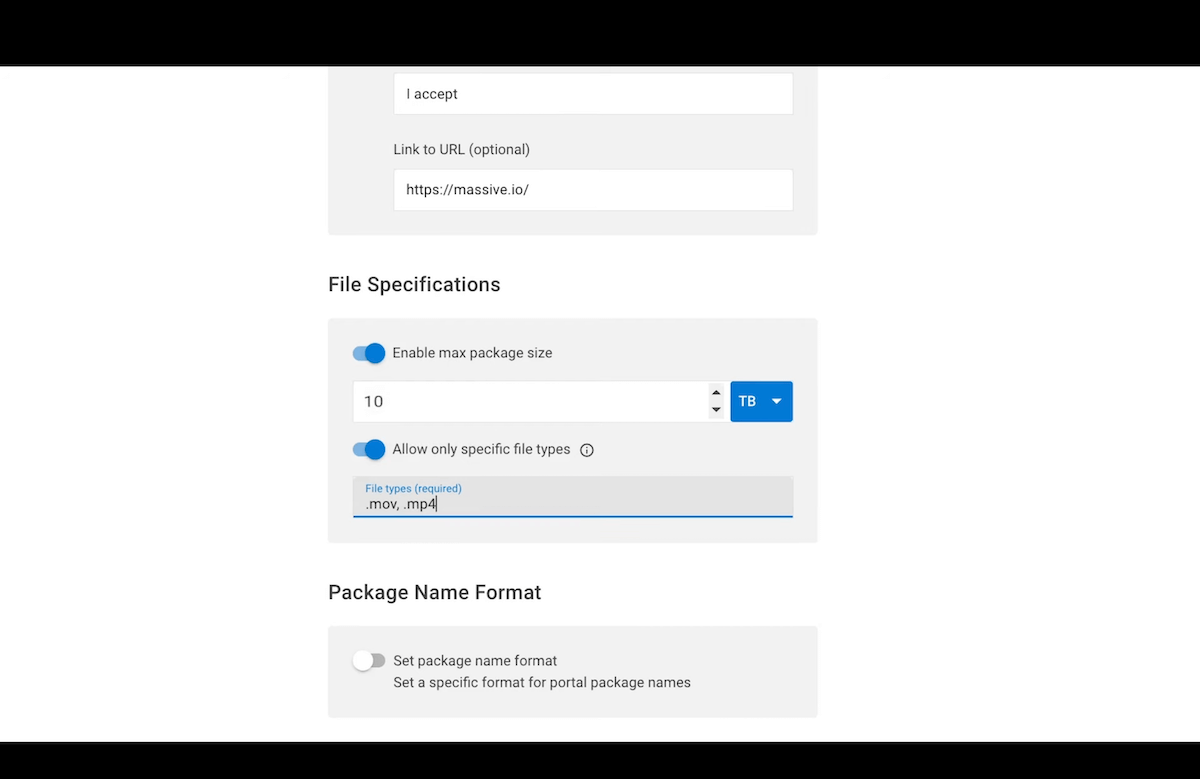
Next, we have Package Name Format. In this field you can set naming conventions for your uploaders. Keep in mind that this applies to the whole package, not each asset.
In the Label field, write the actual name format you want. I’ll use this format: YYYYMMDD_Name_#.
Then we add the RegEx (regular expressions) value. This is an expression that configures the naming convention you want. Click on Learn more for a list of regular expressions you can copy and paste into your Portal rules. There are also many RegEx generators online that you can use to specify your name format.
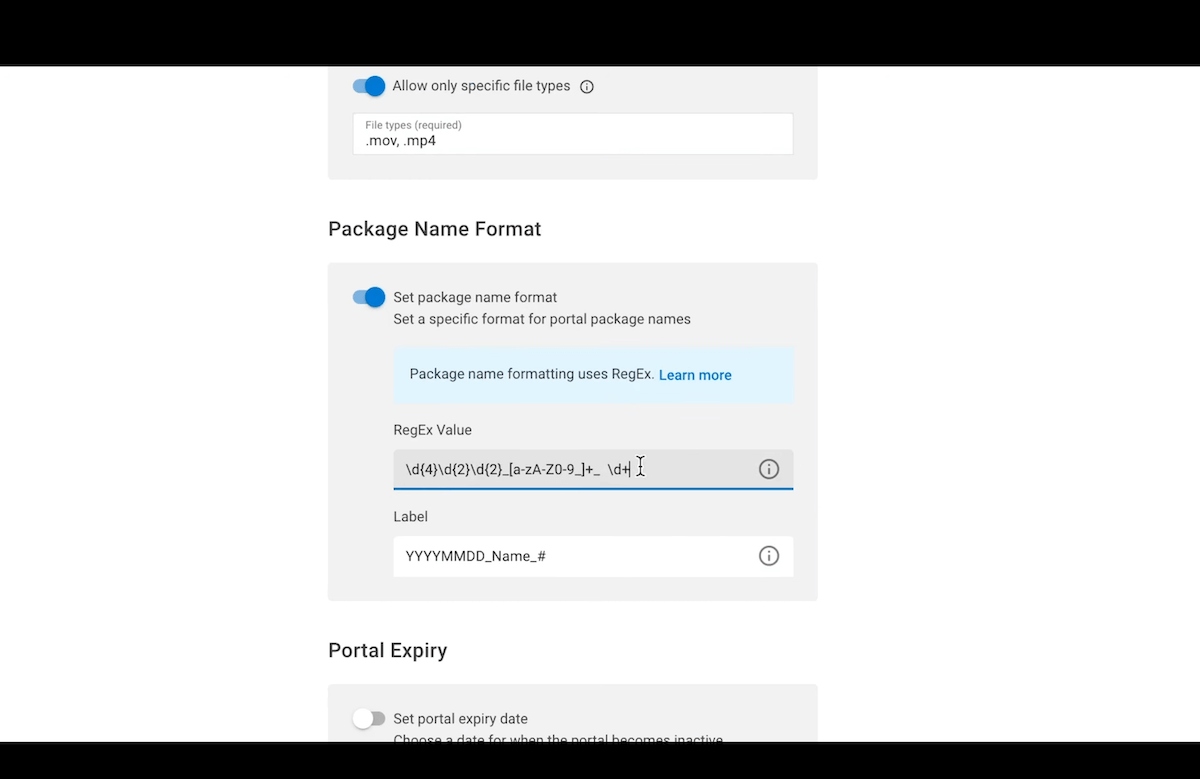
When users type the package name in the Portal, they will automatically see the name formatting they need to follow.
Last but not least, we have Portal Expiry. This allows you to disable a Portal on a specific day and time to prevent users from uploading anything to the Portal past that date.
Look and Feel Tab
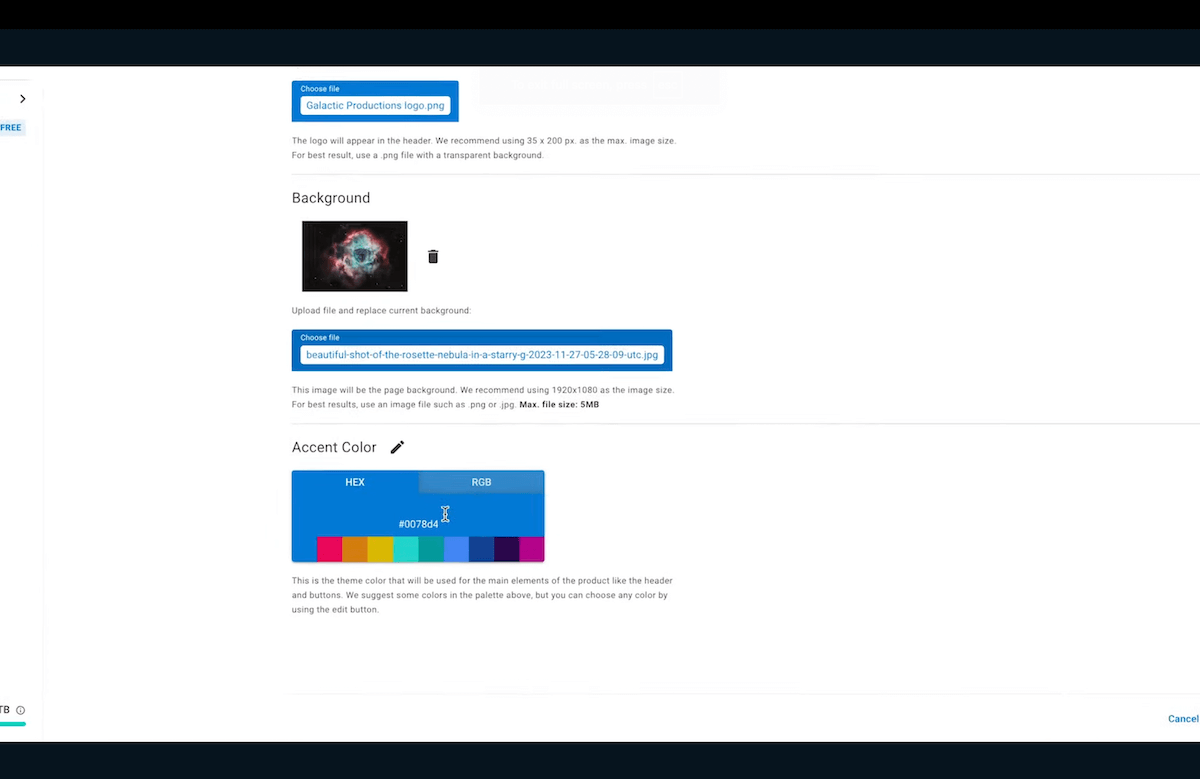
With the Look and Feel tab, you’re able to customize your Portal to make it uniquely yours.
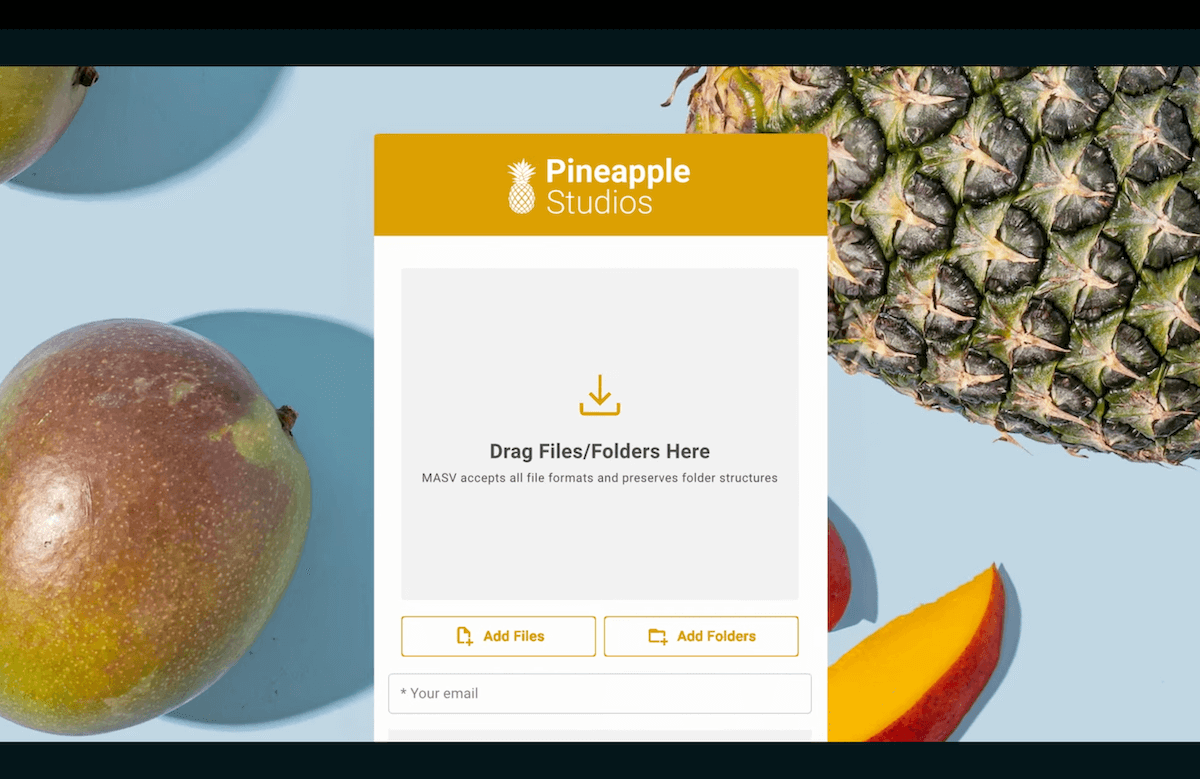
You can add your logo, which will appear on the Portal header. You can add a background color or image that represents your brand or the project. And of course, you can choose your brand colors for the Portal.
Cloud Integrations Tab

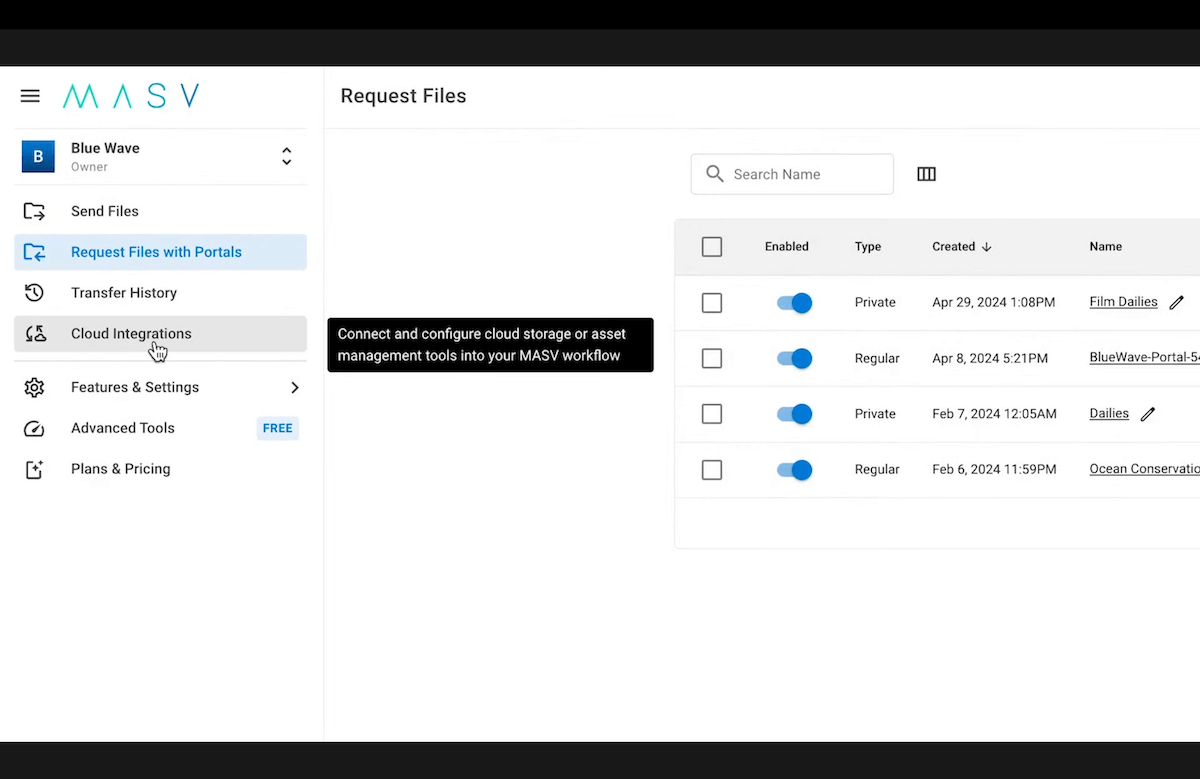
MASV Portals makes it super easy to connect cloud storage destinations or media asset management platforms in your ecosystem. You can automate uploads from all your cloud services (such as cloud storage and media asset management platforms) and drastically reduce the time needed for admin tasks.
You can even connect networked on-prem storage devices like a NAS or a SAN to MASV through its Centralized Ingest solution, which acts as a single entry point to any storage destination, lessening IT burden around managing multiple diverse storages.
To add a cloud storage, click the Cloud Integration tab in the menu on the left-hand side. Then click the blue + New Integration button.
Custom Forms Tabs
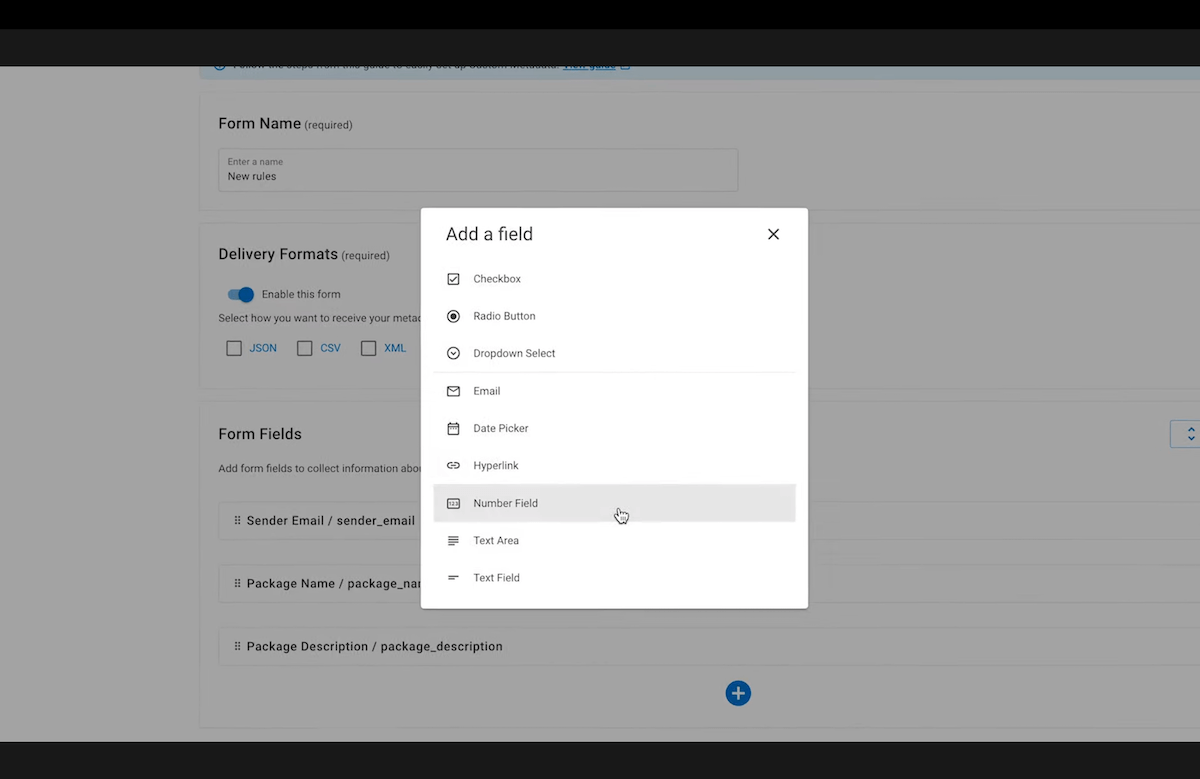
Last but not least, we have Custom Forms. Here you can add even more parameters and fields for your users to complete.
This is optional as well, but it gives you the exact metadata fields you need for your specific use case.
Click Create, and now you have your personalized Portal to send to anyone who needs it!
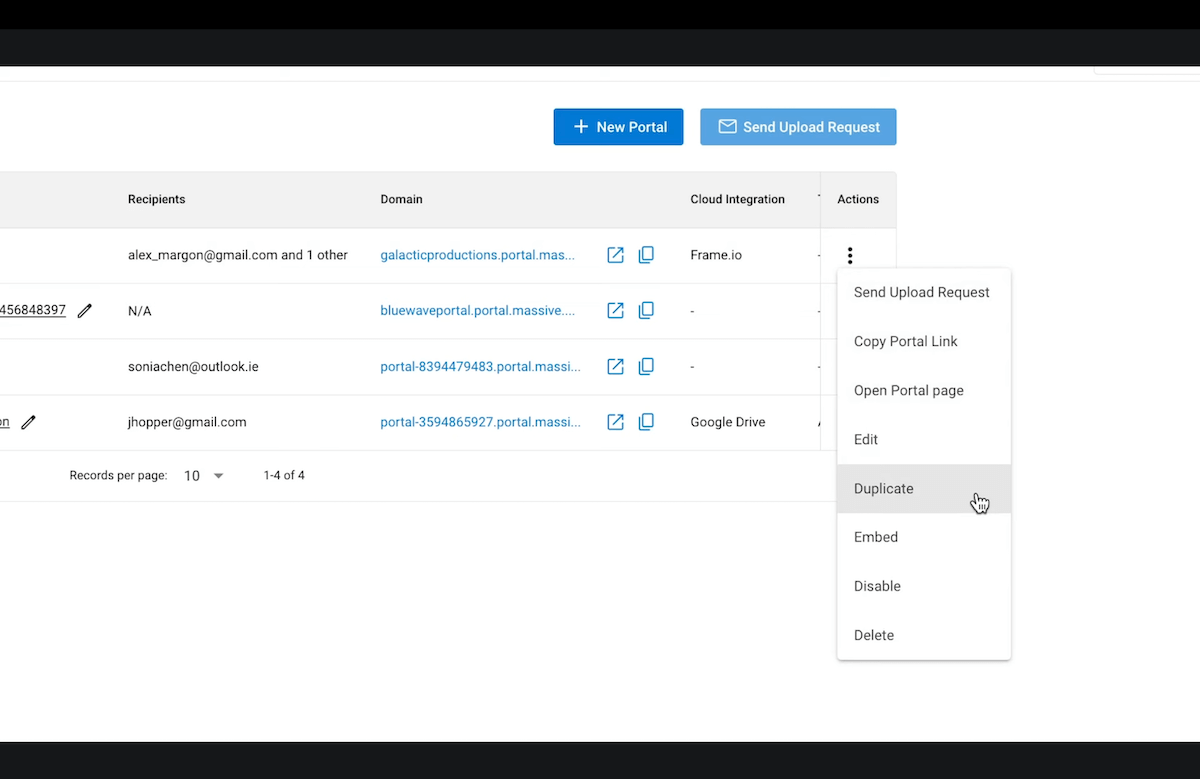
In the main Portals page, you’ll see a list of your Portals. Under Actions, you can send upload requests to a specific Portal, copy the Portal Link, modify the Portal, duplicate or embed it, disable it, delete it, or perform other tasks.
The Easiest Way to Receive Large Files From Anyone
With MASV Portals you can reliably and securely receive files of virtually any size from clients in one centralized place, while using automated tools and no-code integrations to lessen manual work and keep things organized:
- Say goodbye to manually organizing files downloaded from different locations—attach a cloud storage with a few clicks and automatically receive files in a predetermined storage bucket of your choosing.
- Ensure consistent file naming, types, and file size limitations (if necessary) so you know exactly what you’re getting by defining delivery specifications and controlling upload access and formats.
- Keep all uploads secure with an encrypted file uploader with secure authentication and privacy controls.
- Because Portals can be set up for free, you can deploy an unlimited number of them and designate each Portal to correspond with specific projects or content types.
You can easily request file uploads by sharing a link, sending an email, or embedding a MASV Portal in any website or mobile app as an HTML form. Your collaborators don’t even need a MASV account for you to receive files from them in your Portal.
Try MASV for free and experience it for yourself.
Optimize Your Post-Production Workflow
MASV is a secure file-sharing tool with transfer speeds and productivity features you can’t get anywhere else.