So you need to package and export video for broadcast but you aren’t quite sure which settings you should choose. Does that sound like you?
Well, whether you need to send your movie, TV episode, music video, or commercial to a broadcast network or station, we’ve got you covered!
In this blog, you’ll learn how to set the correct frame rates and prepare your timeline audio for submission to broadcast clients or partners. We’ll also explore the most commonly used settings so you can deliver your video production to the TV station while ensuring the highest broadcast quality controls.
Table of Contents
Send Large Files to Broadcast TV
MASV is a secure file sharing tool with transfer speeds and productivity features you can’t get anywhere else.
Broadcasting Basics
Let’s cover some basics on how to export video for broadcast before we dive in:
Standard Definition (SD)
- Resolution of 720×480 or lower
- 4:3 aspect ratio
High Definition (HD)
- Resolution of 1280×720 or 1920×1080
- 16:9 aspect ratio
Ultra-high Definition (UHD)
- Resolution of 3840×2160 or higher
- 16:9 aspect ratio
The NTSC (National Television System Committee), used in North America, and PAL (Phase Alternating Line), mostly used in Europe, are traditional ways of transmitting SD audio and video using analog signals.
Nowadays, however, broadcasting is transitioning to transmitting video using digital signals. That means ATSC (Advanced Television Systems Committee) in North America, and DVB (Digital Video Broadcasting) in Europe have become the standard for digital broadcasting to deliver HD and UHD content.
Just keep in mind that broadcast standards vary from region to region and station to station, and each has its own specific requirements.
By the end of this blog, you’ll learn some of the best workflows and settings for delivering content to broadcast stations.
💡Remember: It’s always best to confirm the specific delivery settings directly with the TV network or station, as different stations can sometimes support different formats, codecs, frame sizes, and frame rates.
How to Do a 3:2 Pulldown
OK, so you’ve got a cut ready for export. But if you’re working with 23.98fps footage and sequence, and the station wants a 29fps interlaced export, you’ll have to do a 3:2 pulldown.
This means you have to convert your 23.98fps footage into a 29.97fps interlaced video. This is a common standard frame rate for North American broadcasts. For Pal in Europe, it’s 25fps.

To do this you can start cutting directly in a 29.97fps sequence, or copy your 23.98fps edit into a 29.97fps sequence.

However, there’s a chance that you’ll run into problems with the cadence.
To address this issue, you can do this in After Effects. You’ll get better results and a foolproof workflow. We’ll take a master exported in 23.98fps lossless as an example.
First, open After Effects.
Then, create a composition by dragging the file in the Project panel on the left-hand side to the third icon at the bottom of the panel.
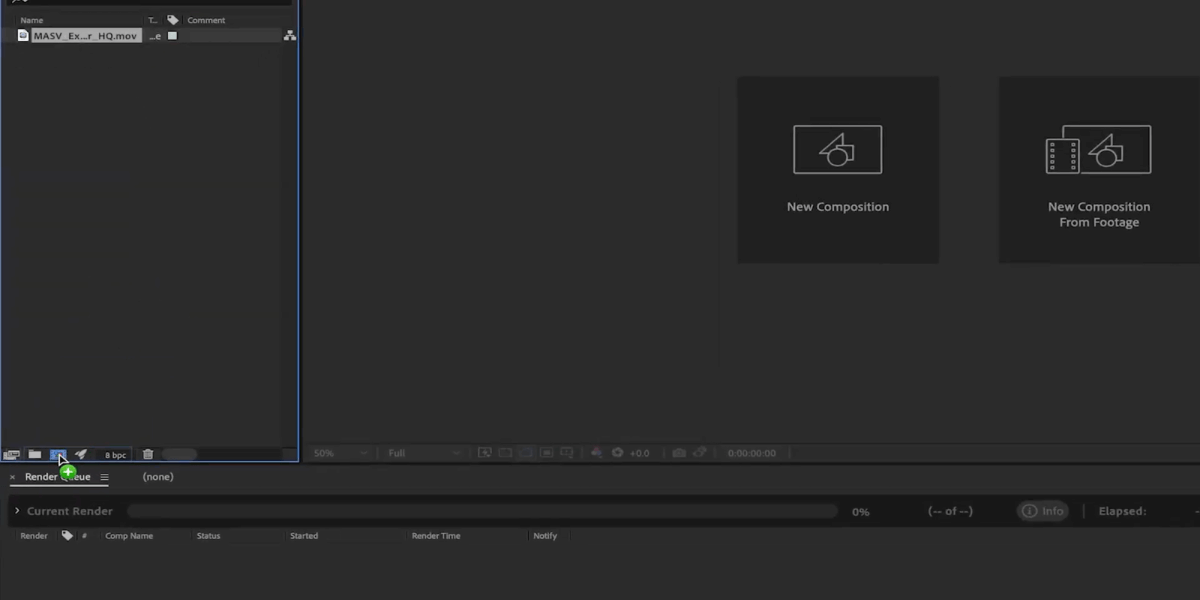
Now let’s add it to the Render Queue.

Scroll down to the Render Queue and click next to Output Module.
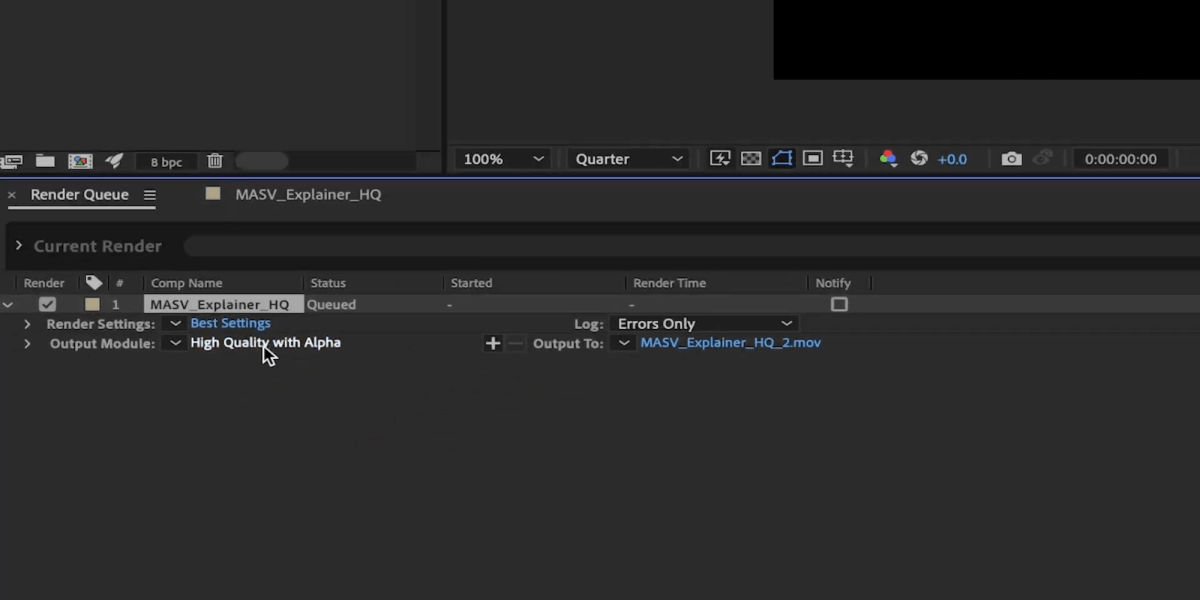
In the new window, choose Quicktime as the format.
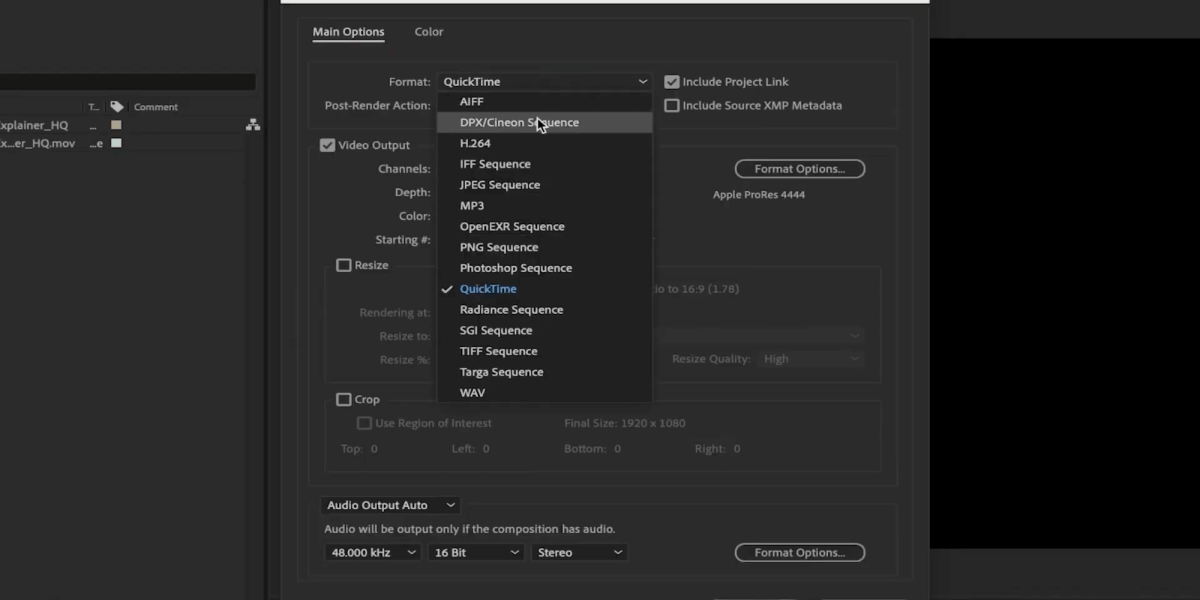
Next, click the button Format Options.

This is where you can choose the codecs Animation, Apple ProRes HQ, or DNxHD. All of them are super high-res codecs. We’ll choose Animation (keep in mind that this codec will give you a massive file).
Now go back to the Render Queue panel at the bottom and click next to Render Settings.
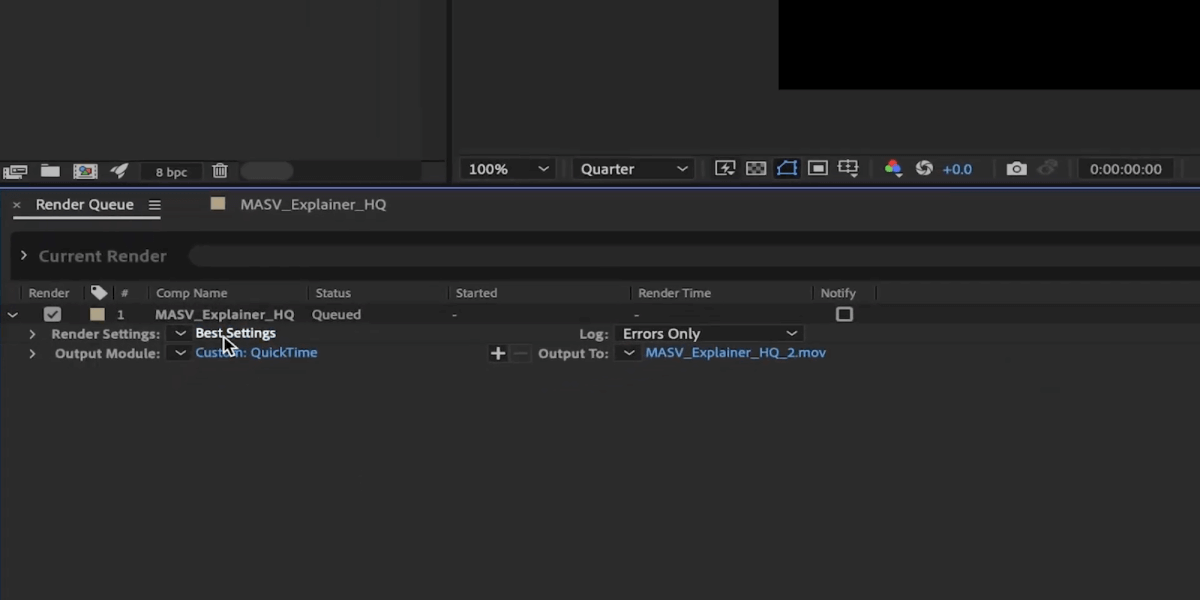
In Frame Blending, click On for Checked Layers.
Make sure Field Render is set to Upper Field First.
Next, go to 3:2 Pulldown. We suggest using WWSSW because it gives your footage a nice cadence, but you can try exporting with the other ones to see which you like best.
Under Frame Rate, After Effects has already guessed at what we’re trying to do by setting the frame rate to 29.97 fps.
Make sure the start time is set to 0.

Click OK to render your clip.
While it’s exporting, you may notice weird lines in the video. Not to worry—that means that it’s working perfectly!
💡Note: The above workflow in After Effects works for video only. For sound, you’ll have to sync it afterward in Premiere Pro.
Now import the pulldown file we just created in After Effects into Premiere Pro. Drag it to the sequence icon at the bottom so it creates a sequence with the clip settings.
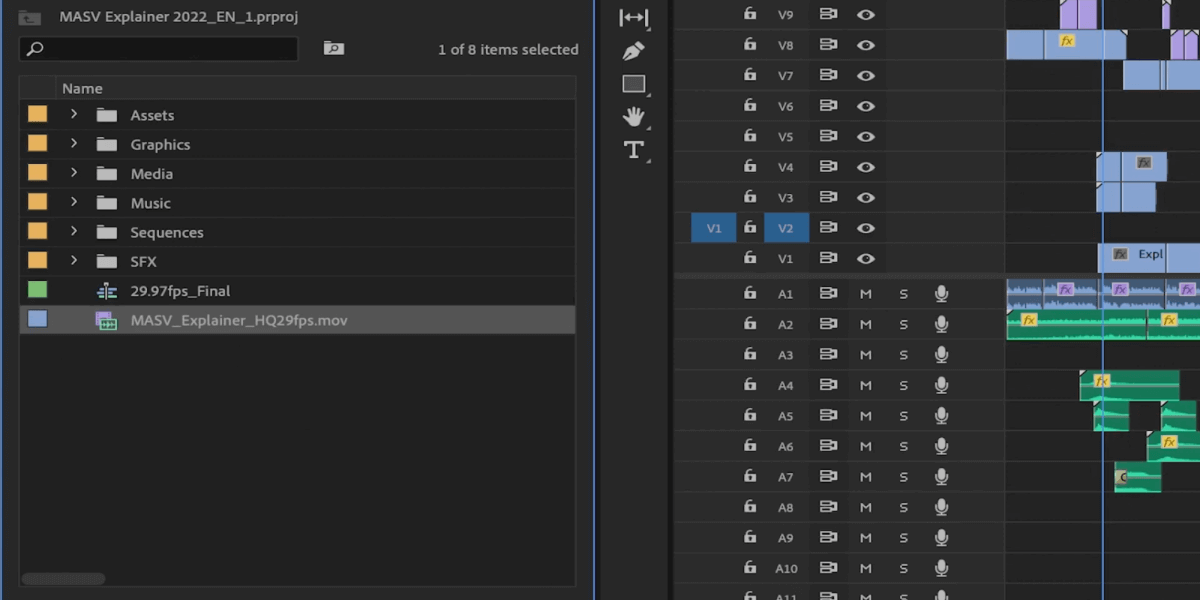
In this example, I exported a WAV audio file of my main sound, which I exported from the 23.976 fps main sequence. Line them up and they should match in the timeline.

Timeline Settings: How to Create Multichannel Audio
Most broadcast networks will ask for a multichannel audio format, so you need to set that up as well.
Let’s create a new sequence to prepare the general timeline for export.
In the New Sequence window, go to the Tracks tab. In the dropdown menu beside Mix, choose Multichannel. Next to it you can select channels. For this tutorial, we’ll select 8 channels.
Click on the plus button to create 8 new tracks. Set the Track Type for each one to Mono.

Click the icons under Output Assignments for each track to route your audio correctly.
For each track, assign the Mix Track Channel number that matches the track’s name.

You can also do this in the Audio Track Mixer if you forget to do it here or need to change the assignments later.
Dual Mono Files
If your main audio is in stereo, you will need to convert it to Dual Mono Files in order to export video for broadcast. To do this, right click on your audio in the project window.

Select Modify, then Audio Channels.
Now change the Clip Channel Format to Mono and type 2 in Number of Audio Clips.
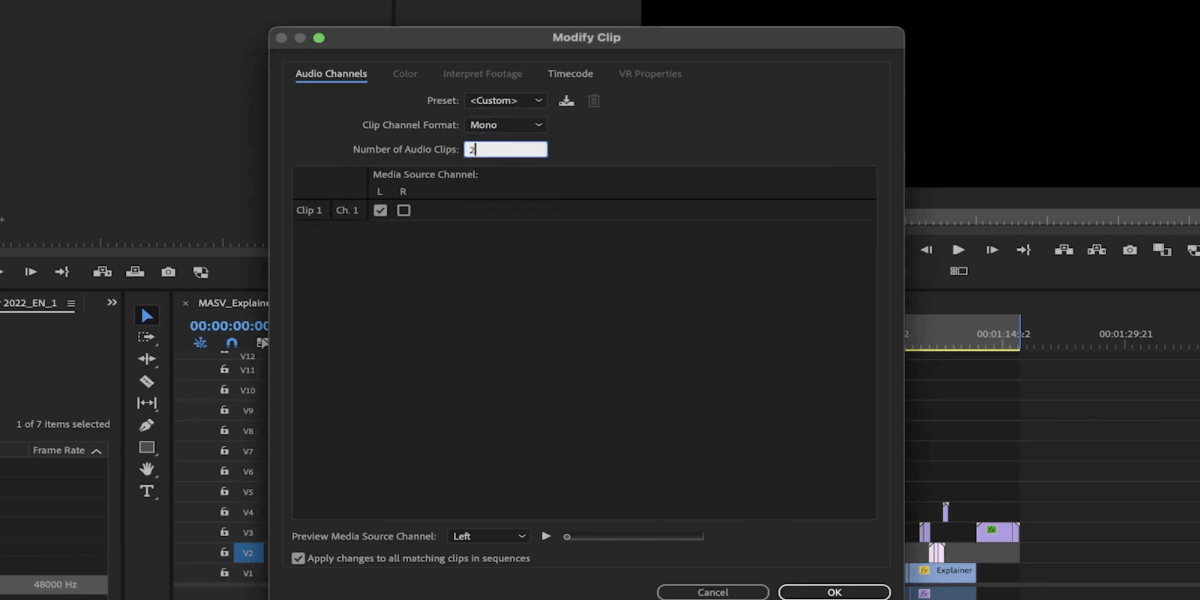
Click OK.
When you drag your audio to a new sequence, you’ll now see your two mono files in the timeline.

You can also do this super easily in Adobe Audition.
Within Adobe Audition, right click on your stereo file and select Extract Channel to Mono Files.
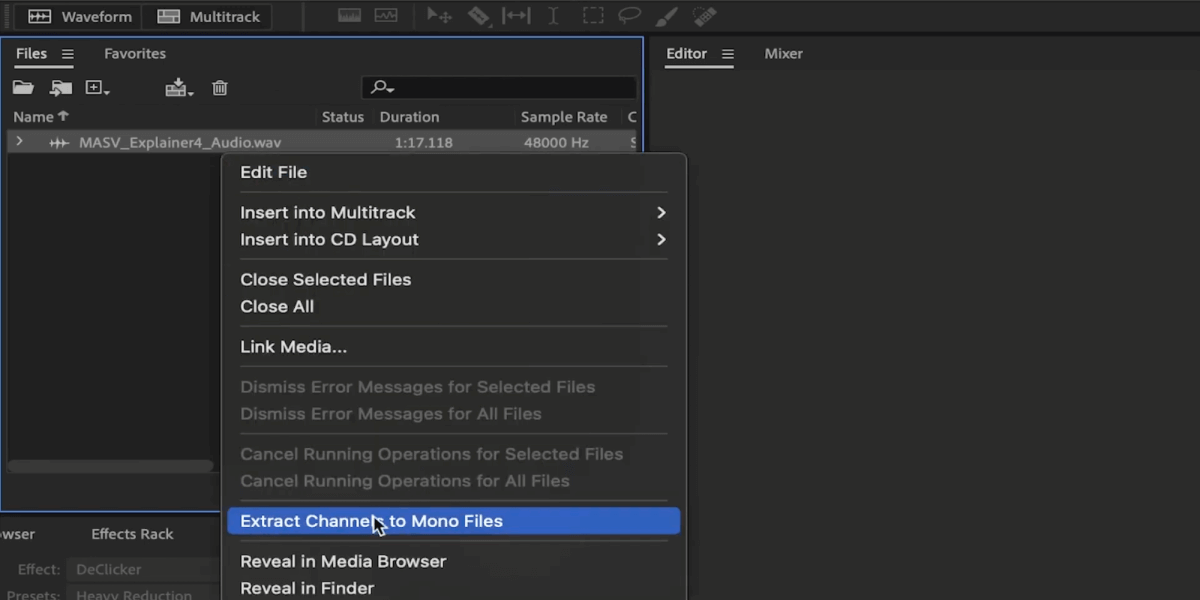
You will see two files appear: One with an L in the name (for “Left”) and another one with an R (for “Right”).
Double click on one of the files, then go to File > Export > File.

Make sure the file is in Wave PCM format. The sample type should be Mono with a bit depth of 24.

Do the same with the other clip and now you’re ready to go!
Next, go back to Premiere Pro.
Drag the left channel audio clip to A1 and A7, and the right channel audio clip to A2 and A8 so they’re in the first and last tracks. The rest can be left empty.
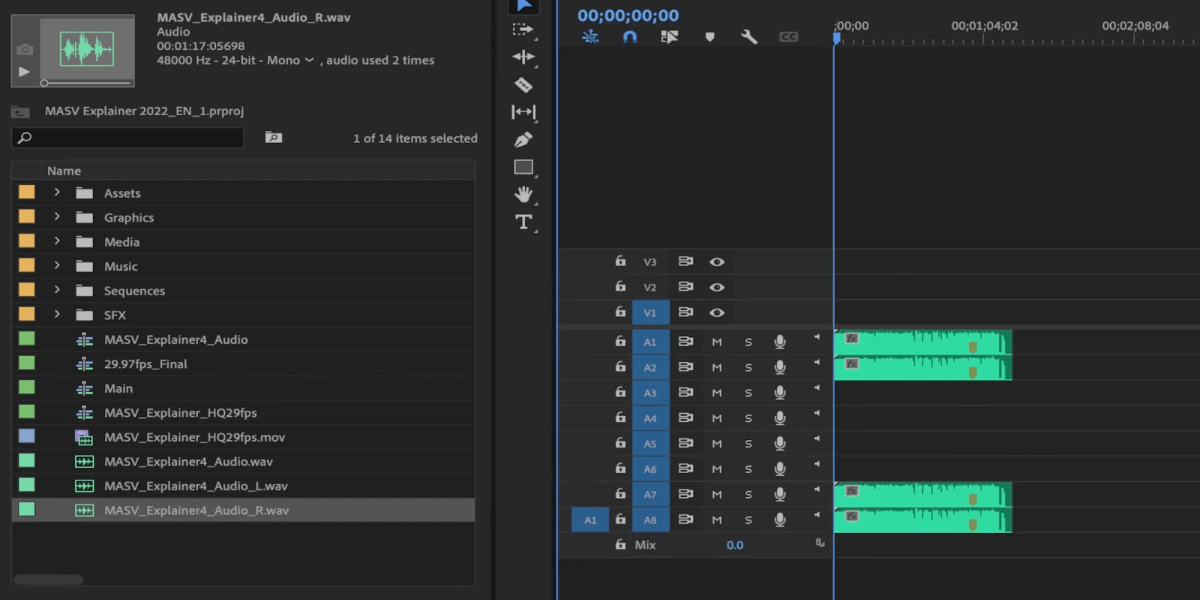
Remember: This is just an example. Make sure to follow the specifications required by the station you are delivering to.
Quality Control
Another thing that you want to do is make sure your highlights and shadows don’t go over or under. Luminance values should not exceed 9.5 IRE, and you can make sure of that by checking your scopes. Nothing should cross 100 or 0.
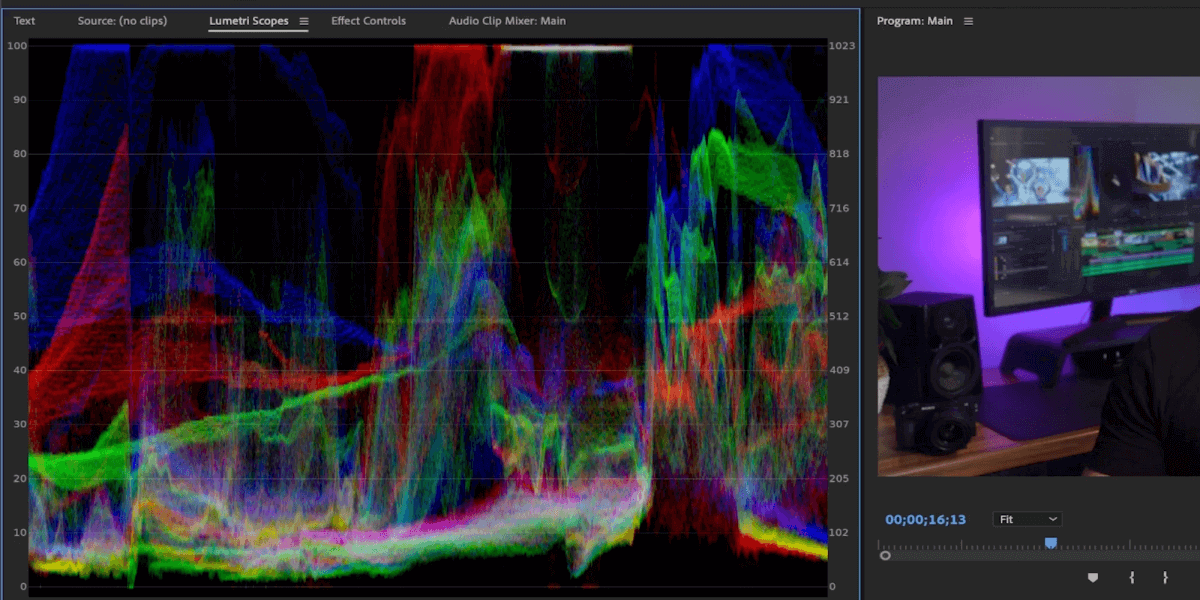
Additionally, don’t forget to turn on safe margins to make sure there’s no cropping. Titles and people should be inside the inner rectangle, and everything else should be inside the outer rectangle.

Export: Formats and Codecs
Next is to make sure there’s nothing else on your timeline before exporting.
We suggest using in and out points to make sure you only export the video you want, without any blacks or extra clips laying around on the timeline. I can also use this method to confirm the final length of the video in the bottom right-hand corner of the Program window.

Now go to the Export tab at the top of the screen.
Select the lossless format MXF OP1a, which is pretty standard.

We’ll select the video codec XDCAM HD 50 NTSC (4.2.2). If you need to export for PAL, there are options for that, too. Remember: Select the resolution that the station asked of you.
For NTSC, the frame rate can be 23.9 fps or 29.97 fps.

In Field Order under Basic Video Settings, select Upper First if you were asked for an interlaced export. If you weren’t, you can select Progressive.
Under the Audio section, make sure the 8 Channel option is selected under Channels. Choose 24 bit under Sample Size.

If you have captions, click the Captions section. Next to Export Option, choose Embed in Output File. This will allow whoever is watching to turn captions on and off (as opposed to having them burned into the video).
Other high-res formats and codecs that are usually pretty standard for broadcast delivery include (again, always confirm that these specs are accepted by the network):
- Quicktime
- Apple ProRes 422 HQ
- Apple ProRes 444 (mostly used for HDR or alpha channels)
- DNxHR/DNxHD
- GoPro CineForm
- MPEG2
MASV: The Best Way to Export Video for Broadcast
Now that you know how to prepare your video for broadcast, why not use MASV to send it off? MASV is a powerful tool built specifically with media professionals in mind that delivers files at lightning fast speeds, and provides peace of mind with enterprise-grade security features such as strong encryption and access controls.
You can also automate MASV file transfer to send large media files with Watch Folders, which are folders on your computer that perform a task when files or folders are dropped in. Video pros working on live broadcasts or streaming can use our powerful Multiconnect channel bonding to boost speed and reliability in areas with low connectivity, or combine it with MASV’s Growing Files functionality to send fresh files from the field (such as a live broadcast) while they’re still in progress.
Sign up for MASV today!
Simplify Your Post-Production Workflow
MASV makes sending massive files to TV stations a breeze.