If you’re recording interviews, events, music videos, or even a short film, you likely have two or more cameras recording a scene or subject. Instead of manually layering all the footage in your editing timeline to switch between cameras, utilize Premiere Pro’s multicam view for effortless editing.
Multicam editing in Premiere Pro lets you group all your footage from different sources into a single nested multicam sequence to easily switch between different angles using your keyboard as a switchboard.
Let’s dive into how to automatically sync multiple clips and work with a multicamera sequence. By the end of this tutorial, you’ll be cutting and switching cameras in Premiere Pro with just a few clicks!
Table of Contents
The Easiest Way to Send Heavy Files
Sign-up for MASV to send big media files quickly and reliably.
What is Multicam Editing?
Multicam editing is the process of editing footage of a single scene or subject recorded from different cameras and angles. Showing the same scene or subject from different angles helps make the video more dynamic and visually captivating for your audience. Using this technique also helps show the same scene from different perspectives. Multiple cameras are commonly used in music videos, soap operas, reality TV, live performance recordings, corporate videos, and weddings.
How to Create a Multicam Sequence in Premiere Pro
Worry not — it’s easy to create a multicamera source sequence.
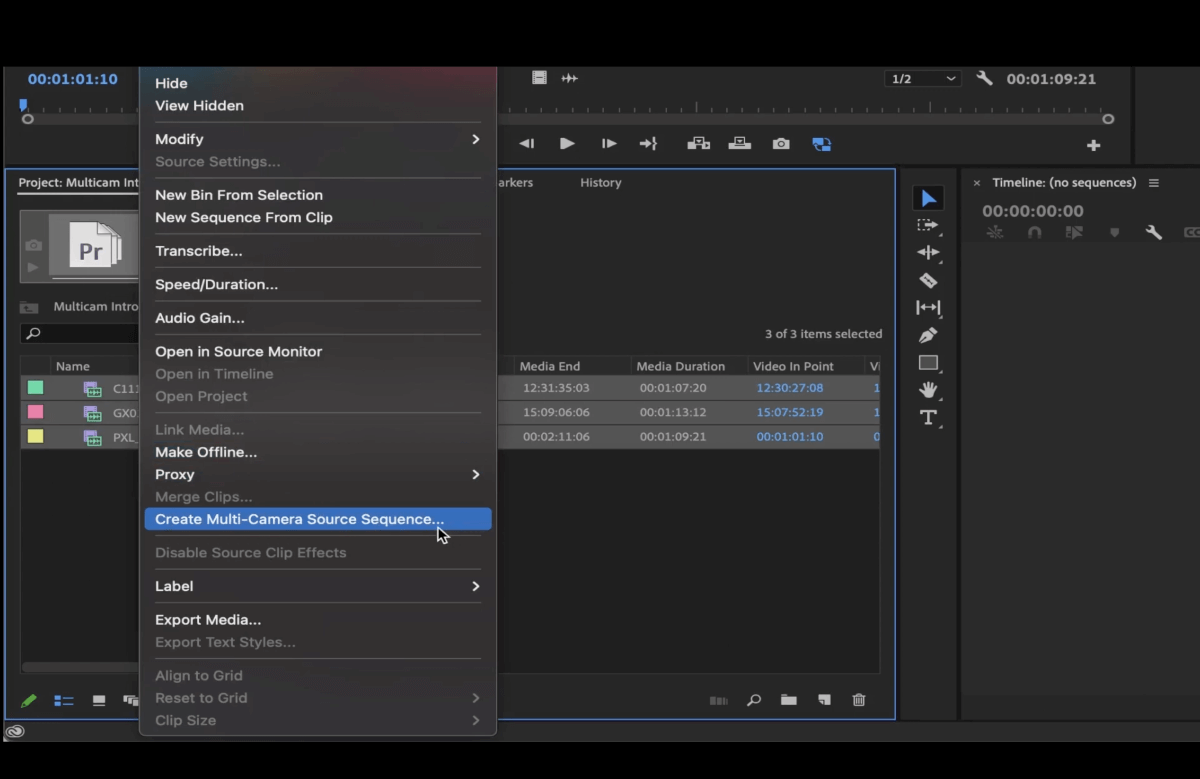
Start by selecting all of the footage. Right-click, and choose Create Multi-Camera Source Sequence.
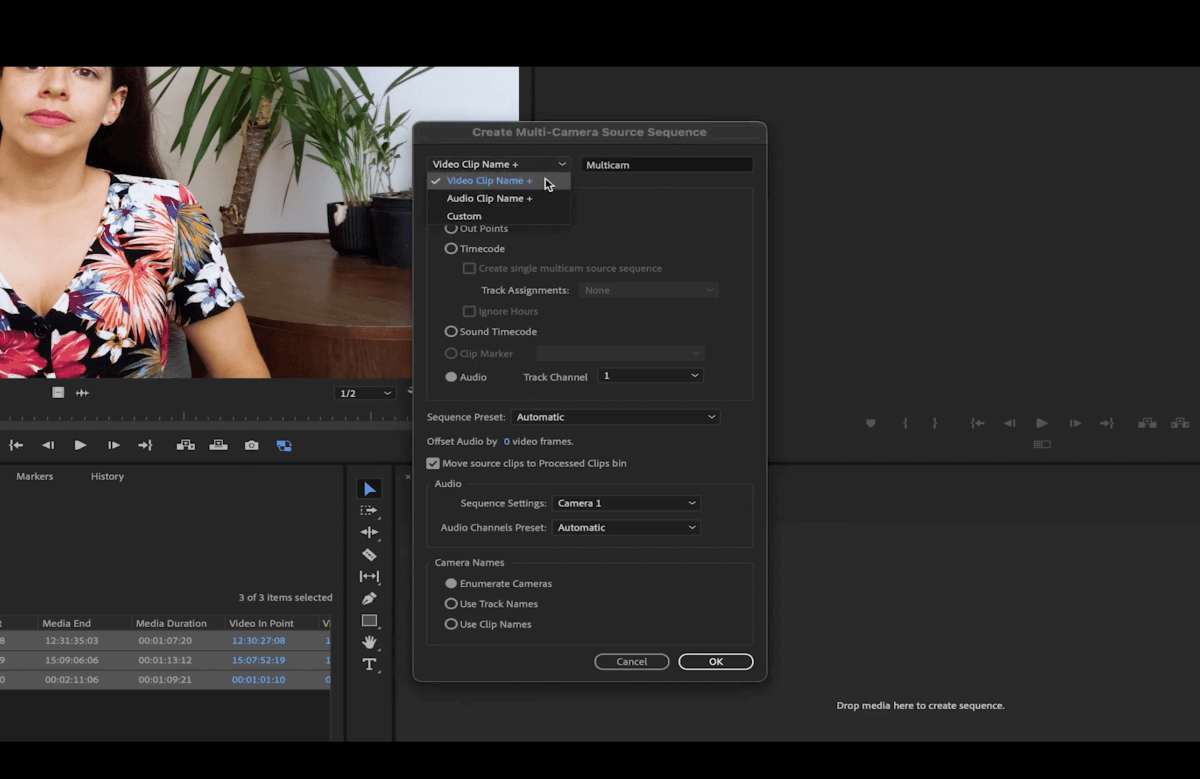
In the pop-up window, we can set up our multicam sequence. You can name it after the main video clip or the audio, or choose a new name.
Next, we need to specify the synchronization point. This determines how Premiere will sync our different cameras.
One option is to use in and out points. To do this, you need to mark the in and out points in each of your clips before creating the multicamera sequence.
Another option is to use timecode, but this must be set up during recording or you must manually adjust the timecode of your clips.
You can also sync your clips by audio. To do this, make sure all your clips have audio recorded, and then select which audio will be primarily used for syncing.
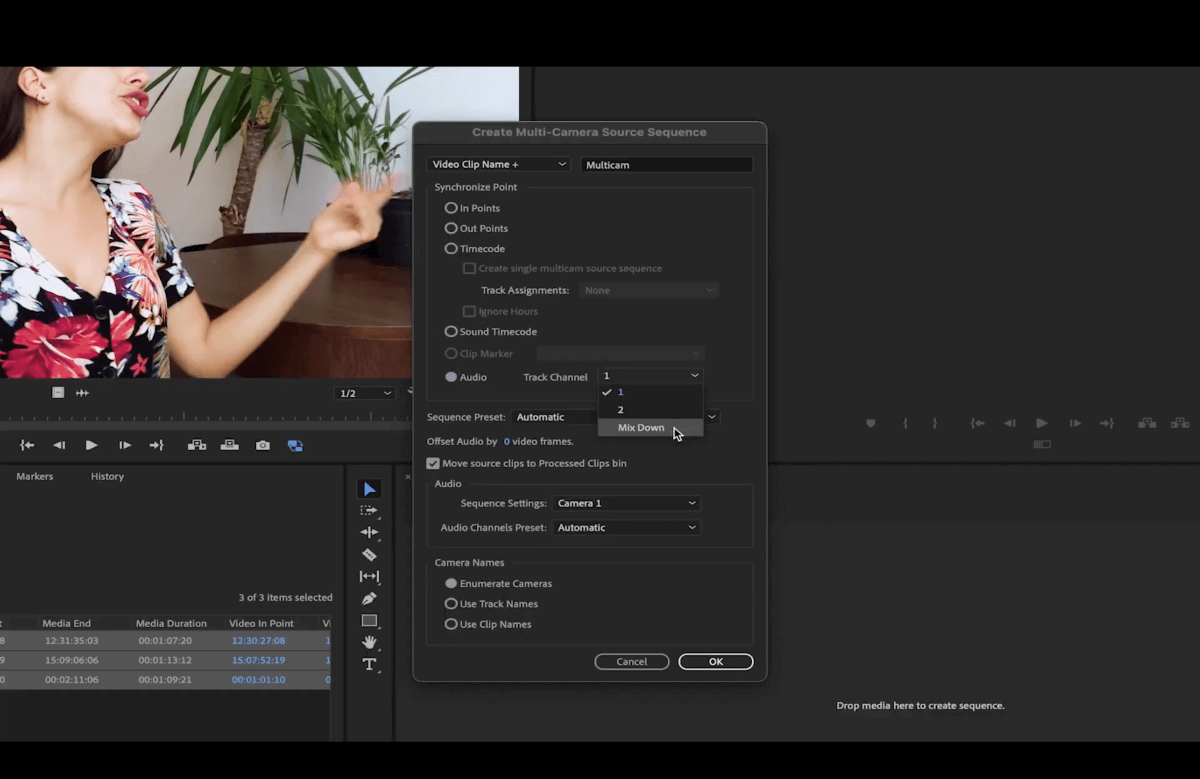
In the Sequence Preset menu, you can select the settings for your sequence. If you leave it on Automatic, it will take the settings of the main clip, which is the one you chose first when you selected all of your footage.
Go to Sequence Settings under the Audio section. Select where your main audio is recorded. In this case, Camera 1 is the main source.
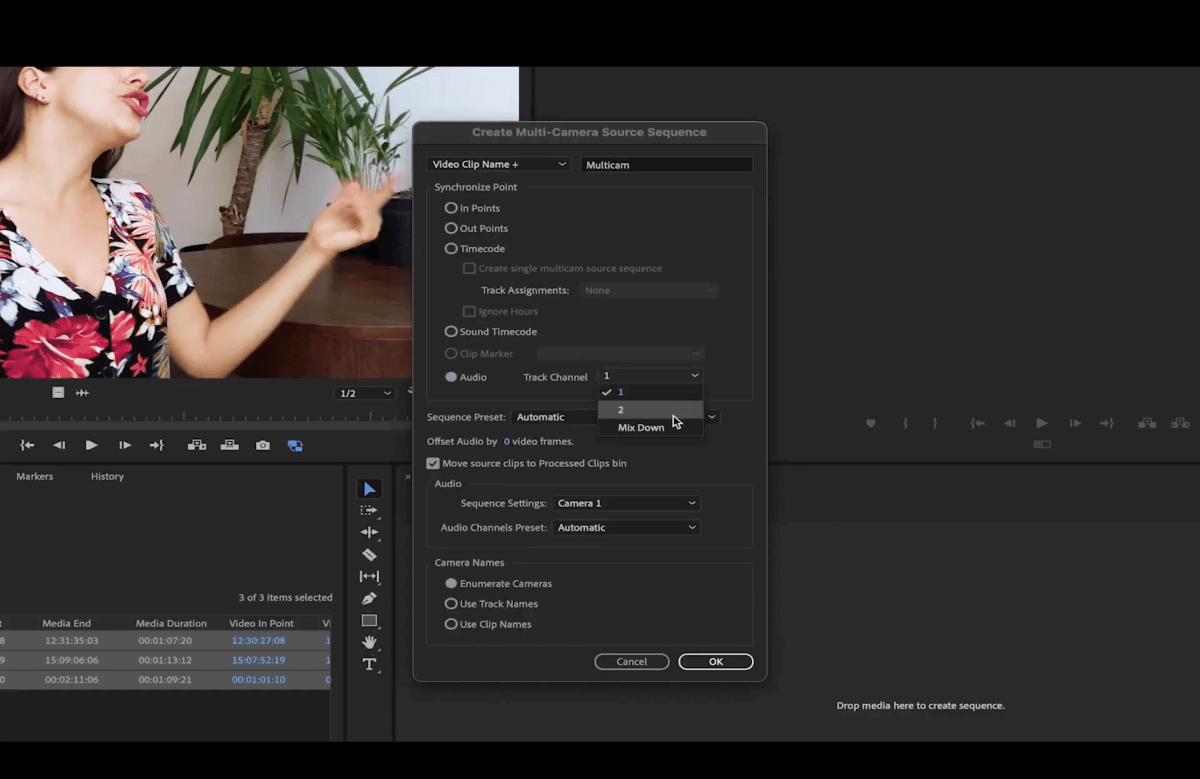
You can select All Cameras to use audio from all the clips or Switch Audio to use the audio from the camera angle you selected during editing. This option can also be used when you have individual audio files.
In the Audio Channel Presets menu, you can change the audio to Mono or Stereo. Under Camera Names, you can choose to display clip or track names, or simply use Enumerate to number the cameras.
Once you’ve made your selection, click OK to create your new multicamera source sequence.
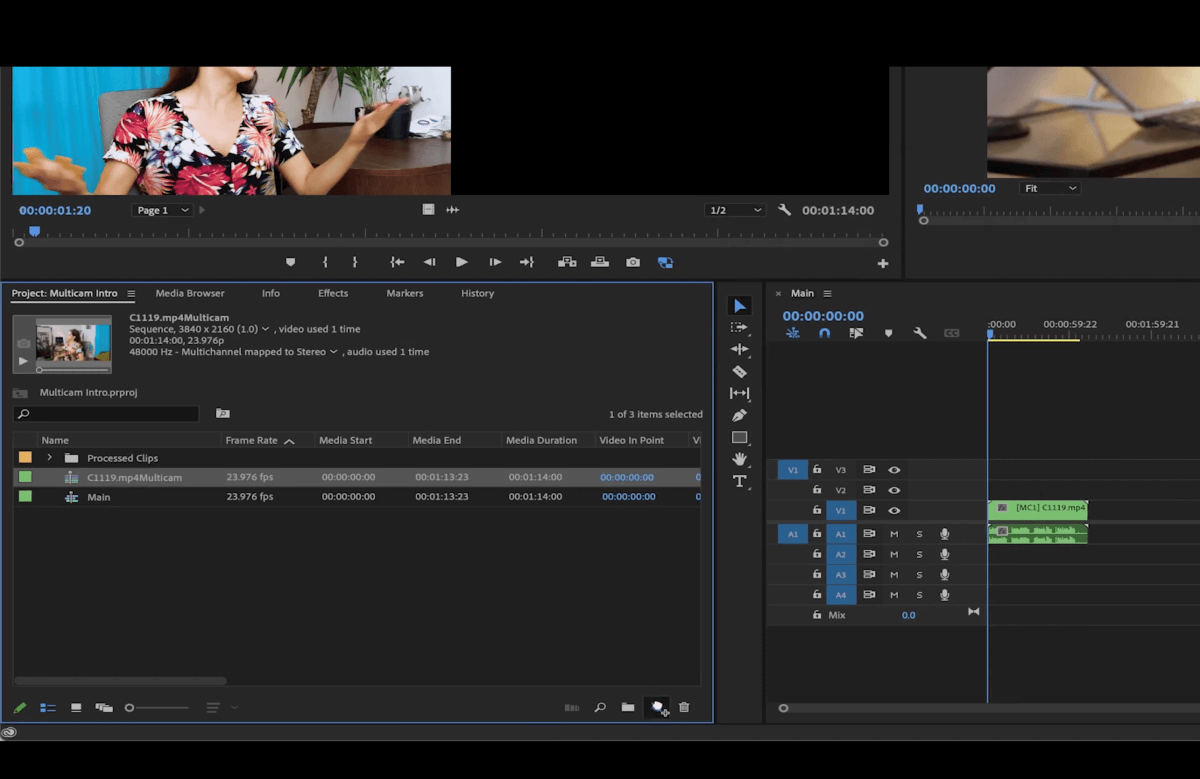
And there it is! This sequence acts like any other nested sequence; it contains all the footage but acts as a single clip.
Double-clicking on the clip will reveal the different camera angles in the source window. You can then add it to any sequence or create a new sequence with it. Simply drag it to the new item icon in the bottom left corner of the project window (it looks like a folded piece of paper).
Heavy Footage of Multiple Angles? No Problem.
With MASV, you can send up to 15 TB of files!
Editing Individual Clips Inside the Multicam Sequence
In this tutorial, we’re working with a 1080p sequence. This works well because all of the footage is in 4K. I can reduce the size from the Effects Control window.
But, if you have smaller footage, you can enter the multicamera clip by double-clicking on its audio. Just the audio though. It will not work if it’s still attached to the picture.
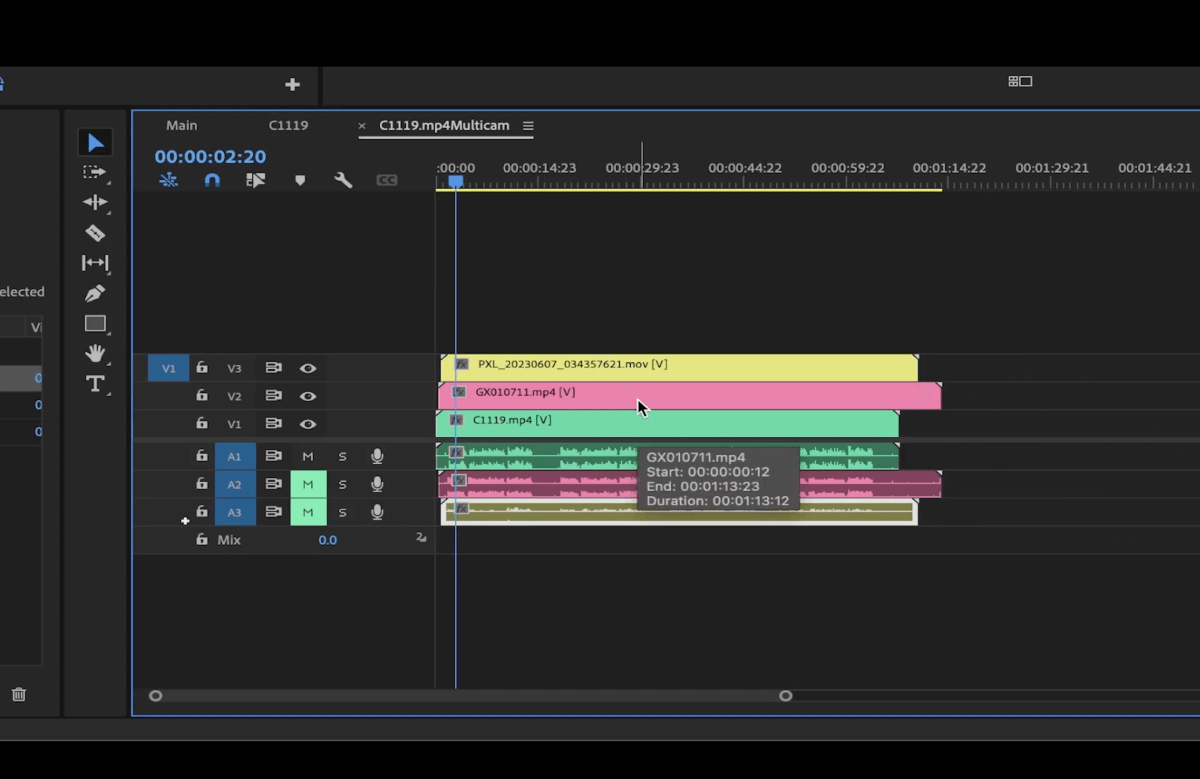
Once inside the multicamera clip, you can adjust the size, color, or audio manually for each file. These changes will be saved and updated wherever the multicamera source clip is used.
Creating a Multicam View in Premiere Pro
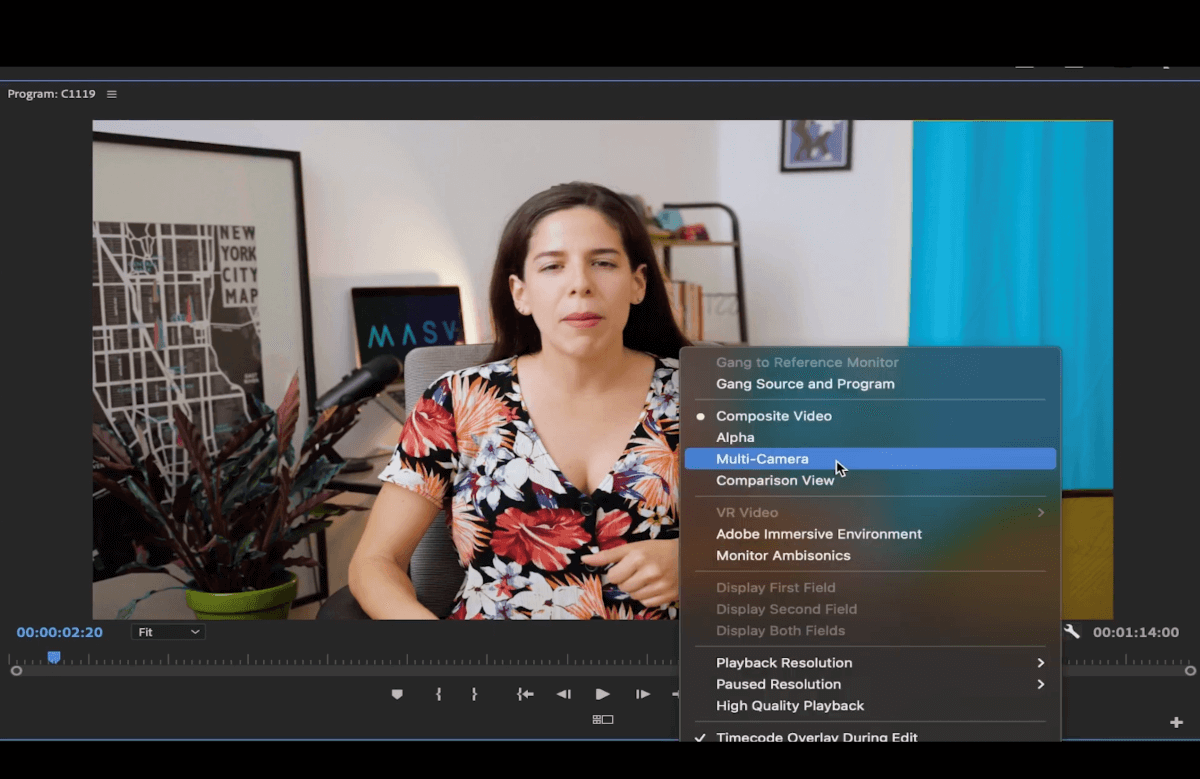
You’ll want to change the view so we can see all of the camera angles in the Program window.
Go to the wrench icon and select Multi-Camera.
If you want to add a button to the toolbar to quickly go to this view, first click the + sign in the bottom left-hand corner. Now click the icon for toggling the multi-camera view and drag it to the toolbar.
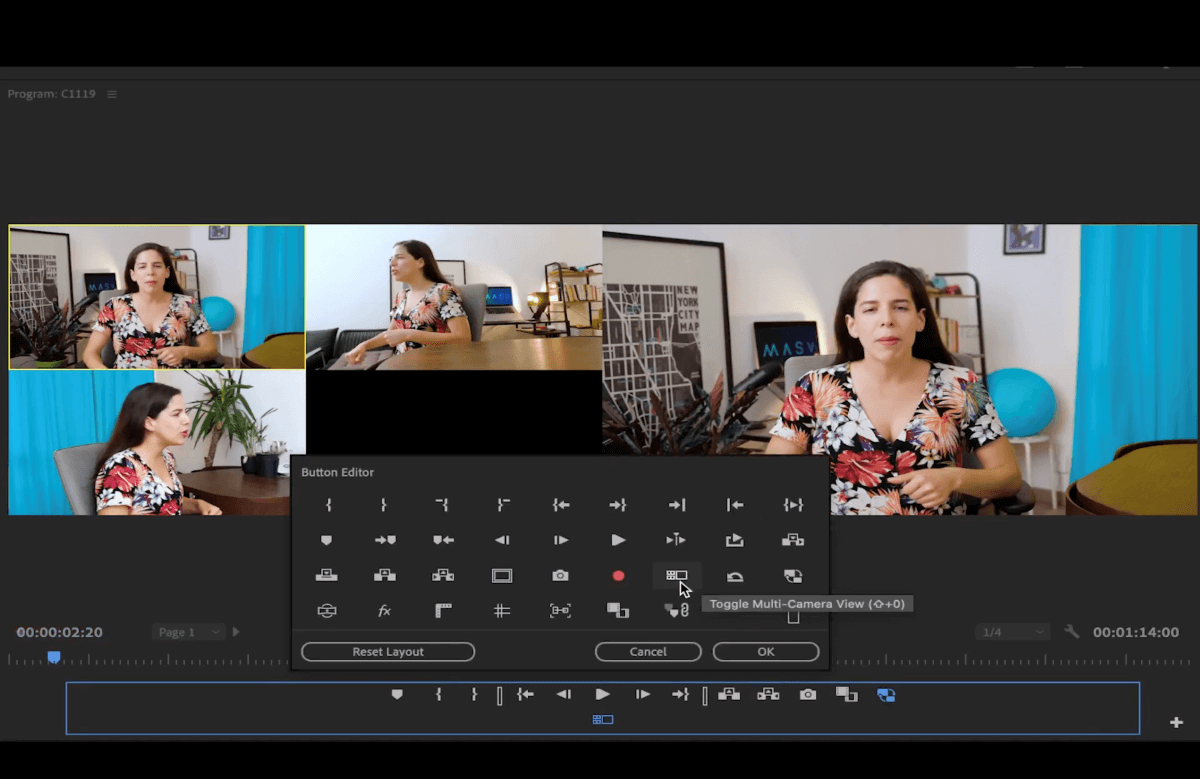
Or use the shortcut Shift + 0 to open up this view.
Click the little wrench icon in the bottom left corner of the Program window. Scroll down to Edit Cameras to edit your cameras, reorganize the order and enable or disable them.
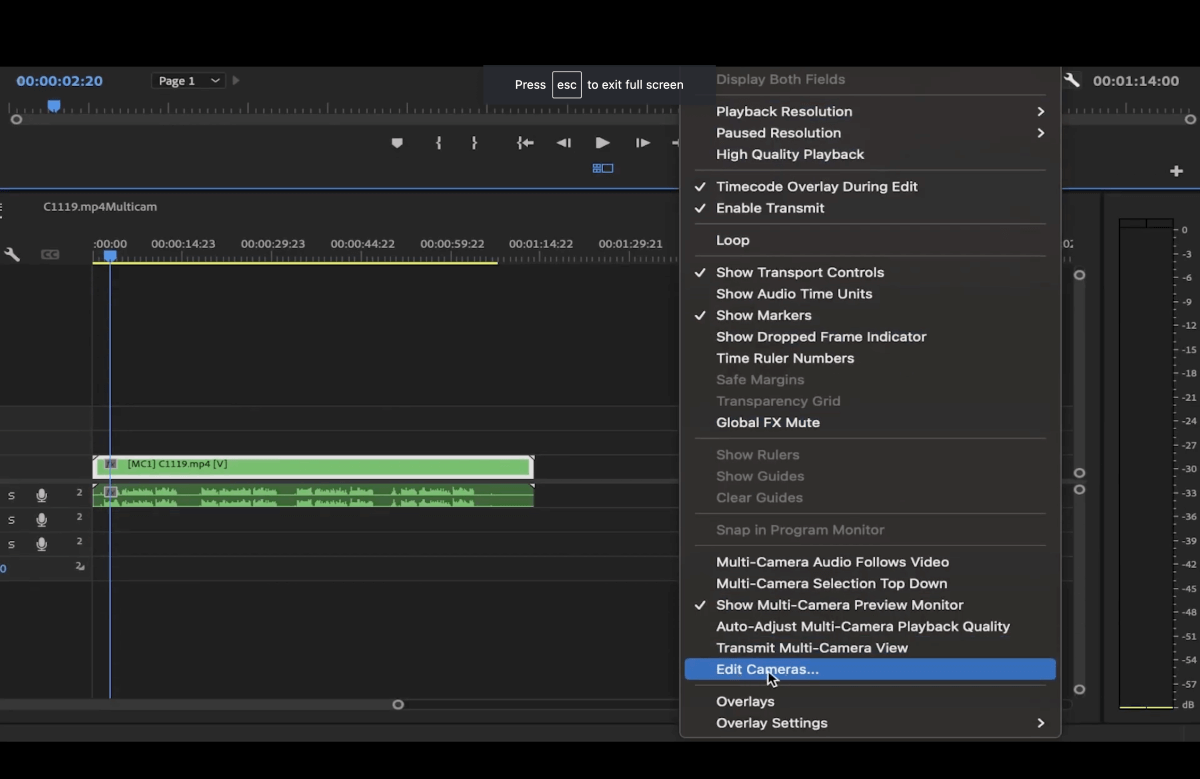
You can click on each clip from the program window. Doing this will change the bigger preview picture on the right. This feature tells us which clip is going to be shown.
To preview the video, press play (you can also press the spacebar).
Optimize Your Editing Workflow
Fast, simple and secure–transfer your video files using MASV today.
How to Cut and Switch Cameras
While playing the clip on the timeline you can click on any of the camera angles to change the perspective.
Premiere Pro will generate cuts on the clip timeline automatically to show when the camera angle changes. You will see them after you pause.
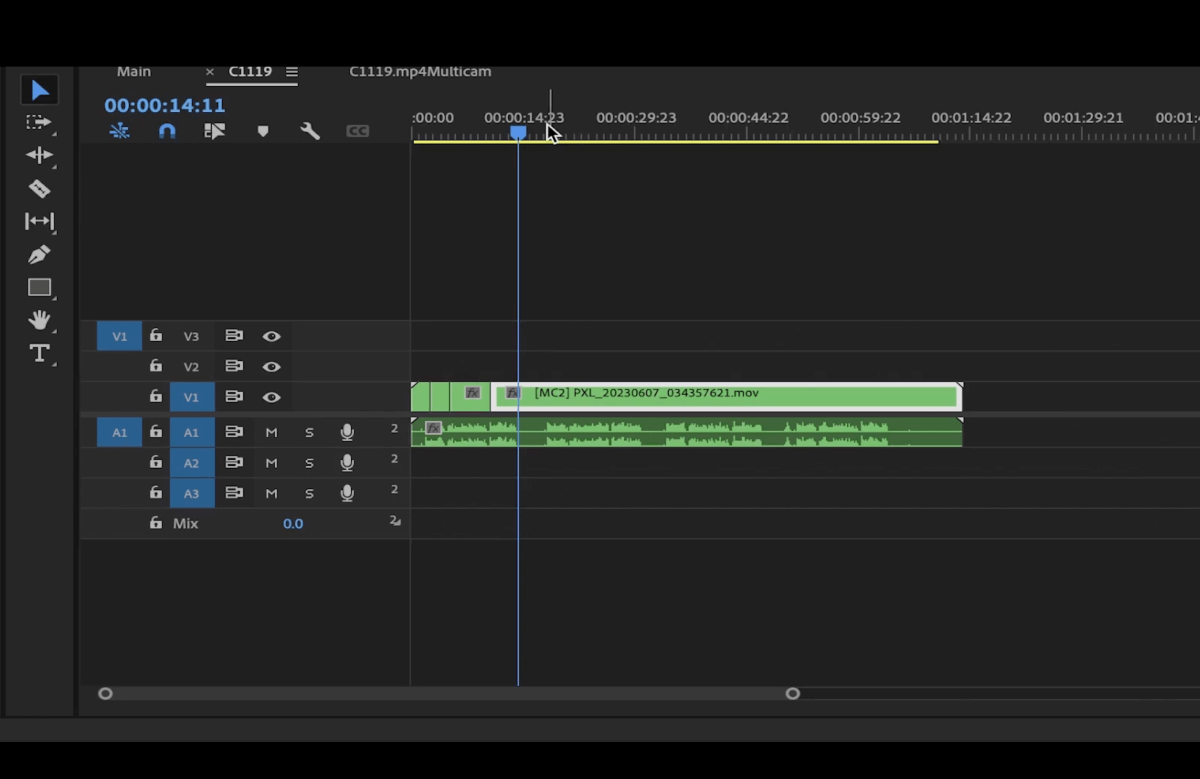
You can also press numbers on your keyboard to change between camera angles while playing your clip. In this case I can click 1, 2, and 3 because I have three camera angles.
If you change your mind and want to switch to a different camera angle at a specific point, simply move the play head to the clip where you want to change the angle. It will get highlighted automatically.
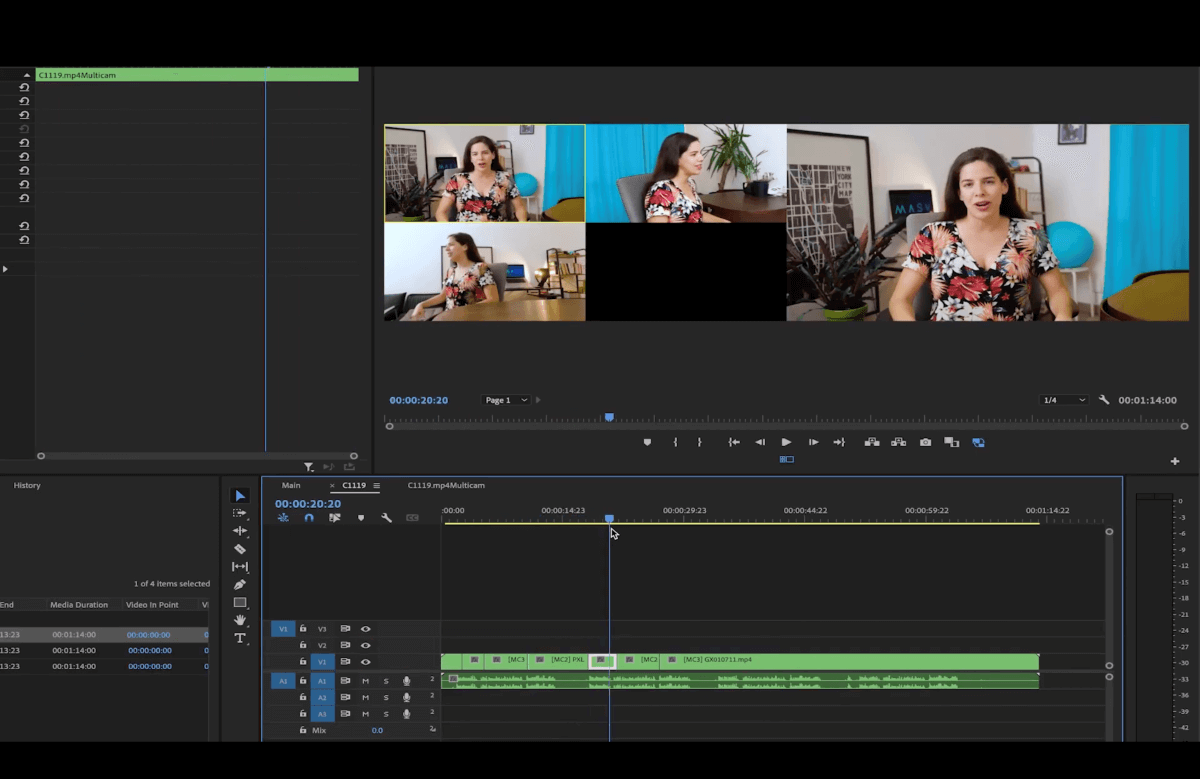
Then, select the new angle you prefer or press the number of the camera angle you want. From here, you can treat them as individual clips and edit them like you usually would.
You can also use the rolling edit tool to adjust the end and start points of each cut. Just press N on your keyboard or press this icon here in the toolbar.
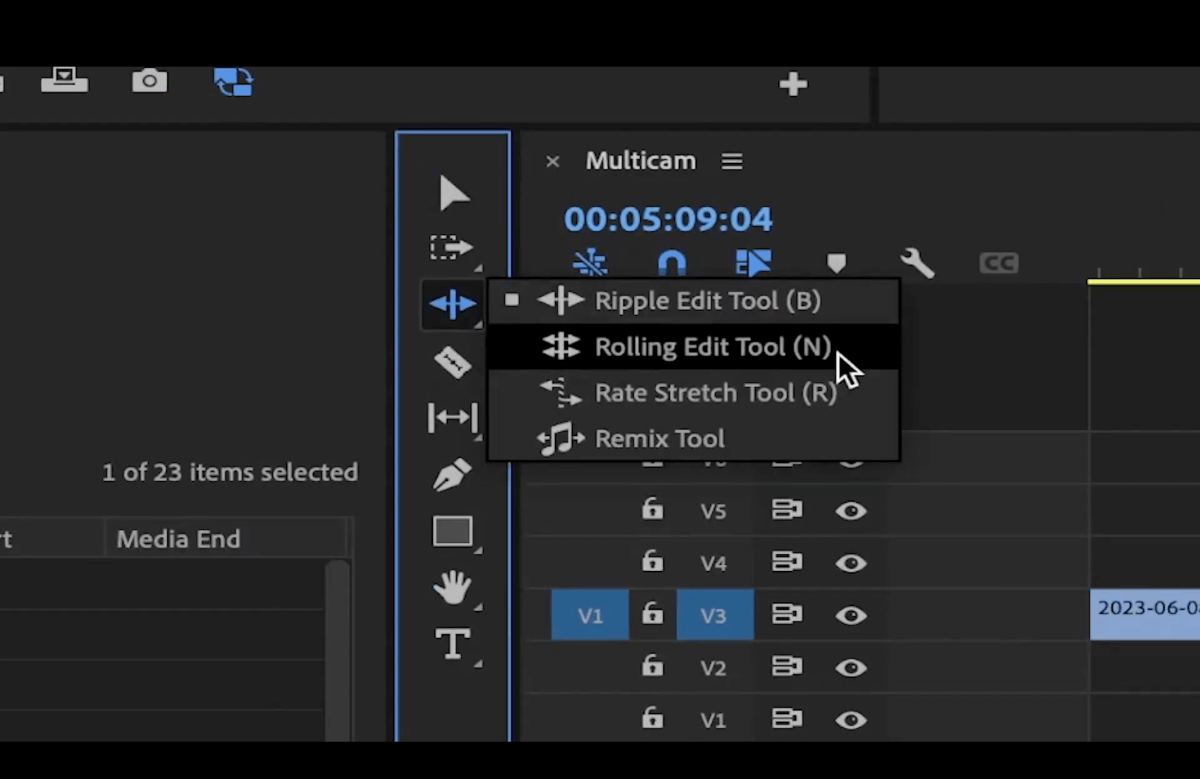
Then click on the intersection of two clips and adjust the cut.
If you want to cut out any dead noises, remember to make a cut on the audio as well because the cuts made to a multicam sequence are only made to the picture. Click Shift to make sure you’re in the cut, then press C to cut the audio.
You can use the ripple edit tool, or you can press “B” to activate it.
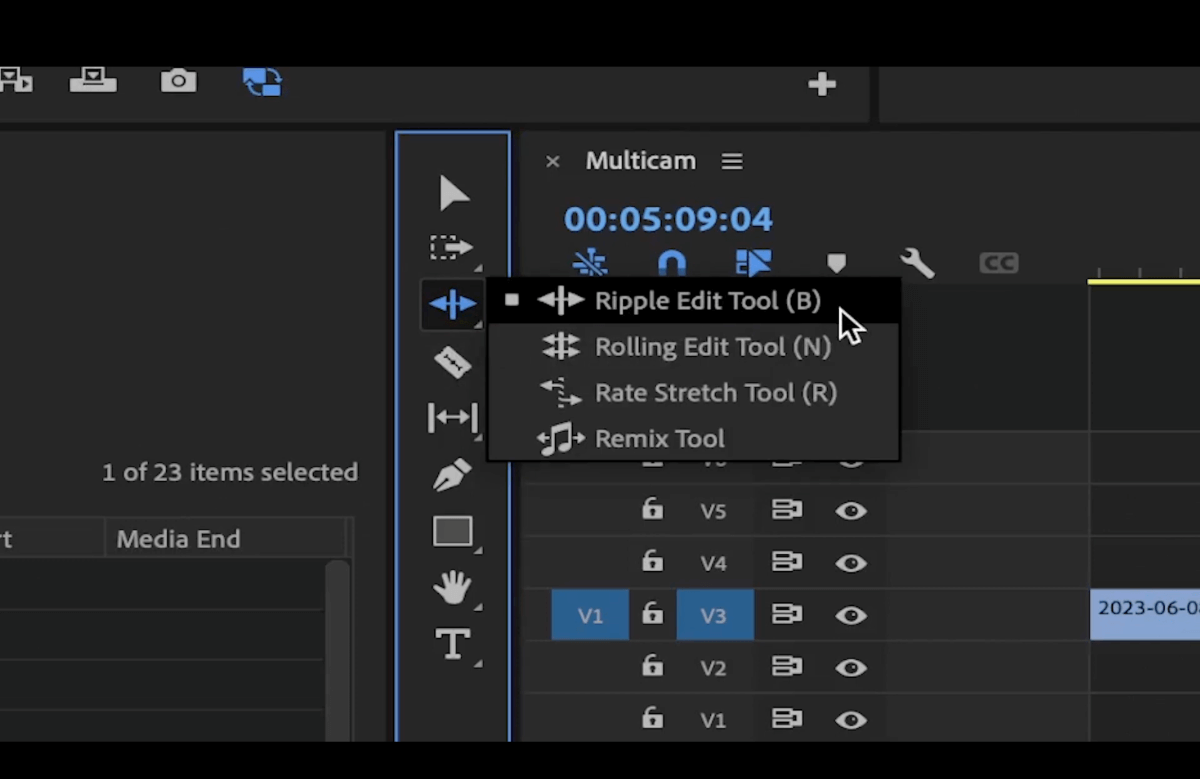
This allows you to trim and snap the clips together at the same time so there are no black spaces.
And of course, if you want to cut out a whole section, select it and just press Option + Delete. This will delete the section and snap the clips together.
💡 Related: 10 Premiere Pro Shortcuts to Edit Faster
Send Video Files Anywhere in the World
With MASV, send large video files wherever they need to go, and in a flash.
How to Create a Manual Multicam Sequence
If you prefer to have a little more control, you can also create a multicam sequence manually.
Put your clips on different tracks.
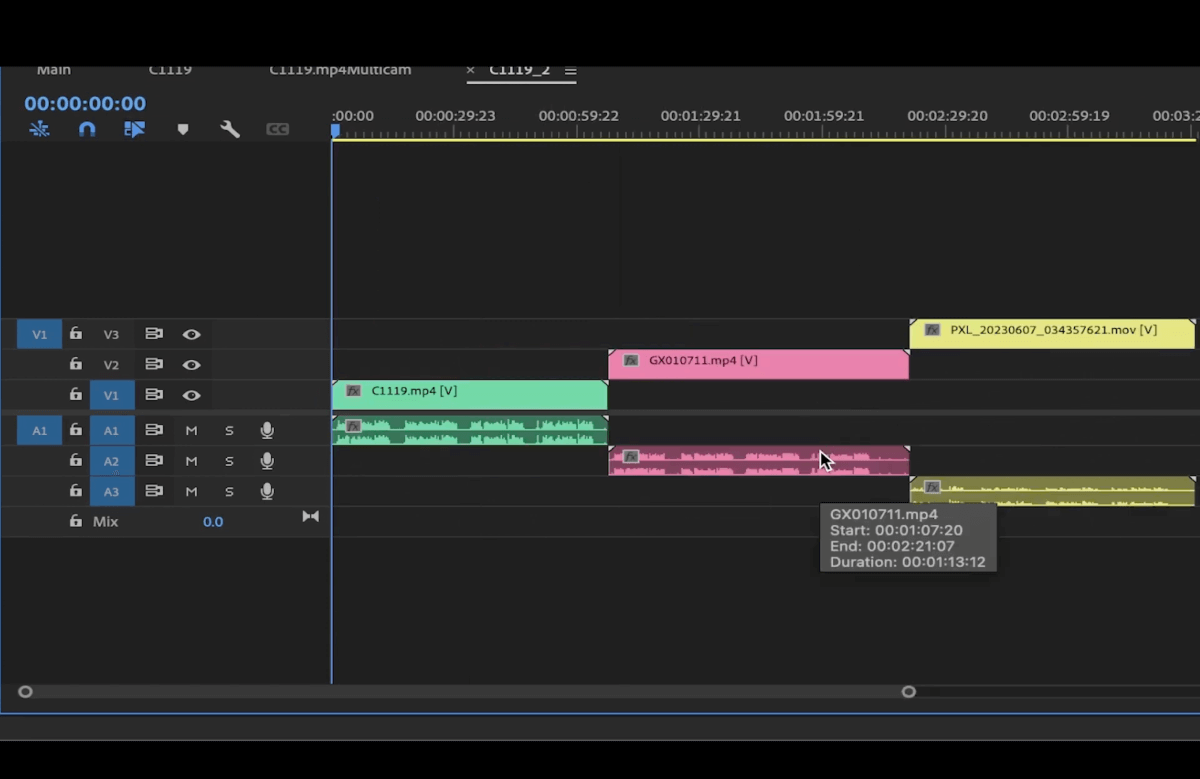
Select all the clips, right-click, and select Synchronize.
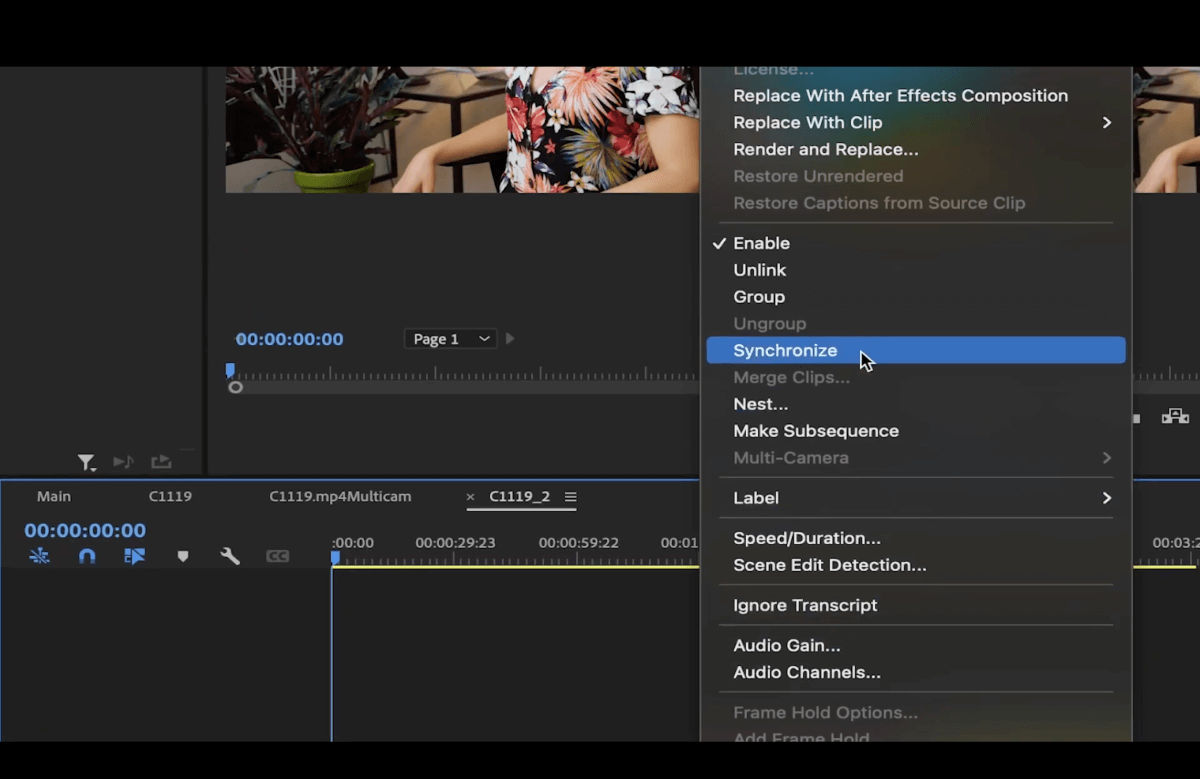
In the popup window, you’ll choose how you want to sync your files. Click OK. Now your clips are all synced.
Let’s select them all again, right-click, and click Nest to nest the sequence.
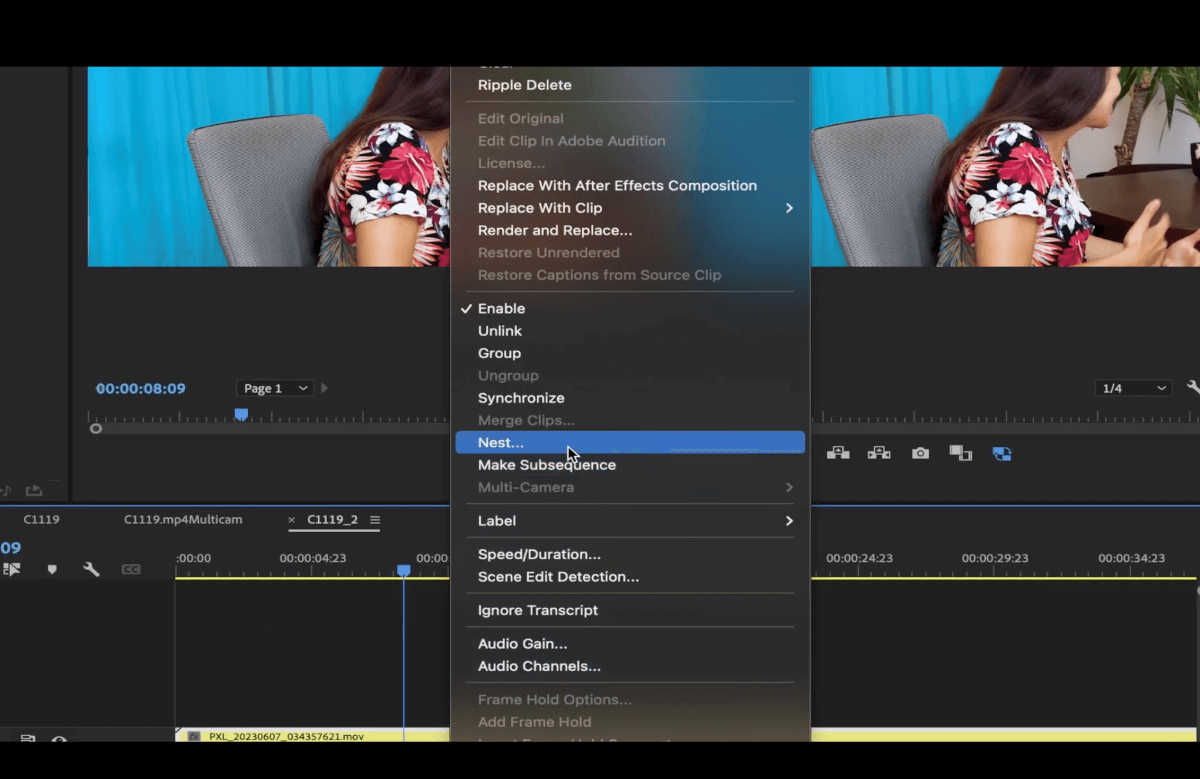
Name it then click Ok. Then right-click again on this new nested sequence, select Multi-Camera, and then Enable.
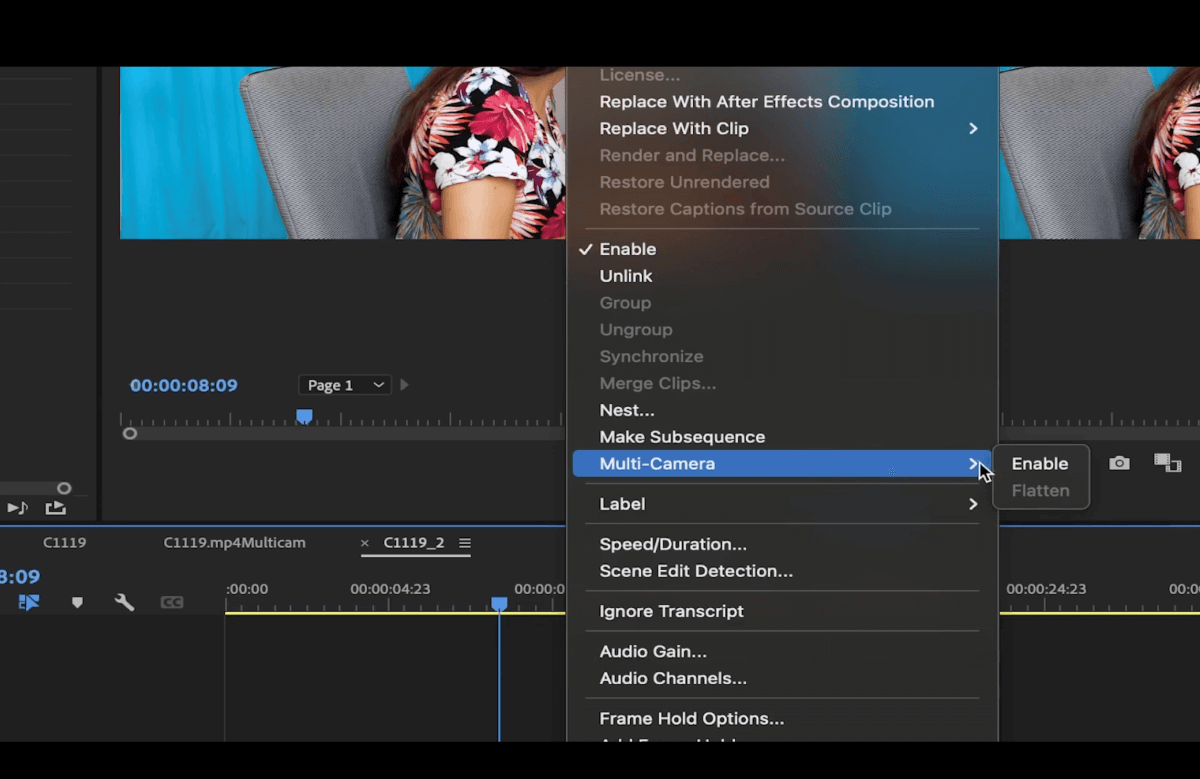
Now this sequence is going to act as a multicamera clip.
Make sure that this sequence you are using to create the multicam sequence has the right video and audio output settings to assure you are doing the right workflow. Choose appropriately if you have stereo or mono audio.
💡 Related: How to Send Large Video Files
Now You’re a Pro at Multicam Editing in Premiere Pro
Editing multicam timelines is simple in Premiere Pro. You can easily switch between different angles and make cuts with a single keystroke which makes your workflow much faster and easier.
When you record high-resolution footage on multiple cameras, you’ll have a ton of heavy files to work with. The best way to get those big files to a computer for editing is to use MASV.
MASV, a powerful file transfer tool built for filmmakers, is the best way to quickly share your raw camera footage with an editor so they can get to work faster. It’s as easy to use as any web browser with insane cloud performance underneath the hood. Try for free today!
Accelerated Cloud Transfer for Massive Files
Experience the power of the fastest large file transfer service in the world.