So you want to know how to export DaVinci Resolve videos? You’ve come to the right place! Whether you’re new to DaVinci Resolve or just need a refresher, I’ll show you:
- How to export videos from DaVinci Resolve
- DaVinci Resolve export options (settings and codecs included)
- How to save and send your new DaVinci Resolve export video
Without further ado, let’s jump right in. You can watch the video below, read the transcript, or both: 👇
Transfer Large Video Files
Send and receive large media assets over the cloud with MASV.
Table of Contents
Quick Export DaVinci Resolve Projects (Faster Export, Lower Quality)
Step 1.
Let’s say you’ve completed your project and all your edits have been implemented. To render your video quickly without choosing specific settings, click File > Quick Export. If saving time is more important than video quality, this is a great option.
A window will pop up where you can select presets with recommended export settings. It also allows you to upload your videos directly to social media platforms such as YouTube and Twitter.
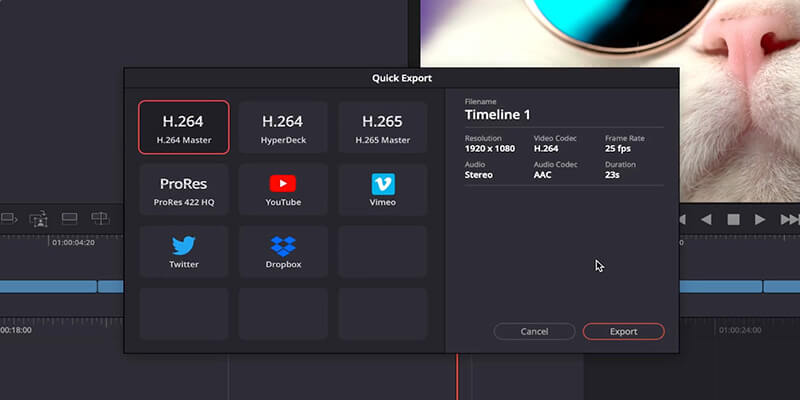
You can choose from three compression formats:
- H.264
- H.265
- ProRes
H.264. and H.265 will compress your file considerably but still maintain decent video quality.
ProRes, on the other hand, will keep compression to a minimum. This will ensure that your video is of the highest quality possible, though it also means you’ll be dealing with a larger file.
💡 Read More: Our Guide on How to Send Large Video Files
In this window, you’ll also see a few different social media platforms. If you click on any of these, DaVinci Resolve will suggest the best export settings for each platform.
For example, if you want to do a Quick Export to YouTube, the suggested codec is H.264. You can also sign into your account and post from DaVinci Resolve to YouTube, which I think is a pretty neat feature!
Simply choose the file settings that suit you best.
Step 2.
Click on Export, then select where you want to save it and name the file. Easy as 1-2-3.
Want an Easy, Fast Way to Send Large Uncompressed Files?
Send file packages of unlimited size with MASV. Try it free.
Export DaVinci Resolve Projects with the Deliver Tab and Render Settings (Best Quality, Larger Files)
Step 1.
If you want to modify your export settings manually, go down to the bottom of your screen and click the Deliver tab.
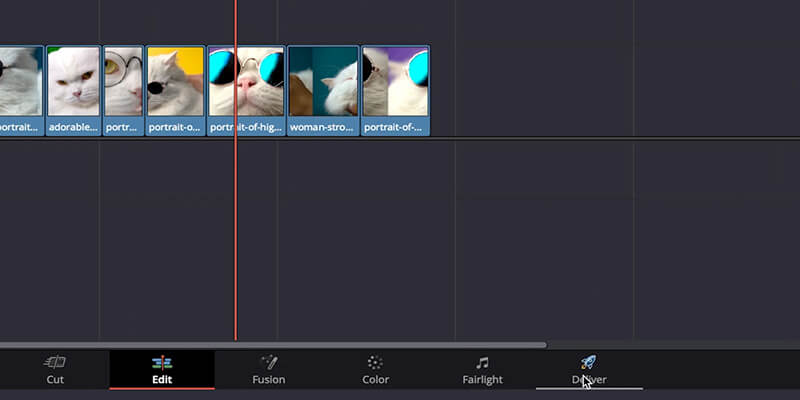
On the top left-hand side of the screen, you’ll see the same presets in the Quick Export window, but you’ll also have more options to render to other software tools as well, such as Final Cut Pro 7, Premiere XML, and Pro Tools.
Step 2.
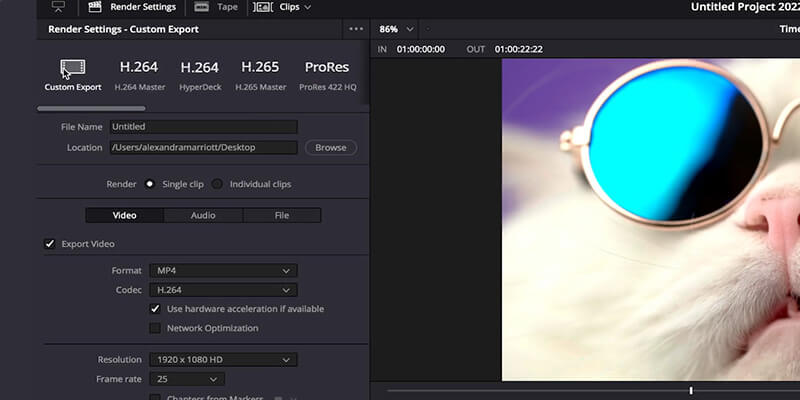
Click the Custom Export button in that top left menu to start from scratch. Write the name of your file and choose its location.
Step 3.
Go down to Format and open the drop-down menu. You’ll see a variety of formats to select from.
Let’s look at the list:
- MP4 and QuickTime are the most popular video formats. With MP4, you can use H.264 and H.265 codecs. With QuickTime, there are more options to export with high resolution in ProRes, but it also includes the H.264 and H.265 codecs.
- DNXHD / DNXHR and GoPro Cineform are the industry standard codecs that are specific to certain platforms.
- DPX and EPX are high-risk codecs with minimal compression.
- Grass Valley HQX is specifically for editing.
- VP9 is specifically for streaming videos.
- EXR, TIFF, and JPEG 2000 will give you high-quality images.
Choose the desired video format.
Step 4.
Underneath Format, you’ll find different options for Resolution, such as 1920 x 1080 HD and 3840 x 2160 Ultra HD (also known as 4K resolution).
How do you choose the resolution that best suits your project?
First, click the Media tab at the bottom of your screen.
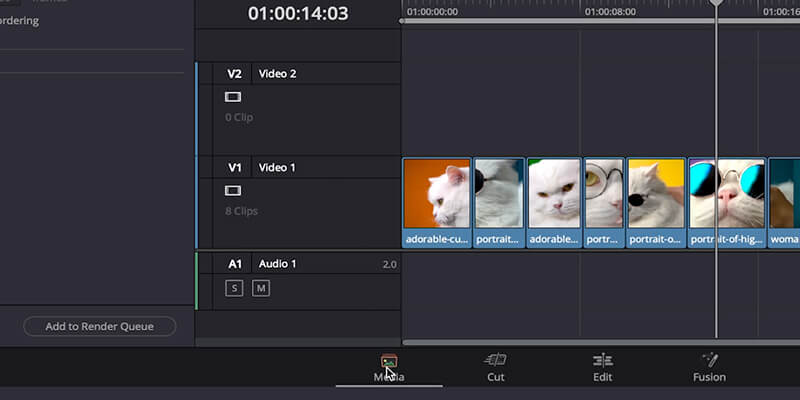
Then right-click on the timeline you want to export. Select Timeline > Timeline Settings. A window will pop up that shows you what your timeline’s resolution is.
A good rule of thumb is to avoid choosing a resolution that’s larger than the size of your footage.
Select a resolution.
💡 Read More: What is Video Upscaling and How is it Getting Smarter?
Step 5.
Go back to Deliver.
Go to the Quality section and click Restrict. This is where you can set the bitrate. Bitrate is the amount of information or data that is transferred per second. The higher the resolution and frame rate, the higher the bitrate should be.
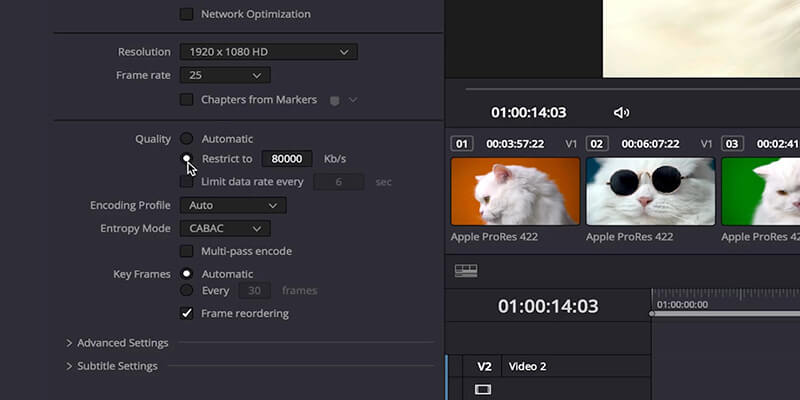
Change the bitrate to 20,000 for a standard, lighter export. For better quality, increase it to a higher number.
To be safe and assure your video is of high quality, you can double your frame rate, found directly below Resolution in the section above, and add three zeros.
For example, if your project’s frame rate is 25, your bitrate would be 50,000.
Those are the parameters that will affect the final export’s quality the most.
Remember that with a higher bitrate, you’ll get the best quality, but as you probably know all too well as a video professional, you’ll also end up with a heavier export.
Step 6.
Go down and click Add to Render Queue.
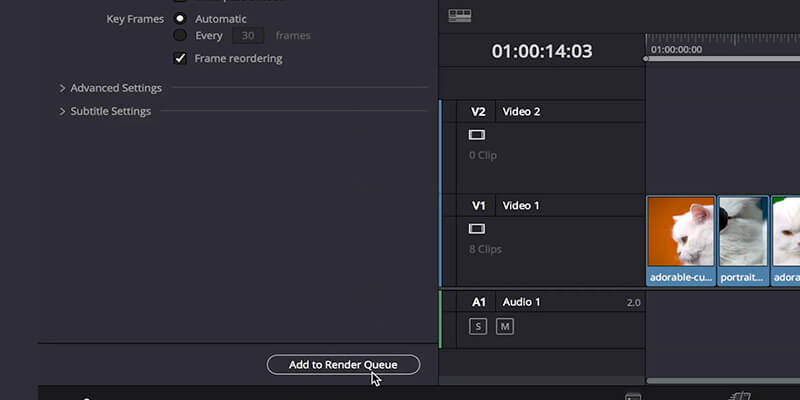
Step 7.
In the top right-hand corner of your screen, the current video you want to export will appear in the Render Queue. Click on Render All and your video will start to export.
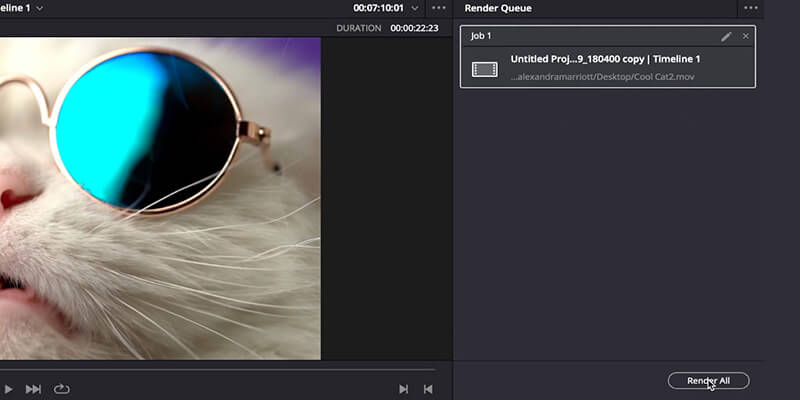
Step 8.
You can also customize the same video into other formats, such as ProRes, and keep adding different versions to the Render Queue to export as many as you want.
Et voilà! That’s how to export videos in DaVinci Resolve with optimal settings for your projects.
🎯 Learn More: How To Render and Send Files at the Same Time with MASV’s Premiere Pro Panel
Sending High-Resolution Videos and Images?
Use MASV to send raw camera footage, high-resolution media, DCPs, DPX/EPX files, and other large file formats.
Where Does Davinci Resolve Save Projects?
Now that you’ve exported your file, you need to find where it is saved on your computer.
Step 1.
If you want to find where your DaVinci Resolve project is, go to the bottom right-hand corner and click on the little house icon. This will open the Project Manager window.
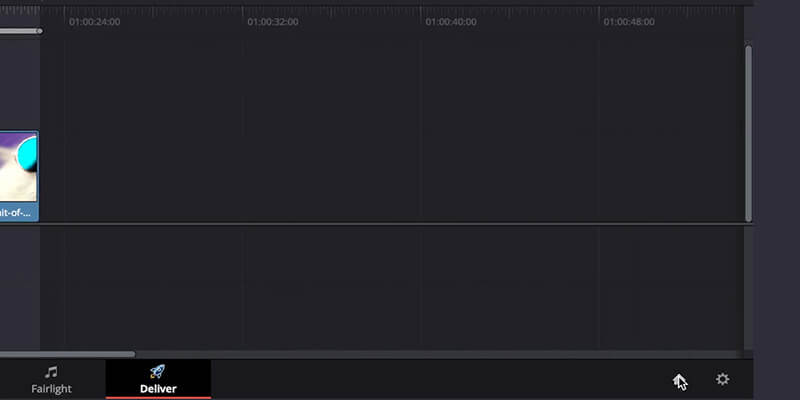
Step 2.
Click on Projects > Project Libraries > Local Database.
Right-click on Local Database and click Reveal in Finder. In Finder, click Resolve Projects > Users > [Your Username] > Projects and you’ll see the folder for your project.
Large File Transfer for Colorists, Editors, VFX Artists, and more
Quickly share large files between other production departments. Speed up your creative workflow with MASV file transfer.
Transfer a Davinci Project to Another Computer
If you work in DaVinci Resolve, there’s a good chance you need to transfer a Davinci Project to another computer or to a colleague that will continue working on it (e.g. color grading, VFX). Here’s how to send DaVinci Resolve files.
Step 1.
Click the house icon in the bottom right-hand corner to go to the Project Manager window.
Step 2.
Right-click on your project and select Export Project Archive.
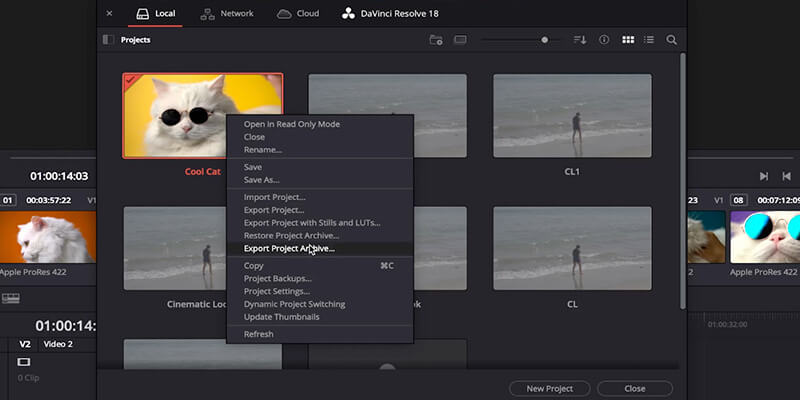
Choose where you want it to be saved and check all the files you want to be included (Media Files, Proxy Media, Render Cache). Click Ok.
Everything you need will be in a folder in the location you selected.
Step 3.
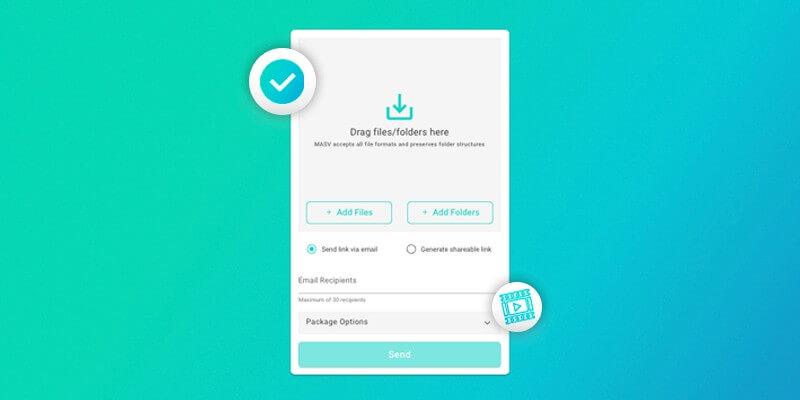
Drag and drop that folder into the MASV browser app to transfer your files. MASV is the fastest way to send large files — like the ones exported through DaVinci Resolve — over the internet, in record time.
The Best Way to Send Large Files Over the Cloud
There you have it. I hope that this guide on how to export videos from DaVinci Resolve will empower you to do and share your best work.
Get start with MASV for free and send your large files anywhere they need to be in the world.
With MASV, you can send file packages of unlimited size over a browser, and thanks to a network of over 300+ cloud servers around the world, files sent through MASV never have to travel far, therefore reducing latency.
No wonder MASV is trusted by thousands of video and media professionals all around the world. Get fast, easy, and secure large file transfer with MASV and speed up your production workflow.
MASV File Transfer
Get the fastest, large file transfer service available today, MASV.