You should know by now that audio quality can make or break your video.
If you’re recording a voiceover, your voice should be crisp, with depth and richness. It should not be muffled, echoey, and tinny (like the bad video conference calls during the height of 2020).
So how can you enhance the quality of your dialogue audio and make your voice sound better? If you have Adobe Premiere Pro, it just takes a few clicks.
Catch our tutorial below! 👇
File Transfer for Filmmakers
Fast, easy, and secure delivery of large media files.
🎥 Video: How to Make Your Voice Sound Better
How to Record Better Audio?
Before we get into the tutorial, it’s important to note that you can’t just enhance voice, sounds, and music in post-production alone. Good audio mastering is about clean-up and editing rather than straight-up repair. In order to avoid bad audio from the start and make your voice sound better, it is recommended you get an external microphone, that is positioned well, and sitting a good distance away from the subject.
If you don’t have a good microphone and are in need of some recommendations, we put together a handy guide on the best microphones for recording, streaming, and podcasting this year.
These microphones will ensure you have professional-sounding audio so you can make your voiceovers pop in Premiere Pro.
Premiere Pro Essential Sound Panel
When you have Premiere open, go to Window > Workspaces > Audio.
A new window will appear on the right which Adobe calls their Essential Sound panel. Here, you can select between four different sound enhancements:
- Dialogue: for spoken word tracks
- Music: for distinguishable tracks like background music
- SFX: short for ‘Sound Effects’ (a door closing, a bell chime, etc.)
- Ambience: for ambient tracks that add a sense of place to your content (car horns in the distance, birds chirping, etc.)
Select Dialogue.
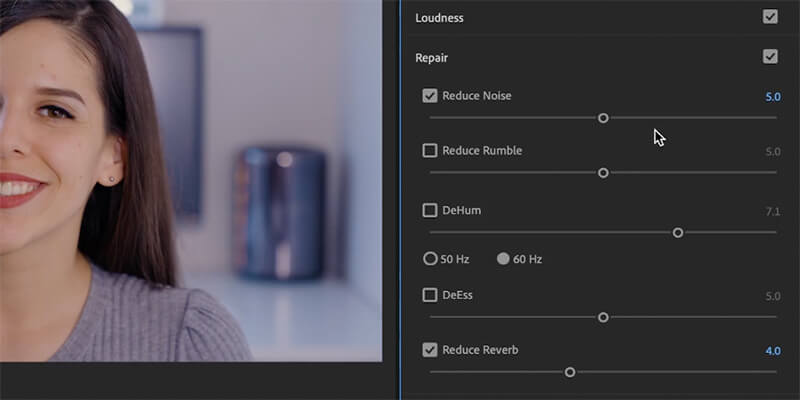
In the tutorial video above, my audio has some background noise and an overall echo. To fix that, I’ll go into the second tab in Essential Sound, ‘Repair’ and activate the ‘Reduce Noise’ and ‘Reduce Reverb’ parameters, and adjust the intensity with the slide bar.

Next we’re going to go to the ‘Clarity’ tab and activate ‘Dynamics’ and ‘EQ (equalizer)’.
From the EQ dropdown menu, you can select a variety of presets. I think the best are ‘Podcast Voice’ or ‘Vocal Presence’, but try them out with your own recording and adjust the slide bar if necessary.
To finish, activate ‘Enhance Speech’ and select to enhance either high or low tones.
The Sweet Sound of Success
How Sound Lounge, a leading NYC-based audio production facility, found better file transfer with MASV.
Premiere Pro Audio Effects
The Essential Sound panel is a quick way to improve your audio quality. For more control, it’s better to play around with some individual audio effects. Adobe Premiere Pro has a ton of audio effects to choose from but I find the following three effects used in conjunction give you the best results:
1. DeNoise

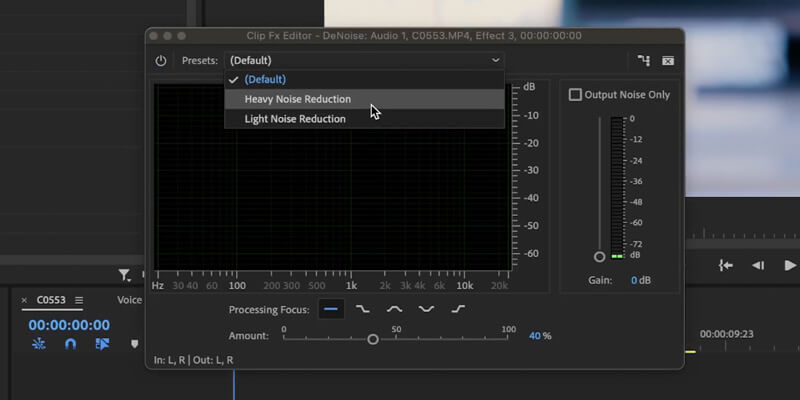
From the ‘Effects’ panel, look for DeNoise and drag it to the audio clip. As the name suggests, this effect helps reduce any background noise. If your background noise isn’t bad to begin with, DeNoise can give the impression you’re in a sealed off sound booth. it’s pretty powerful.
In the DeNoise effect controls panel, hit ‘Edit’. From here, you can select a ‘Light Noise Reduction’ or ‘Heavy Noise Reduction’ preset. Or, you can manually adjust the noise reduction via the sliders. You can also select in the frequency you want your processing to focus on for more detail noise reduction.
2. Parametric Equalizer
Let’s go back to Effects and search for ‘Parametric Equalizer’ and drag it onto the track.
The Parametric Equalizer effect provides control over the low, mid, and high-tones of your audio. All speech patterns naturally hit all three of these tones. Finding a balance between the three parameters will make your voice sound better.
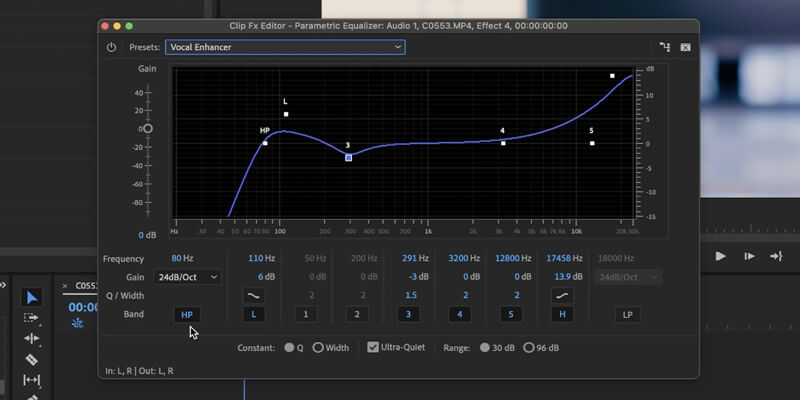
Click ‘Edit’ under Parametric Equalizer and open up the frequency spectrum. On the left, we will have the low frequencies. On the right, the high frequencies. Mid frequencies will be in the middle, of course. We can move each one of these points up to boost them or lower them to cut them down. To make things easier, Premiere Pro has some presets.
For dialogue, the most important preset is Vocal Enhancer. With this preset, The HP filter (high pass) is active so the lower frequencies below 80 hertz have been cut out. This frequency can interfere directly with the voiceover so we don’t want them.

In my video tutorial, the Vocal Enhancer preset shifted my audio’s lower frequencies up a bit. This makes the lower tones of the voice more prominent and present. Meanwhile, the mid tones towards have been reduced a bit to compensate for better intonation. And of course, the higher frequencies have been raised to really get all the power and clarity from the voice.
3. Multiband Compressor

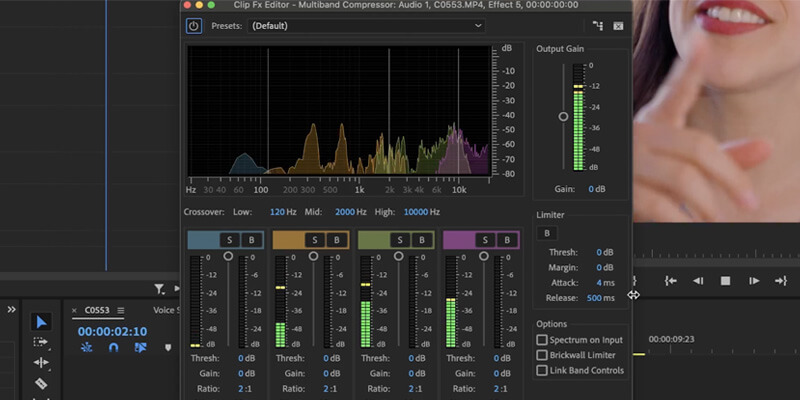
Now, let’s compress the audio. The purpose of a compressor is to tighten frequencies and balance all the voice tones. It may also raise the overall volume. I like to use the ‘Multiband Compressor’.
Again, in this new window we have our frequency spectrum with the other parameters to modify. Let’s check the presets:
- There are many that can improve the quality of the audio like ‘Hiss Reduction’ or ‘DeEsser’.
- There are others that bring the volume up like ‘Broadcast’, ‘Internet Delivery’, and ‘Pop Master’.
- And some are just there for specific effects like ‘Toy’ or ‘Walkie Talkie’.
I usually like to use Hiss Reduction or ‘Snare Chunk’ to compress my audio.
To finish with the compressor effects, I like to add a higher limiter and put the preset limit to minus three decibels. This will prevent the audio peaks to reach tones higher than minus three decibels (which is a big help for audio clipping).
When you finish your video, use MASV, which integrates with Premiere Pro, to send it for reviews or final deliveries to anyone, anywhere in the world. MASV is the fastest and safest way for filmmakers to deliver raw or high res footage to clients and collaborators.
Did I mention MASV has a Premiere Pro plugin to transfer rendered files to an email address without having to leave Premiere?
MASV File Transfer
The fastest, large file transfer service available today, MASV.