Do your folders look like a bull ran through a china shop?
As a video editor, it’s imperative to keep your footage and assets organized both inside and outside your timeline to streamline your editing. To help optimize your video editing workflow, we’ve got some media organization tips to help you create the most efficient folder structure.
Table of Contents
Fast File Transfer for Video Pros
Stay organized and get things done quicker with MASV.
Hard Drive Folder Hierarchy
So where should you start? The foundation for proper media organization is a creating an easy-to-understand folder structure that includes every element of your video project, such as audio and graphics.
Let’s take a look inside this sample MASV folder. It’s organized by year and also includes a general folder for frequently-used branded assets.
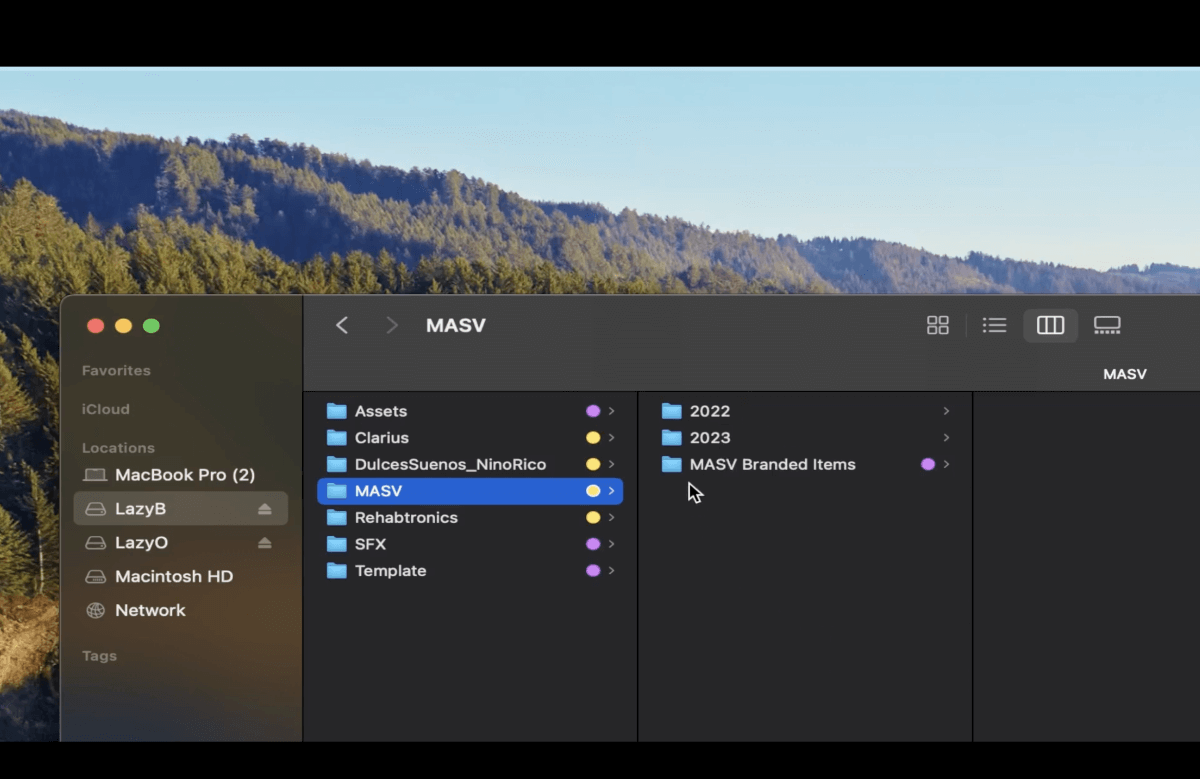
Within each yearly folder, there are subfolders for each month in that year.
Each monthly subfolder contains more subfolders for individual video projects completed within that month.
Each folder should adhere to consistent file naming conventions so you can easily identify the contents of each folder. If someone else has to work on your project, they should be able to understand where things are located and the purpose of each file and folder.
You ideally want the fewest number of folders possible. The structure should also intuitively make sense to you or anyone else.
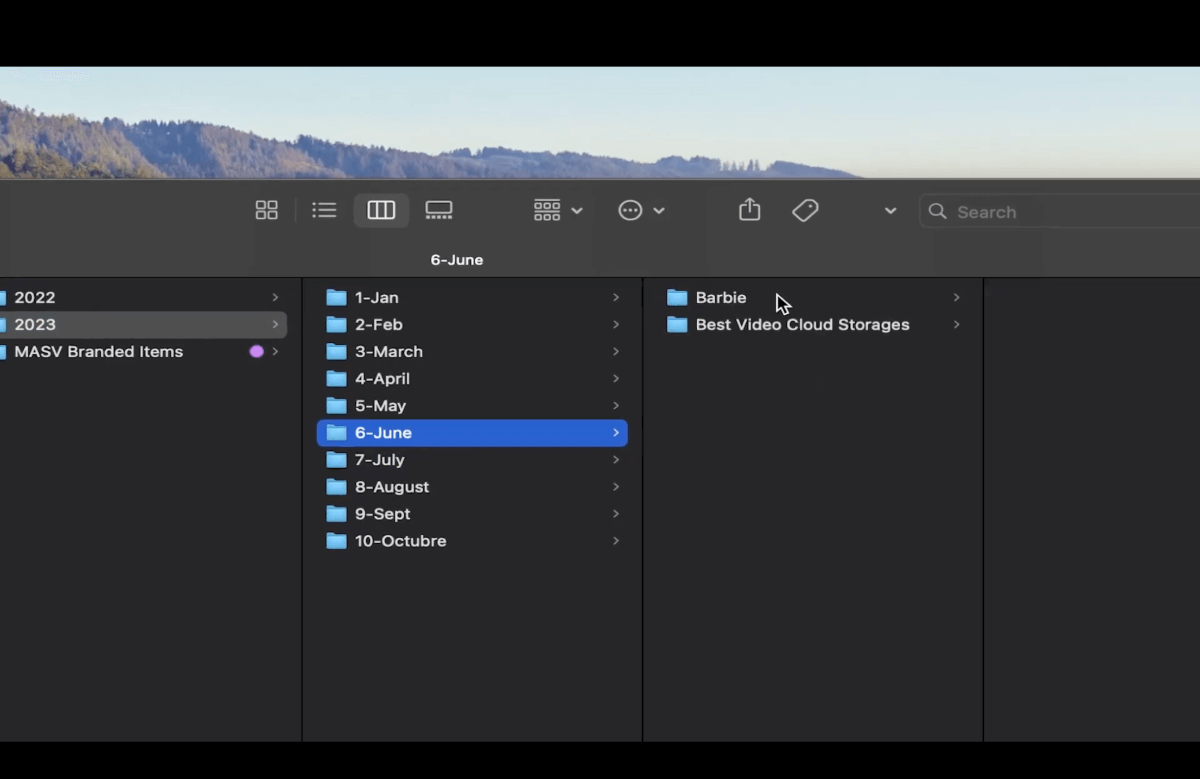
Now let’s click the 2023 folder. Go to the subfolder for June and click Barbie.
In it there are several other subfolders such as 01-Project, 02- Footage, and 03-Assets. Putting numbers at the beginning of the folder name helps maintain a folder hierarchy. This makes it easy to access the folders you use the most.
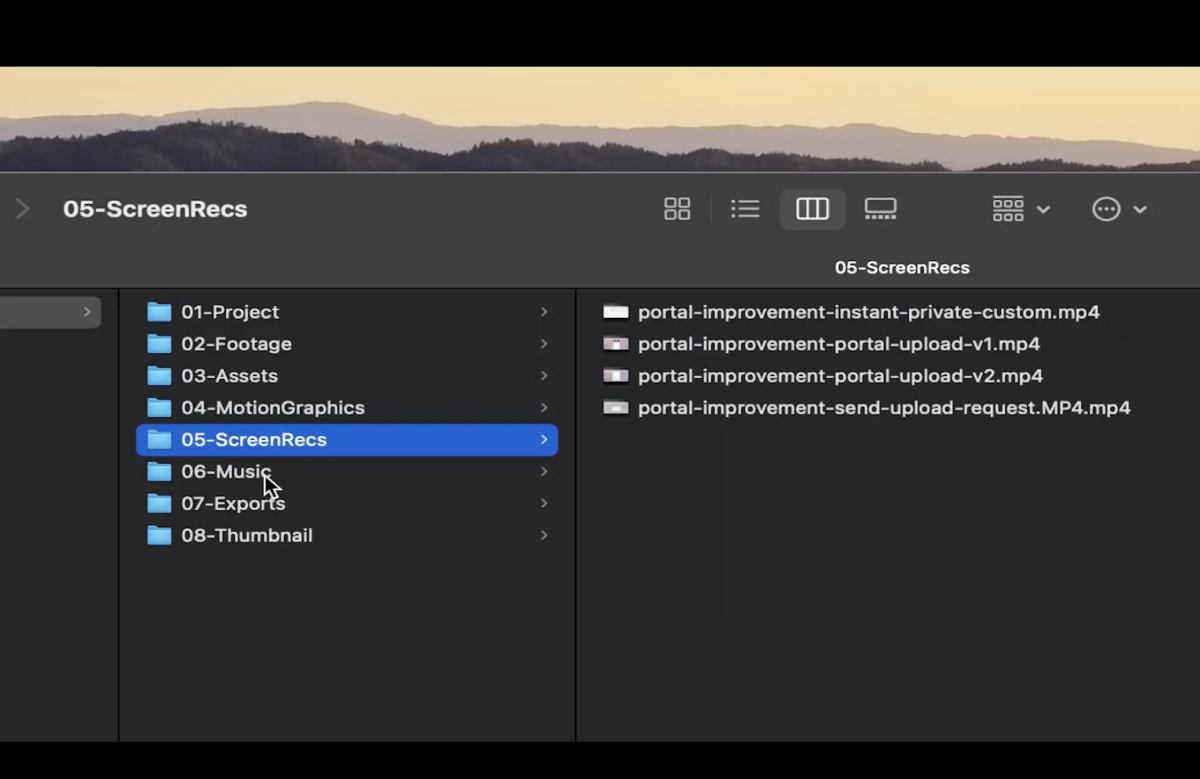
The folder Project is where you can find the main Premiere Pro project along with scratch disk folders such as Previews and Auto-Saves.
If you use other software such as Final Cut, DaVinci, or Avid, those files would also go here.
You can also include your After Effects project here if you’re creating any graphics or animations for the main video.
Next is the Footage folder. This is where I keep all footage from the recording, including the audio.
You can have subfolders to specify the footage type. For example, if you recorded with different cameras, you can create Acam and Bcam folders.
If you recorded in different locations you can create folder names to reflect that (such as the folders Home and Park in the image above). If you filmed on different dates you can organize the footage by date. You can also add a separate folder for stock footage.
Remember: The most important thing is that the organization is logical so it feels intuitive and allows for efficient video editing by either yourself or anyone else.
The Assets subfolder stores any stills, graphics, pictures, or video exports used as assets in After Effects.
In the MotionGraphics folder, I store any exports from After Effects, such as animated titles, intros, or transitions.
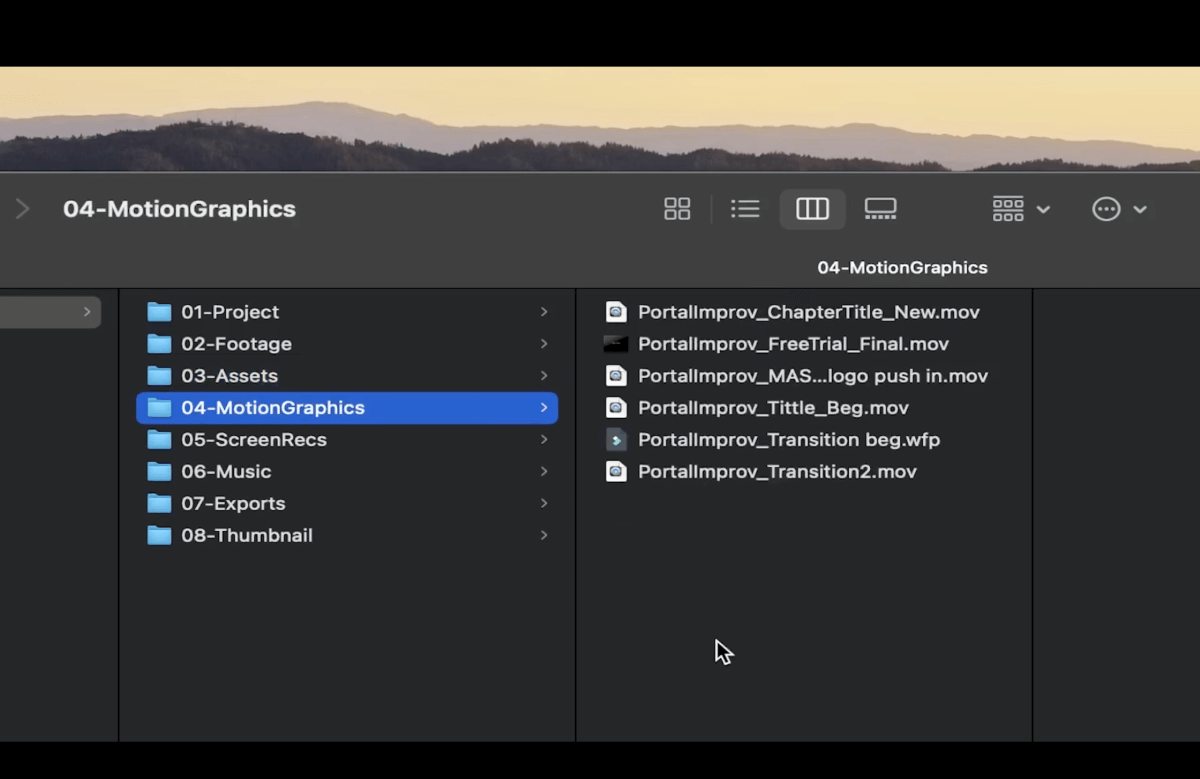
Next, I have the folder ScreenRecs for screen recordings. This folder may or may not be necessary depending on the videos you produce.
The Music folder can also be named Audio. A typical Audio folder contains subfolders for music, raw audio, voiceovers, and sound effects.
You can also create an Exports folder to hold exported versions of your video edits for easy access. If you want to avoid spending hours manually transferring media to your folders, check out MASV’s automated file transfer feature.
For many projects, Exports would be the last folder, but if you make YouTube videos, you might also have a Thumbnail folder containing the Photoshop file with all the assets and exports for the thumbnail image.
Once you land on a folder structure that makes sense, create an empty template you can copy and paste every time you start a new project. That way, you’ll have a consistent folder structure for all your projects, saving you a lot of time with your media management.
Best-in-Class Large File Transfer
Streamline your workflow with MASV’s secure and fast large file transfer.
Folder Organization in Your Timeline
Go to your Premiere project and import the footage, assets, graphics, and all the folders you’re going to use.
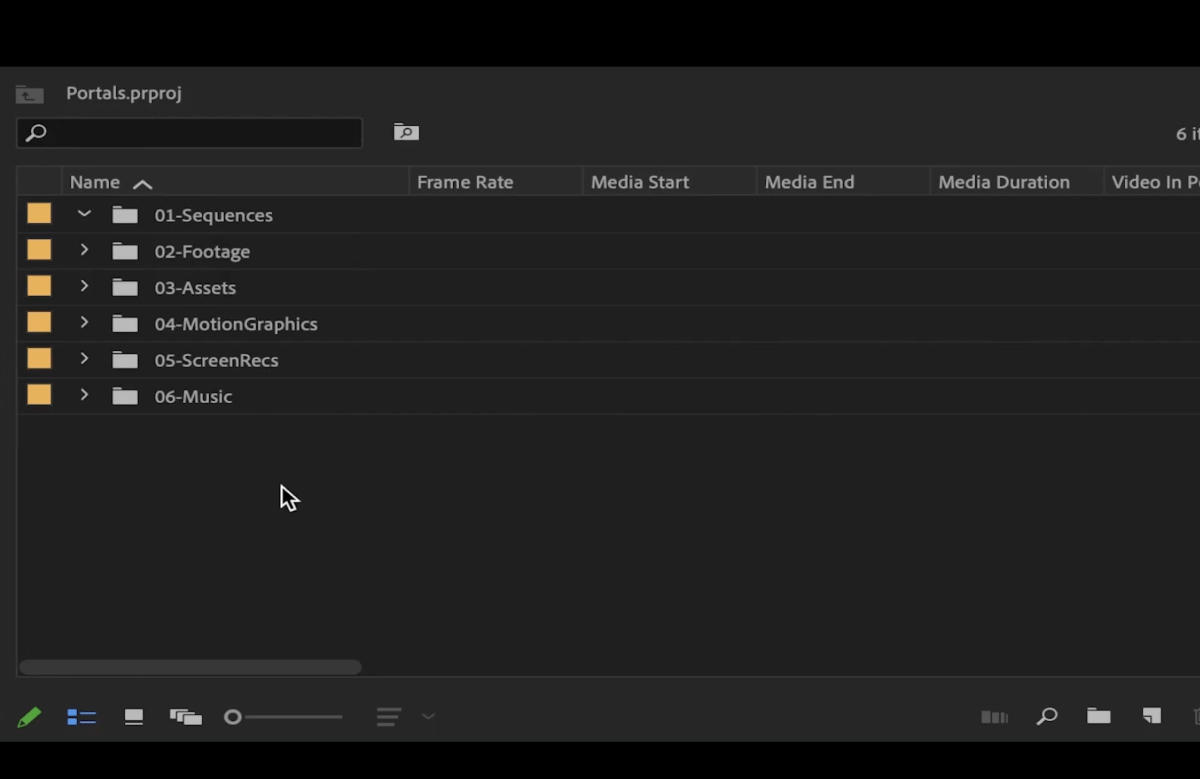
At this point, we’re just missing a Sequences folder. Click on the small folder in the bottom right corner of the project window (New Bin), and name it Sequences.
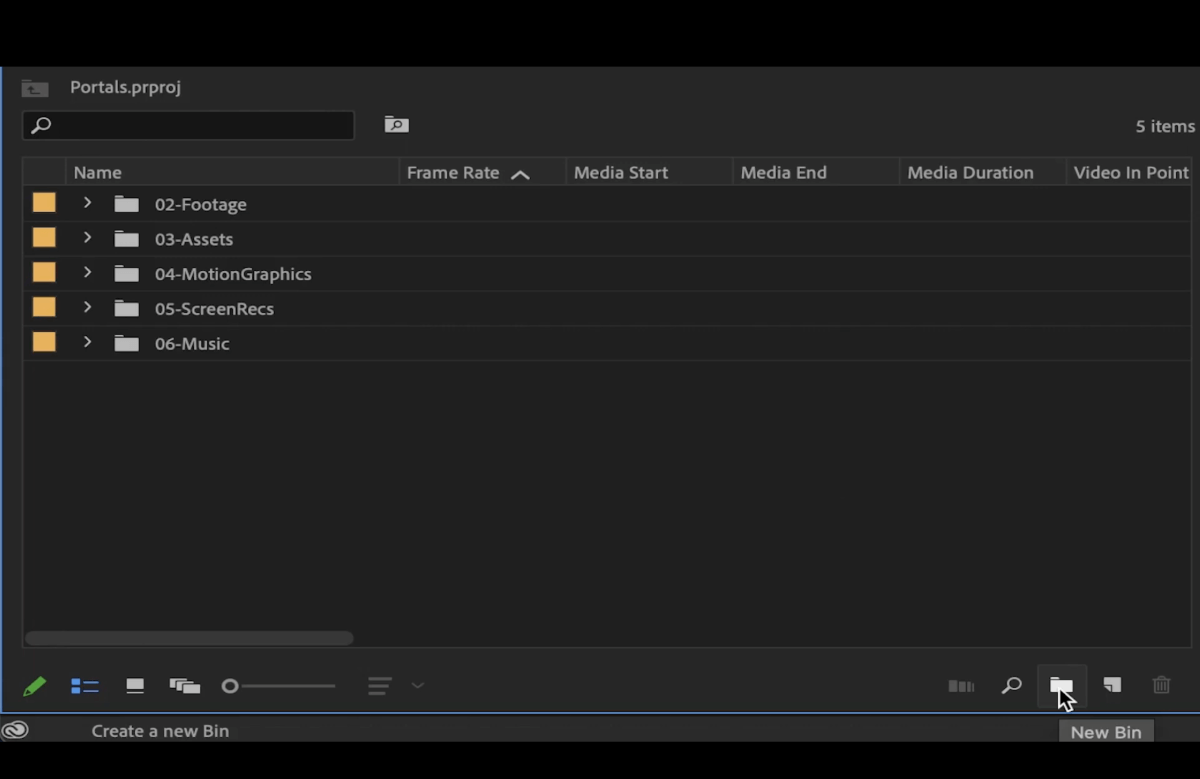
You can add 01 to the beginning of the folder name to make sure it appears first. You can add all the sequences of your project to this folder.
Media File Labeling and Metadata
But wait, that’s not quite everything! Some video editing best practices also include media file labeling inside the project window.
Go to a folder, select the files, right click on them, and change the label color.
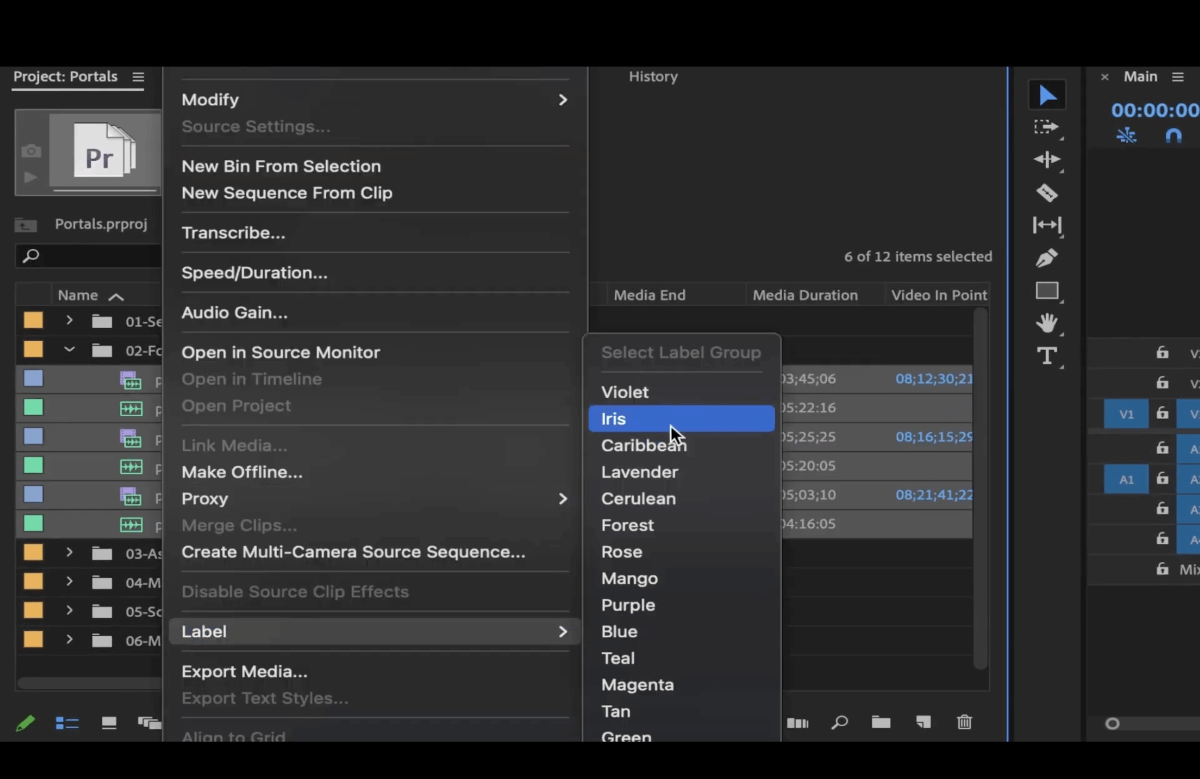
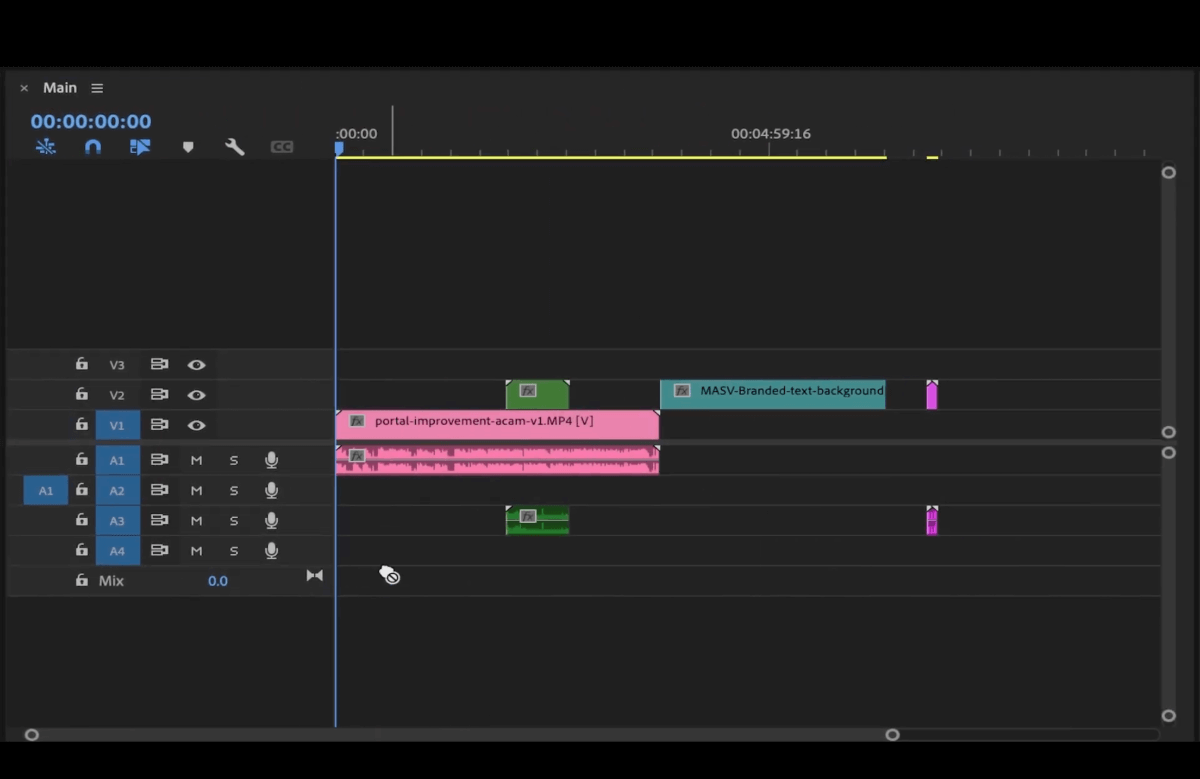
Do this with each folder so you can easily differentiate them on the timeline while editing.
If you want to go even further, fill in the metadata info next to each file in the project window.
Scroll to the right and you’ll find the sections Tape Name, Description, Log Note, Scene, and Shot, among others.
You can fill these in and drag each section to the left so that information appears first.
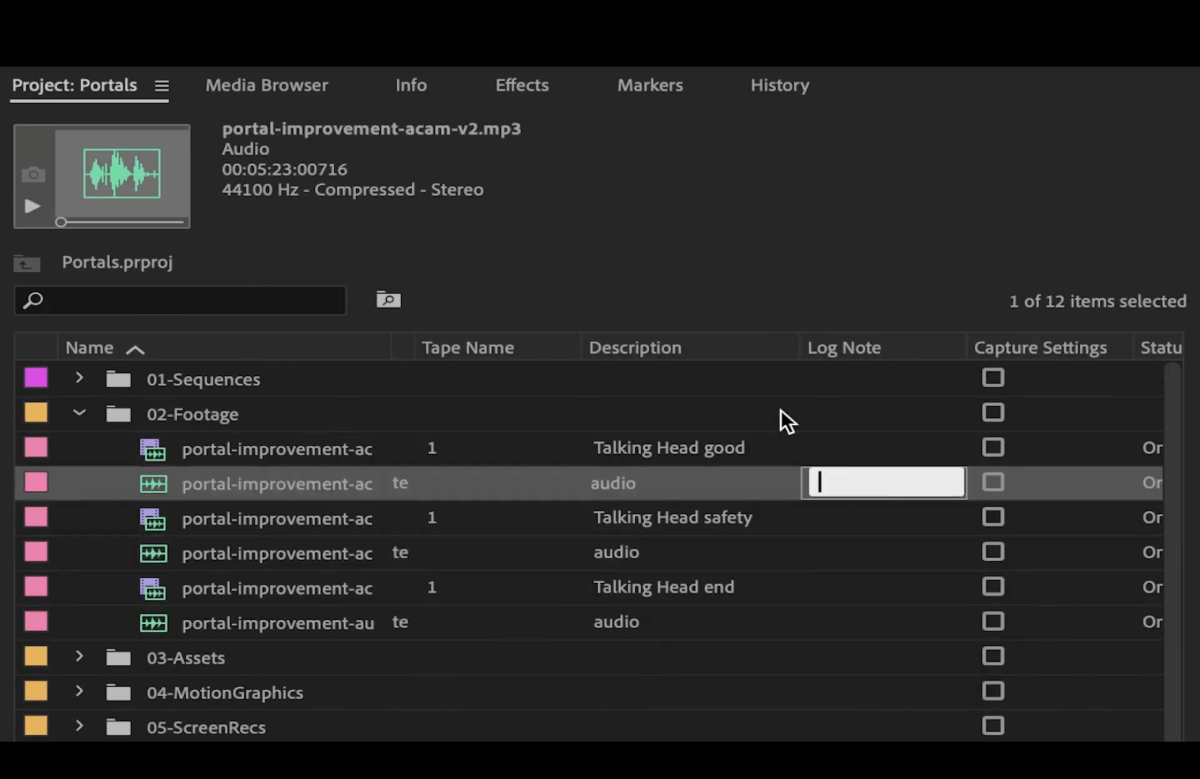
Click on any of the sections to organize files by those categories. The up or down arrows that appear will tell you in what order the files are displayed.
Lastly, remember to regularly back up your folders to ensure data safety. Always archive completed projects to free up space on your computer while keeping all project assets intact.
Organize Your Media Workflow with Trusted File Transfer Tools
Organization is important throughout every aspect of your process, not just your folders or timeline! In the tutorial above, I showed you how to organize your media folders — and if you need to organize your media transfers, look no further than MASV.
MASV is a large file transfer tool that ensures that your media files get where they need to go, and fast. Here are a few ways MASV helps you be more organized:
- It preserves your folder structure, which makes project handoffs a breeze.
- You can create free MASV upload Portals to request, collect, and organize files from clients and contractors.
- MASV allows you to create project Teams and invite as many people to be a part of that team.
And if you’re using Adobe Premiere Pro, make sure you download the MASV panel extension. This powerful integration streamlines client delivery and remote project collaboration by enabling direct file transfer from Premiere with just a few clicks.
Start free, today. MASV is free to use; you get 10 GB free every month. After that, it’s Pay As You Go per transfer for flexibility, or opt for low-cost subscriptions for significant savings.
Share Large Media Files Without Limits
Heavy files? No stress. MASV can handle files up to 15 TB.