Looking to enhance the audio quality in Adobe Premiere Pro? Well, it’s not just about getting a fancy microphone. It’s all about finding the right balance between different sound elements in your project.
By the time you finish this tutorial, you’ll learn how to mix audio in Premiere Pro and balance dialogue, background music, and sound effect levels. A well-balanced audio mix will not only impress your viewers but it will also give your video project an extra bit of polish. So let’s dive in and make your audio sound its best!
Table of Contents
Send Large Audio & Video Files With Ease
Get started with MASV and send and receive big media files quickly and reliably.
What is Audio Mixing?
Mixing audio involves balancing the volume and quality of your voiceover, dialogue, music, sound effects or any other audio files used in your project. This allows you to create a cohesive audio track that, simply put, sounds good when played.
Each one of the audio files you import and edit into your project will have different volumes and quality so it’s necessary to balance out the levels in post-production.
There are many different ways to do this and make your audio sound better, but we’ll show you effects and tips that have allowed us to successfully mix audio in Adobe Premiere Pro for a variety of projects.
Prepare your timeline
Let’s take the project in the video as an example.
In it, there are multiple audio tracks. The first audio track is the voiceover or dialogue. The second track is music. And for the third, fourth and fifth, we have sound effects.
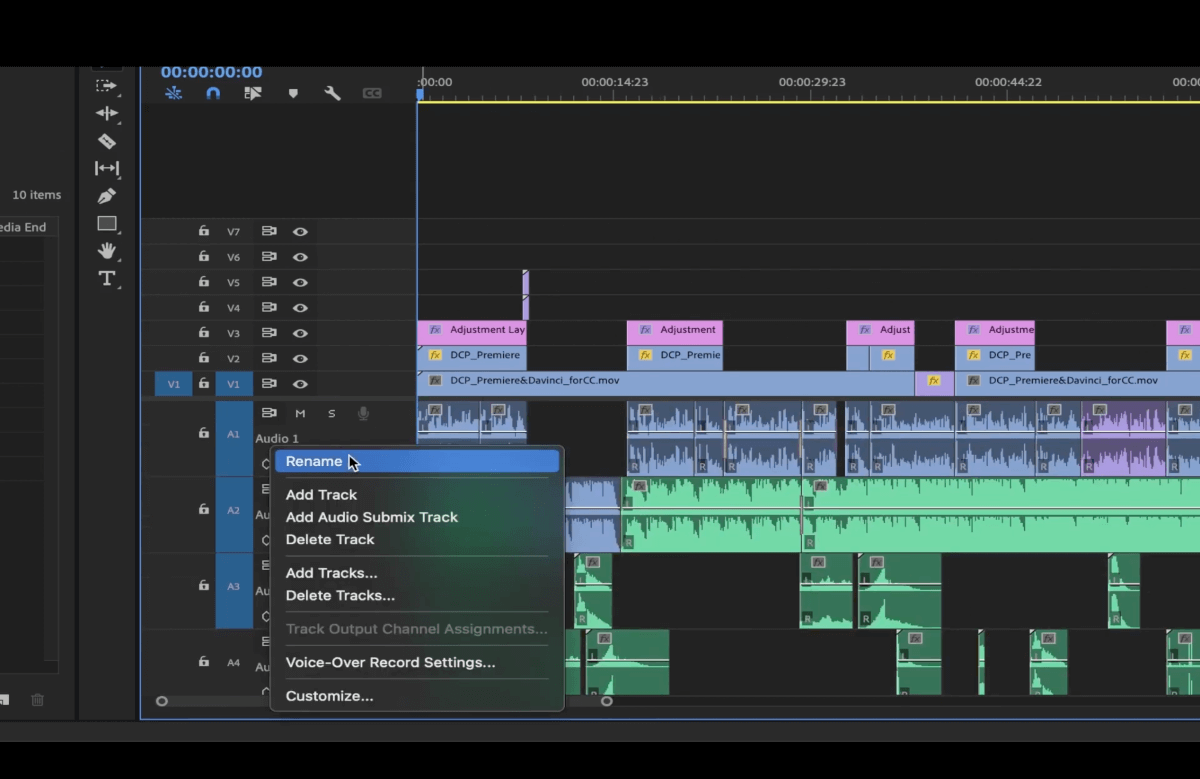
You can rename your audio tracks by right clicking on each one of them and selecting Rename.
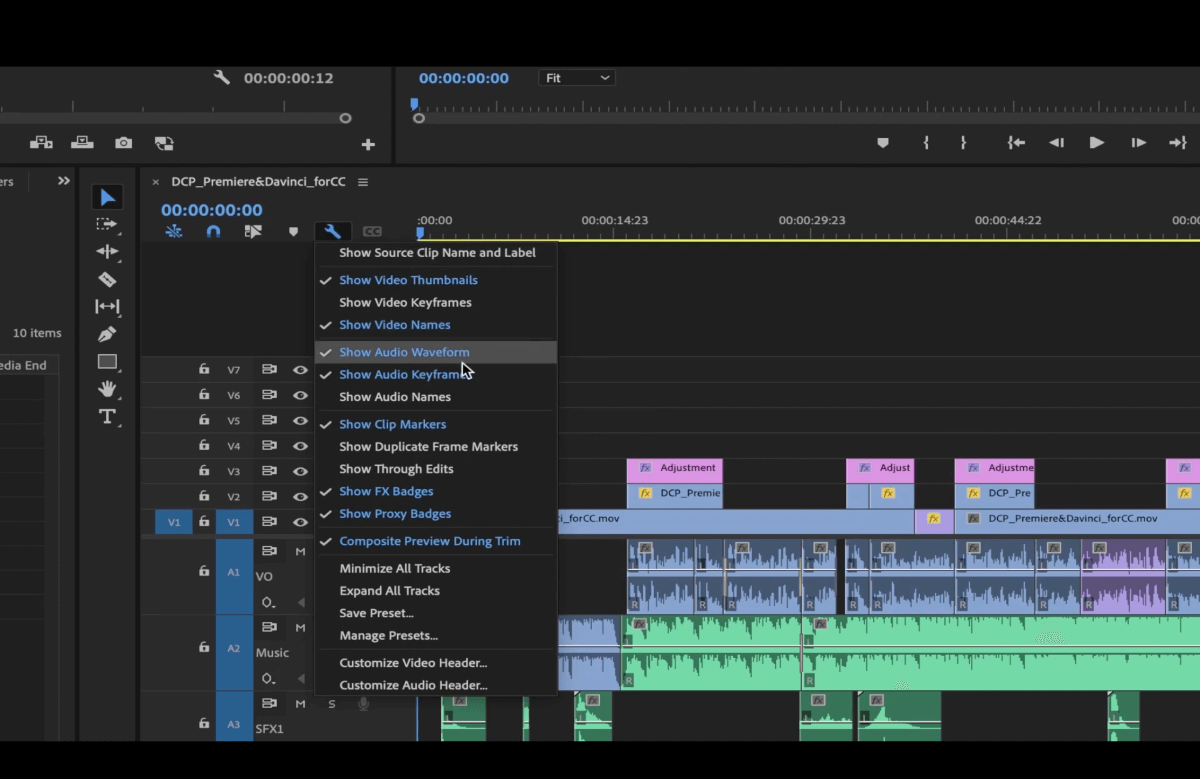
Now, click the wrench icon, which opens up the Timeline Display Settings, to make sure the Audio Waveform and Audio Keyframes are activated in the timeline so you can see them.
Now go to Window > Workspaces > Audio so you can work in audio mode.
💡 Read More: Best Digital Audio Workstations for Filmmakers
Mix Like a Pro, Send Like a Pro
Once the mixing is done, send your files with MASV to make sure they get where they need to go.
Dialogue (Voiceover)
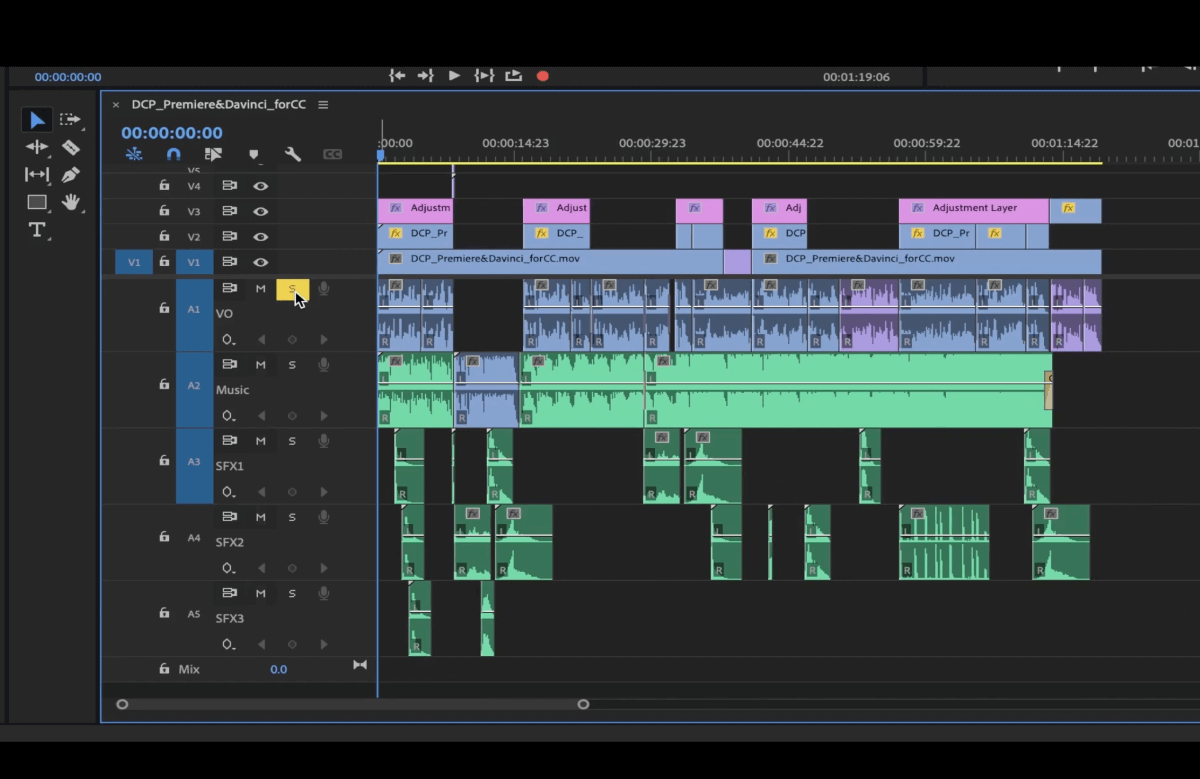
Go to the audio track for the voiceover and click S. This isolates that specific audio track so that it’s the only one you can hear.
The vertical bar with numbers on the right side of the timeline measures the loudness of the clips (in decibels).
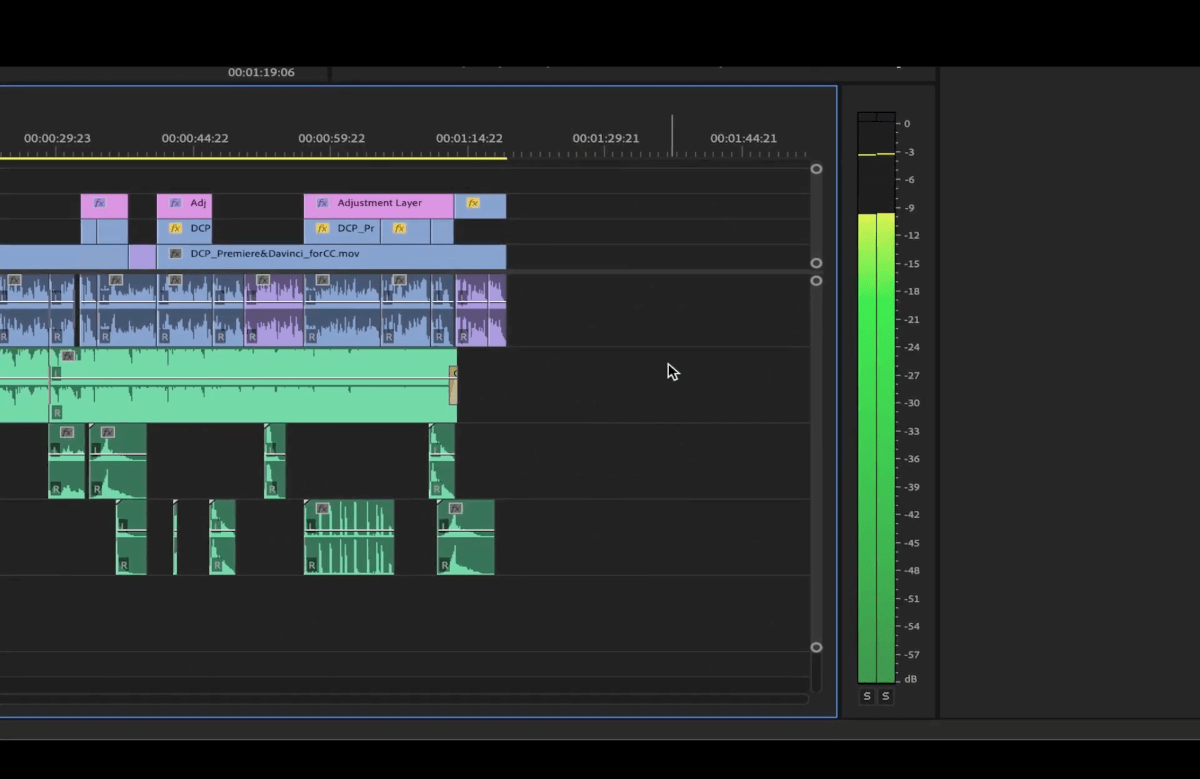
Voiceovers or dialogue is usually between -6dB and -12dB.
We like to keep it closer to -6db, -3db being the peak. These levels are better for internet delivery, but if you’re delivering your audio to movie theaters it’s better to give it a wider range, between -6 and -12db.
Whatever you do, never let your audio reach 0 as it will be peaking and create digital distortion and that it’s just horrible to the ears. Nobody wants that!
Select all voiceover clips, then click on Dialogue on the right hand side under Refine Tag selection.
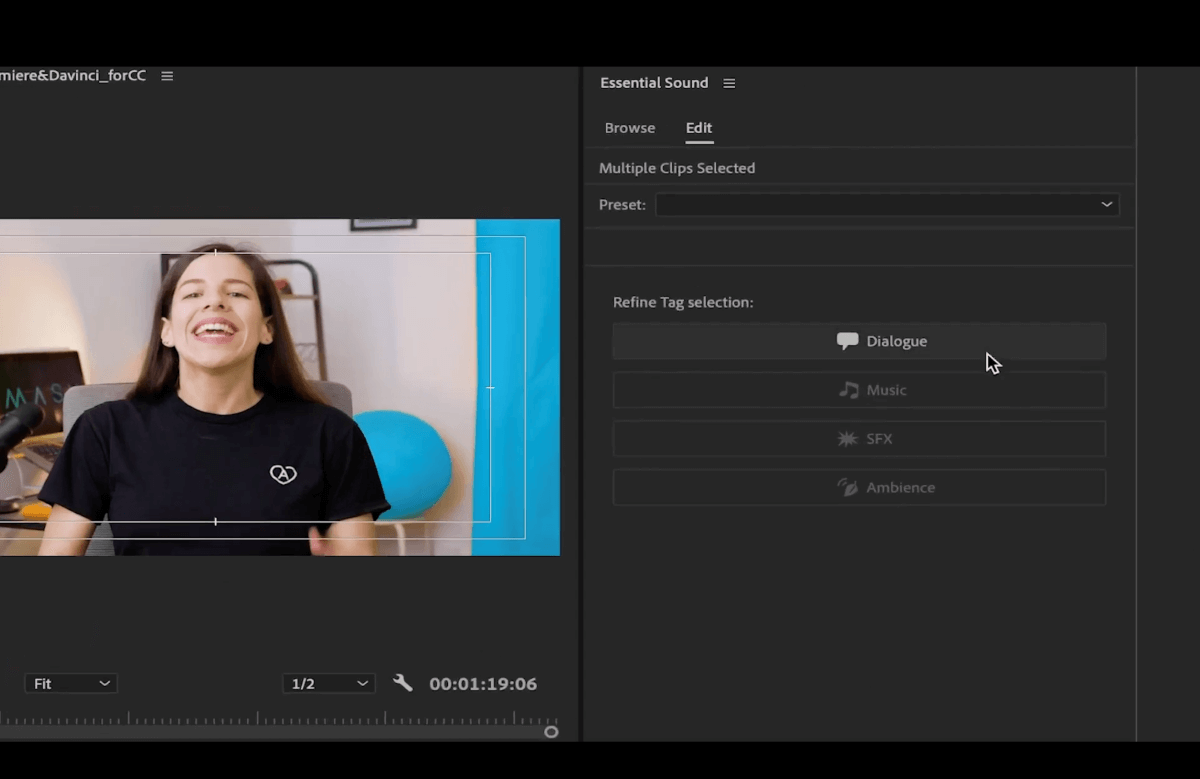
Click Loudness, then select Auto-Match. This will adjust the audio clips so that they’re all at the same level of loudness.
Audio Gain
You can check and manually adjust each individual clip’s audio gain by right clicking on it, and selecting Audio Gain.
In the pop-up window, you’ll see how many decibels were added to the audio track beside Set Gain to.
Pro tip: Use the shortcut G to open up the Audio Gain window faster.
Send Raw Audio & Video Files Without Compression
MASV can handle any file size, so you can spend time creating — not compressing.
Essential Sound Panel
If you’re in a hurry and want to use a faster way to improve your audio, you can adjust the Clip Volume at the bottom of the Essential Sound Panel on the right hand side of your screen.
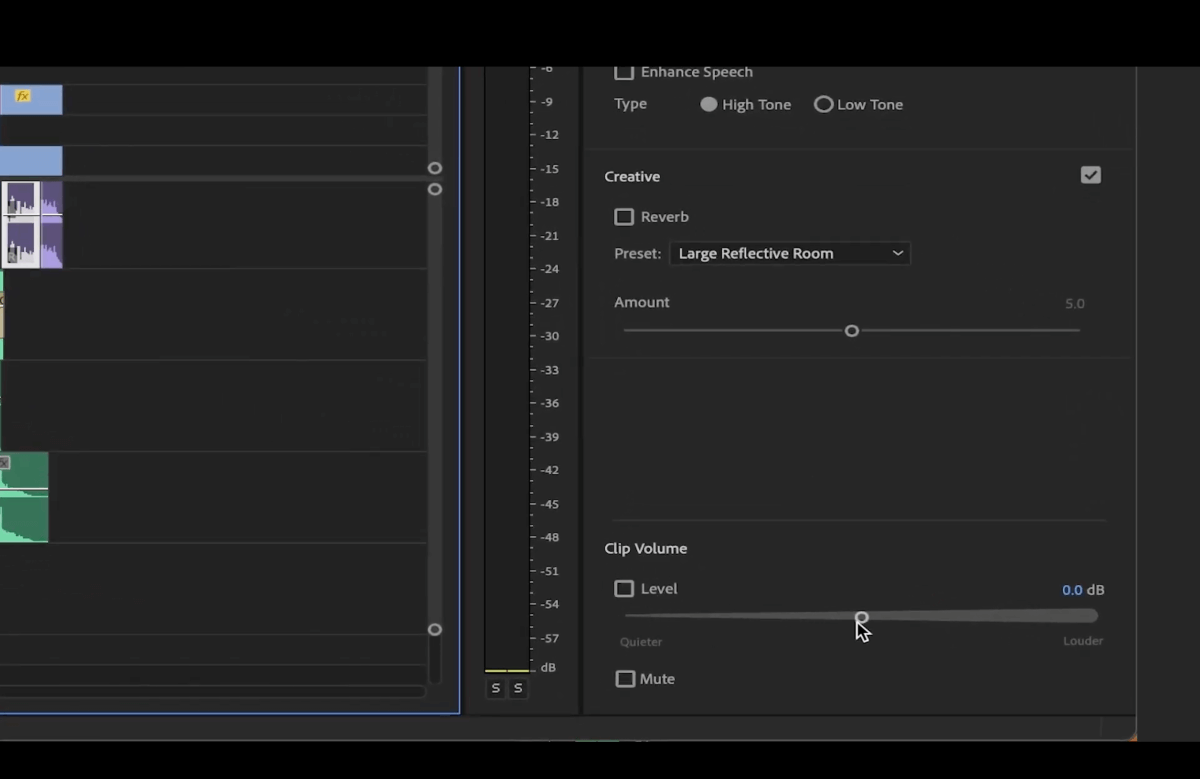
Here are a few other things you can do in this panel:
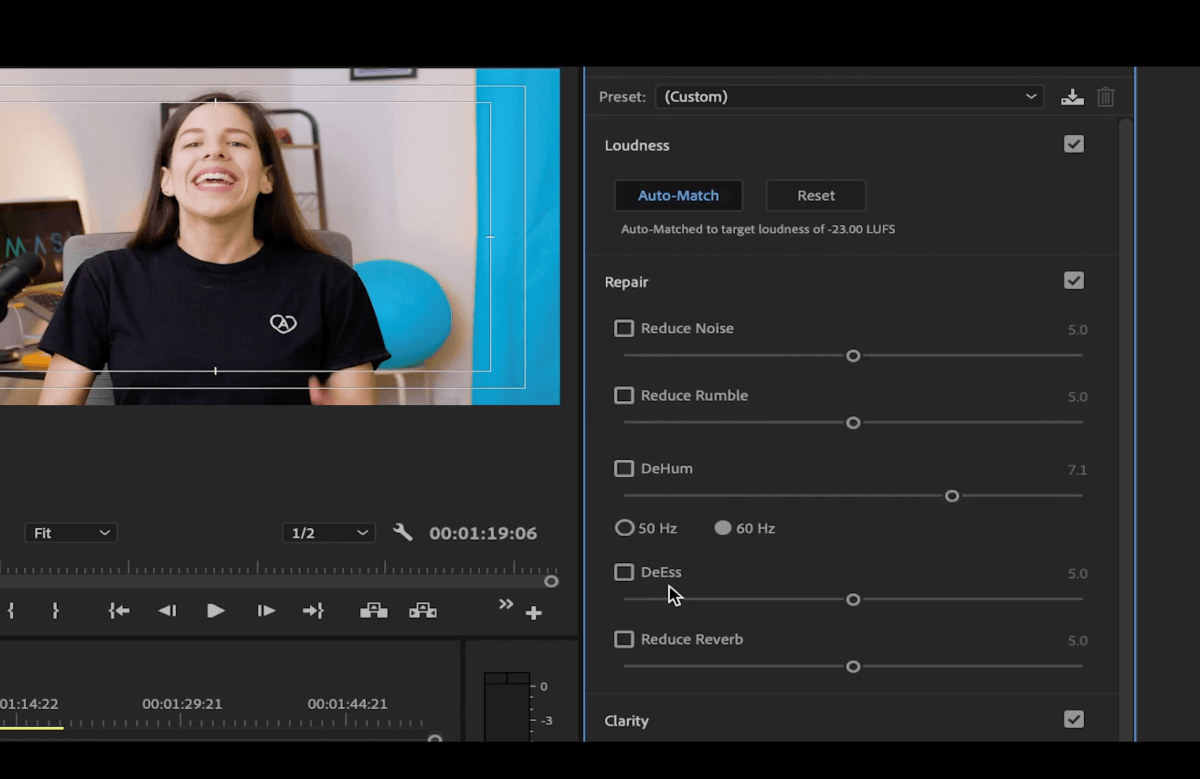
Repair: Fix background noise, rumble, echo, “S” sounds that are too harsh, and reverb. With the slider you can add more or less of the effect depending on your needs.
Clarity: Dynamics allows you to reduce the difference between loud and quiet sounds. EQ (or equalizer) allows you to reveal and enhance vocal frequencies not perceived yet in the clip.
Creative: Add effects to make the audio sound like it’s happening in a specific type of room (e.g. auditorium, warm room etc.)
Audio Track Mixer
Each one of these columns in the Audio Track Mixer represents an audio track. You can see their names at the bottom (e.g. VO, Music, etc.).
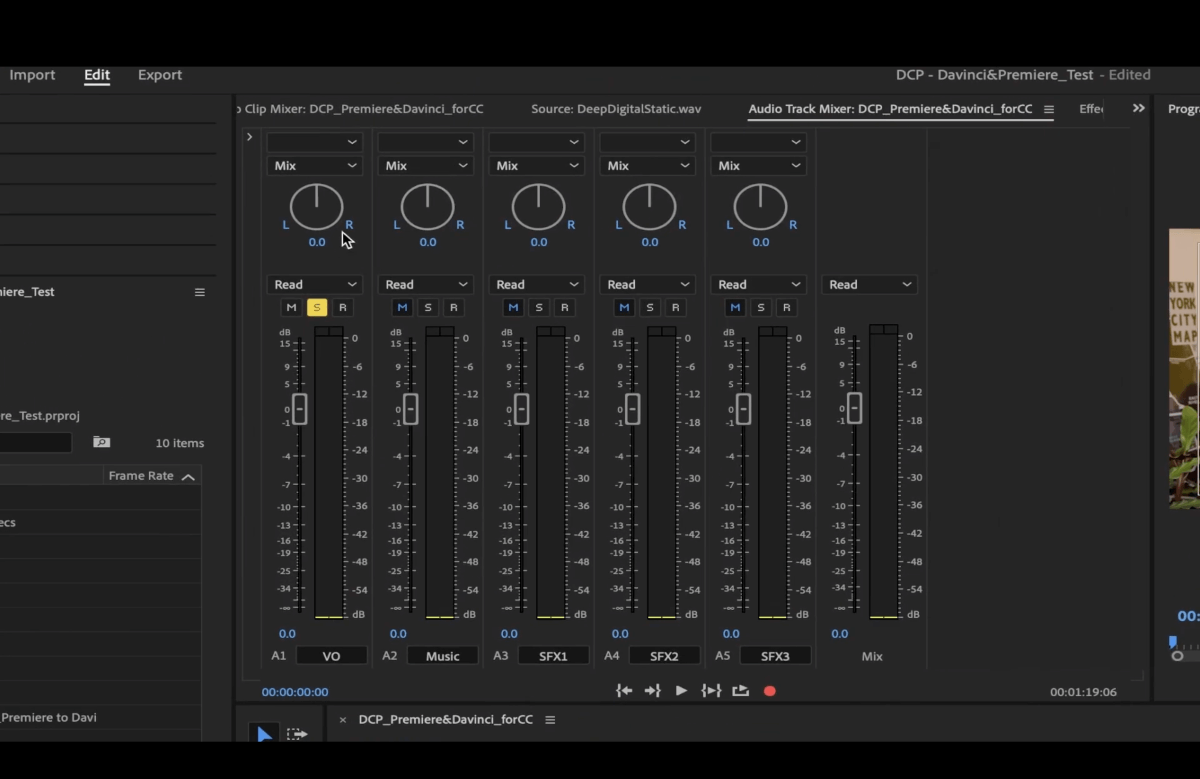
To add effects that will be applied to the audio track, click on the little arrow in the top left hand corner of the Audio Track Mixer box.
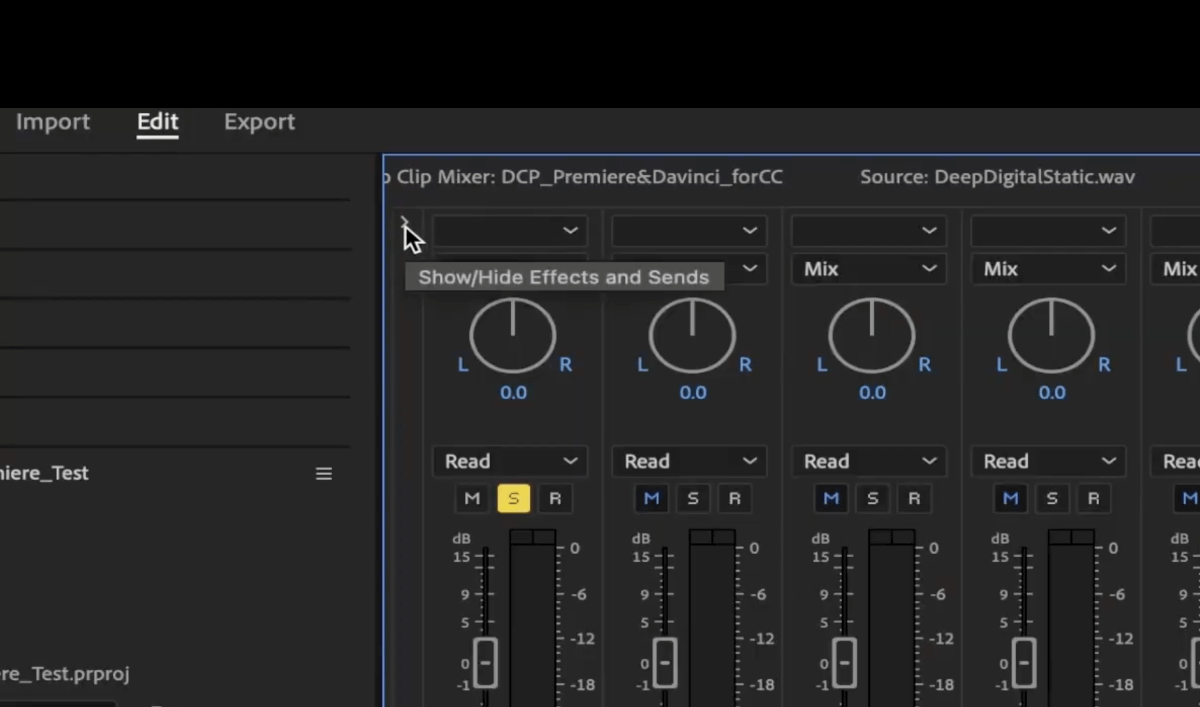
Then click a downward arrow in the grey rectangle above the audio track you want to edit (beside fx).
In the dropdown menu that opens up, you’ll find the effects from the Essential Sound Panel.
Go to Filter and EQ > Parametric Equalizer. Double click on it to open it up.
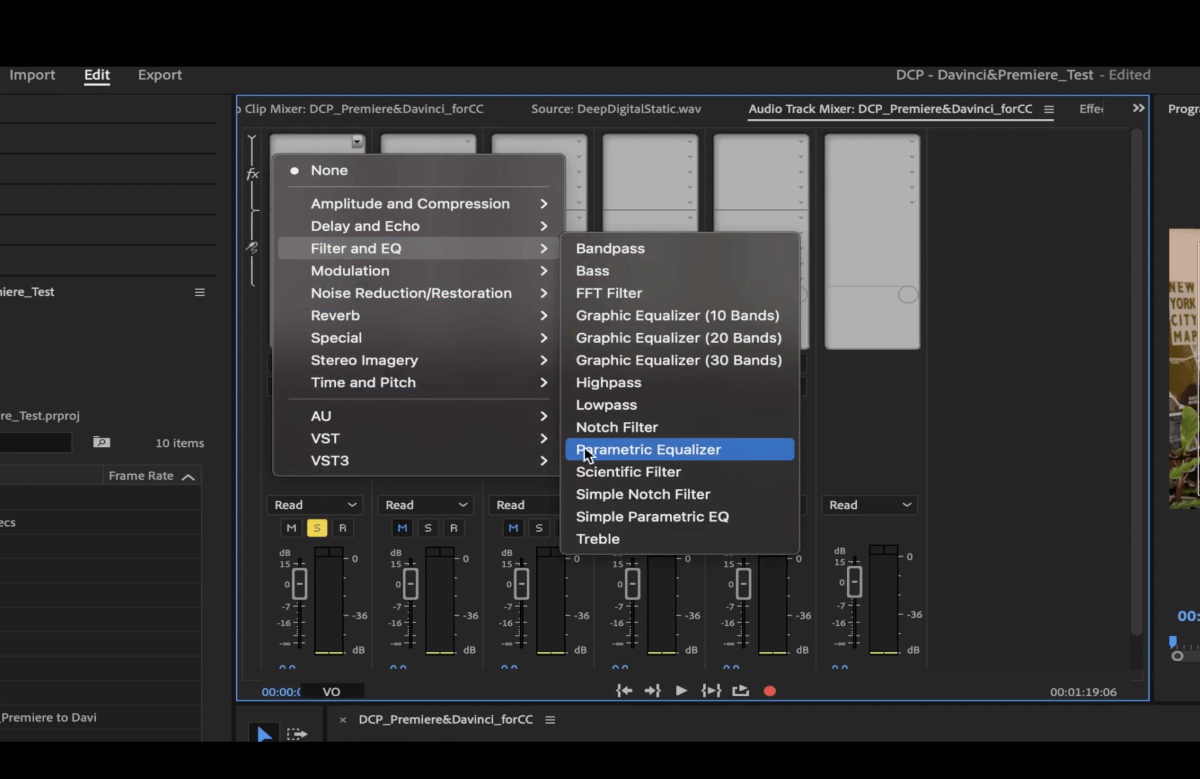
In the popup window, click the preset Vocal Enhancer. This preset works pretty well for doing fast fixes on audio. It will add a high pass filter, cutting off the lower end, which are sounds below 40 Hz, usually background noises, rumbles etc.
The L point higher up around the 100 gives more depth to the voice.
The H point helps to give the voice a bit of a kick.
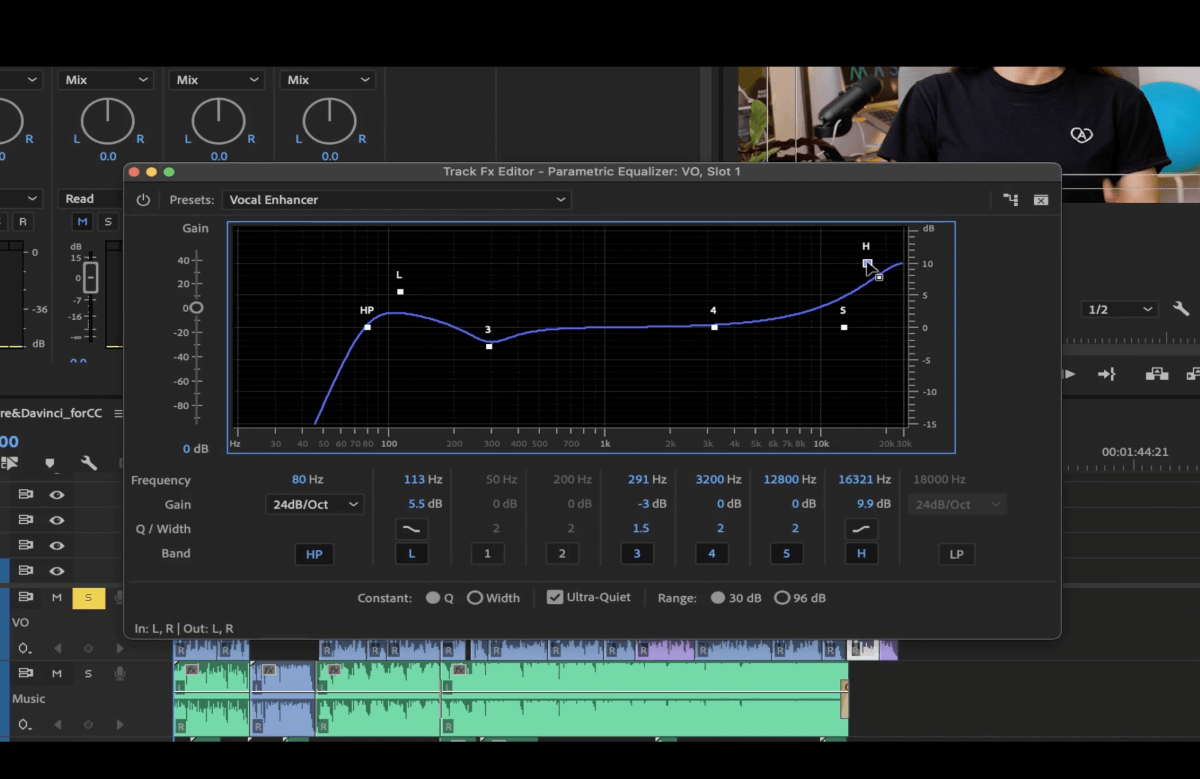
Try playing with them to see which one works better for your audio.
The Fastest Audio File Transfer
When you need to get things done yesterday, you can rely on MASV.
Compressors
Compressors help reduce the dynamic range of your audio, aka the difference between the loudest and quietest peaks of your sound.
The compressors we like are Multiband Compressor and Dynamics. They work super well and you can play around with them easily.
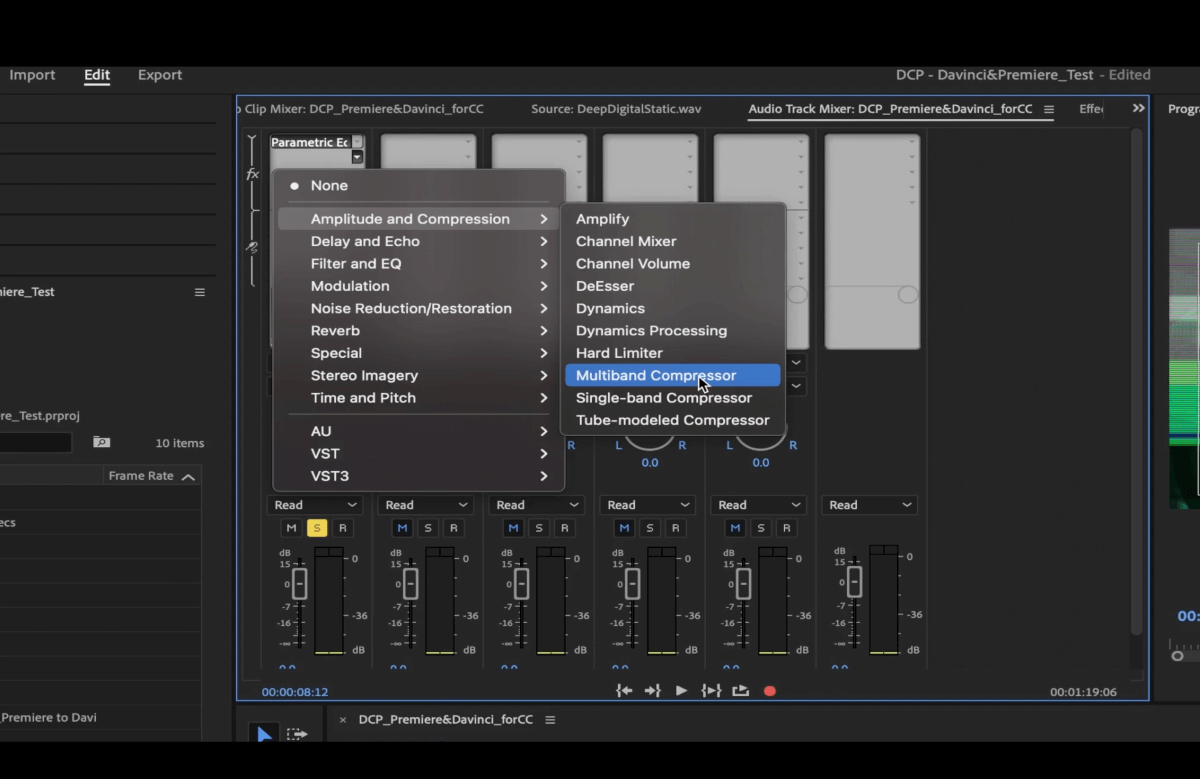
Multiband Compressor works by dividing the audio into different parts depending on the frequencies of your audio and applying compression to each one of those parts separately. It’s great for editing the master audio track but I’ve used it for voice/dialogue as well.
The Dynamics effect on the other hand lets you add multiple effects at the same time. Here’s some of what you can do with Dynamics:
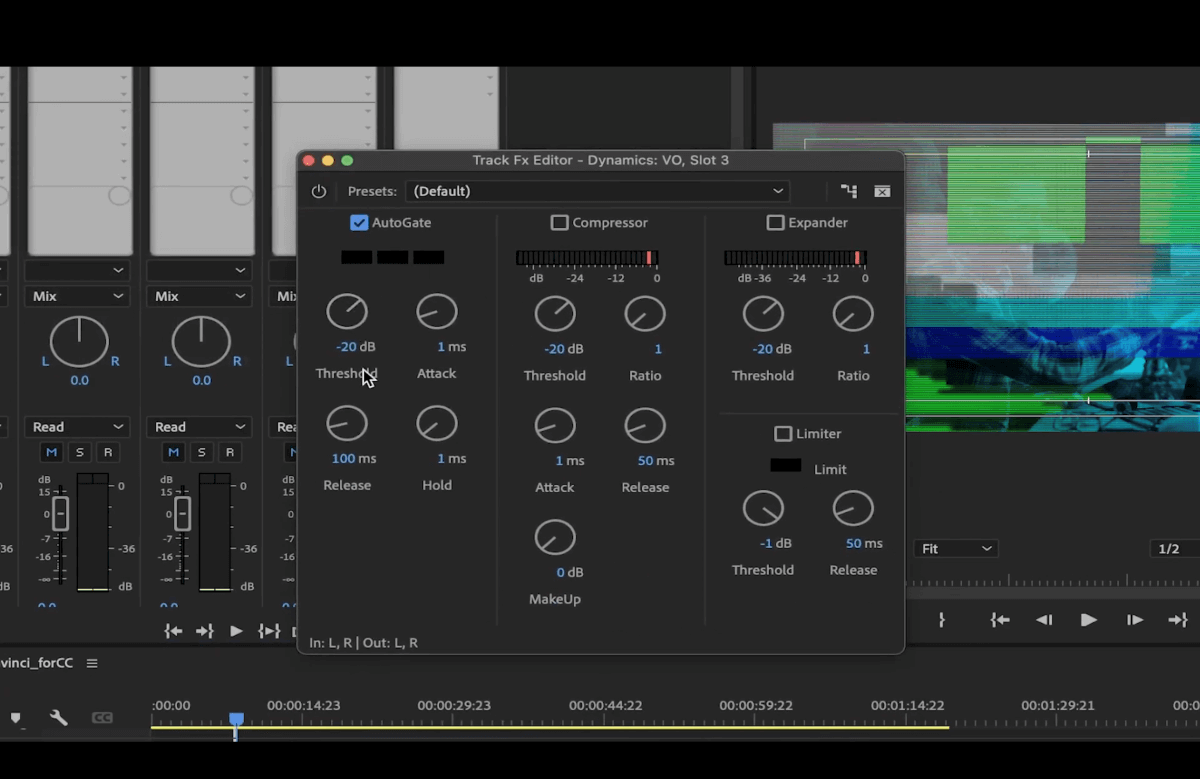
Autogate: Stop certain frequencies from playing. It’s mostly for stopping humming or background noises.
Compressor:
- Threshold is the dB level at which the compressor will start to work.
- Ratio is the level of compression.
- Attack is how quickly the effect will start when it gets to the threshold level.
- Release is how slowly the effect will stop when it goes out of the threshold level.
- MakeUp allows you to bring back any sounds that have been compressed.
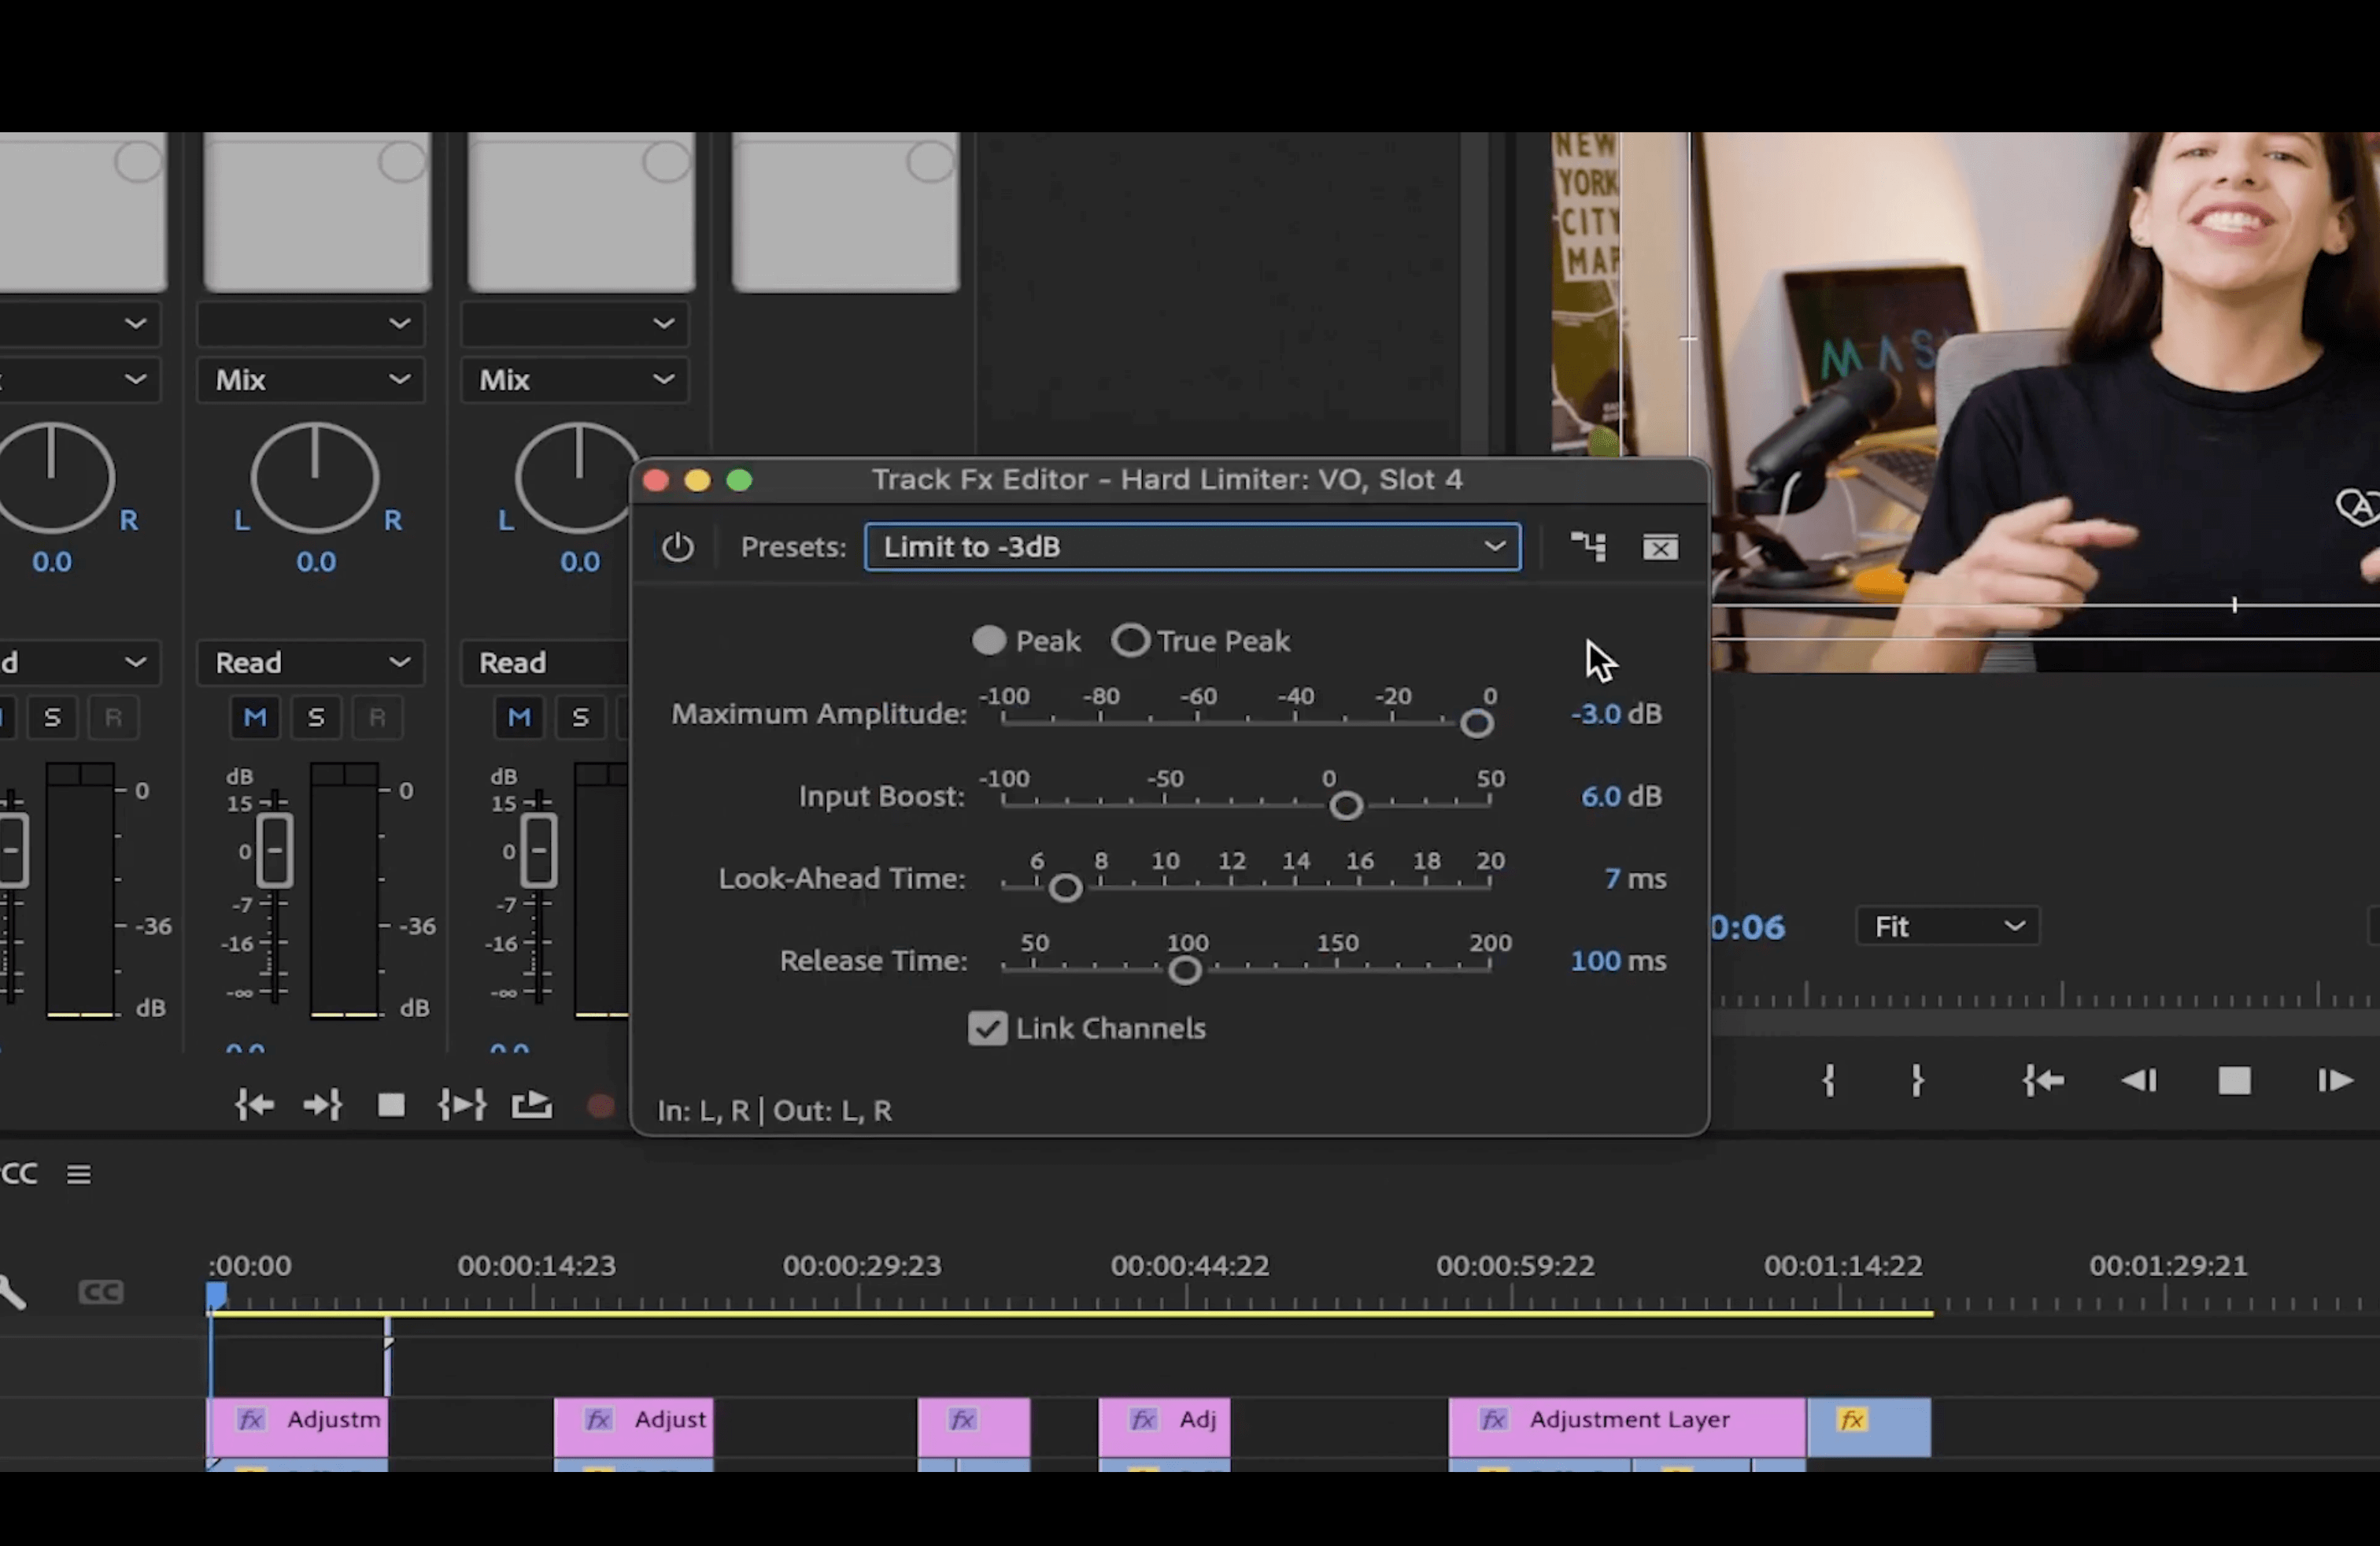
Now, let’s try the effect, Hard Limiter.
Once again, click one of the little downward arrows in the grey rectangle and go to Amplitude and Compresison > Hard Limiter.
This effect helps raise the overall audio volume and limit the peak to whatever we select. I like to use the preset Limit to -3dB to ensure that our voiceover doesn’t touch 0.
The Maximum Amplitude will be the max peaking level of your audio.
Input Boost will increase the loudness of your audio.
Now that your voiceover is ready, let’s move onto background music!
💡 Learn More: How To Make Your Voice Sound Better in Premiere
MASV Makes Your Audio Workflow Easy
Send your massive files (up to 15 TB) to clients, partners, and colleagues quickly and securely.
Background Music
Usually, background music should be between -18dB and – 25dB, but this also depends on the type of music and whether it’s being played by itself or mixed with other audio.
Keyframes
Select the music audio track on your timeline, then click on Music in the Essential Sound panel on the right hand side.
Activate the Ducking section by click the box beside it. Here you can lower the music when the voiceover starts.
Click Generate Keyframes so you can see the keyframes in your audio track. You can see them as little circles connected by lines in the audio track.
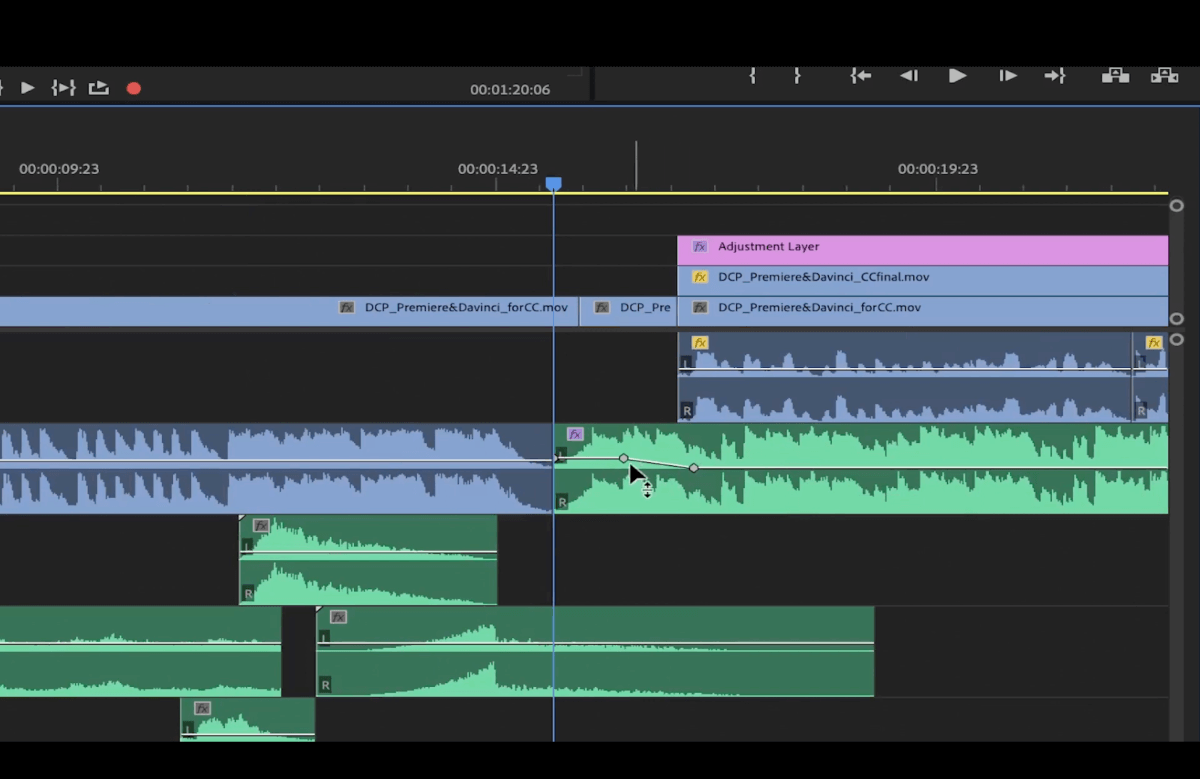
Move the keyframes to choose the point in the video where the volume will decrease. Click Shift while moving the keyframes if you want to freeze them at the same volume level as you move them along the timeline.
You can do this manually by clicking on the shortcut P for the pen tool to add as many keyframes as you want.
To manually adjust when the keyframes start and finish, and manually set the dBs for each keyframe, select the music audio track in your timeline and go to the Effect Controls tab.
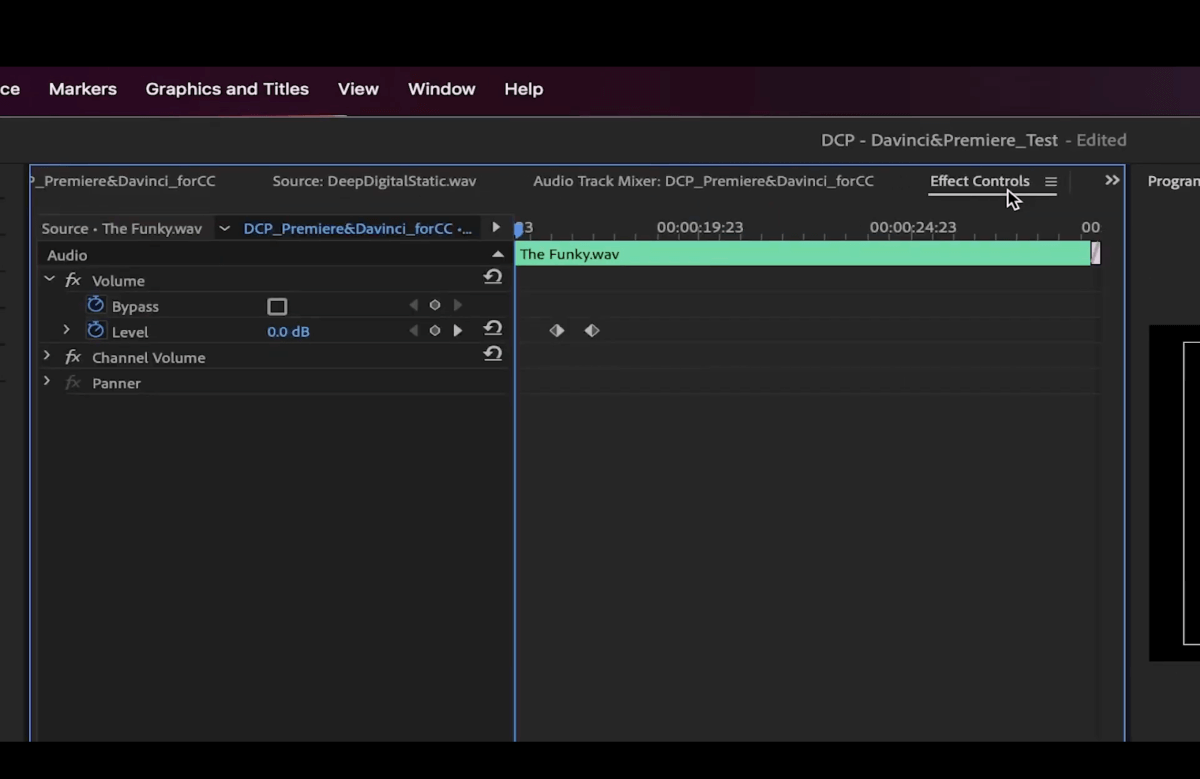
Raising and lowering volume
Modify the volume by clicking on the keyframe and pressing the bracket keys. The left one is for lowering the volume and the right one for raising the volume. Each click will increase or decrease it by 1dB.
Fading
For fading any kind of audio, go to the Effects panel on the top left hand corner. Go to Audio Transitions > Crossfade > Exponential Fade.
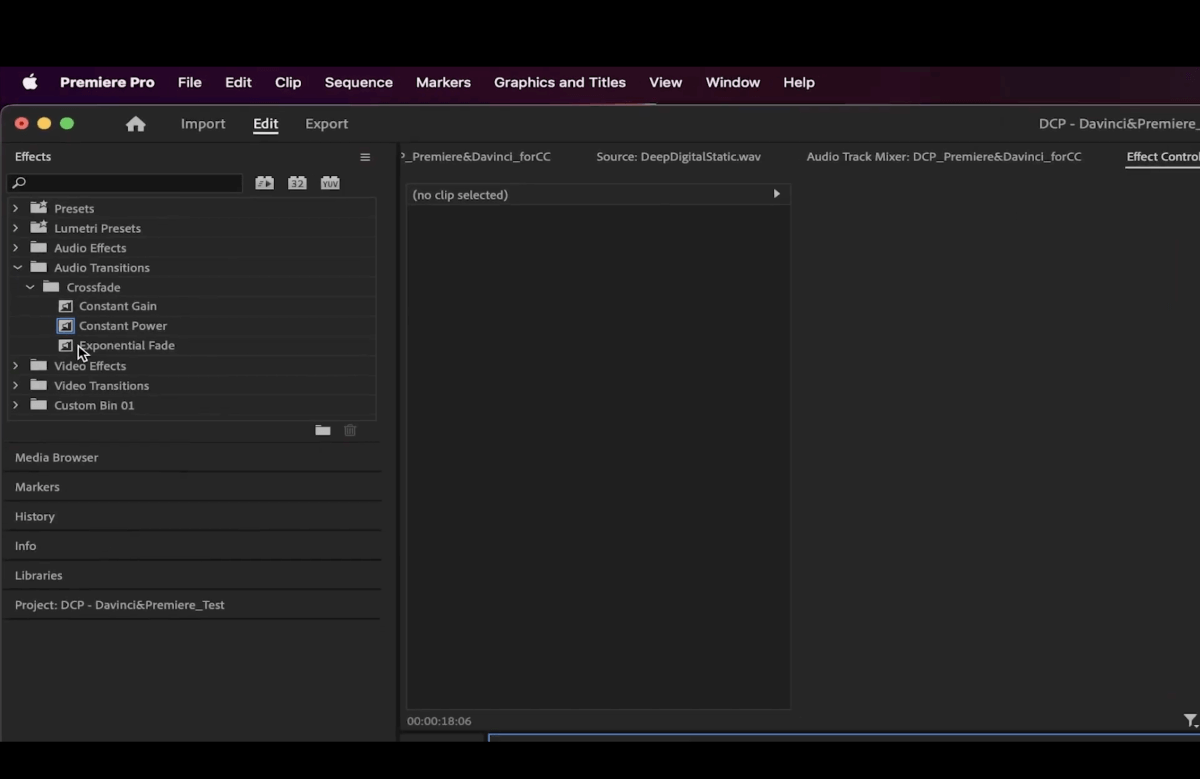
Drag and drop it to the beginning and/or end of your clip so your dont have to use keyframes all the time to fade out or fade in.
Sound Effects
Sound effects are normally between -12dB and -18dB. They should be lower than your voiceover or dialogue.
Select all of the sound effects in your timeline, then click on SFX in the Essential Sound panel.
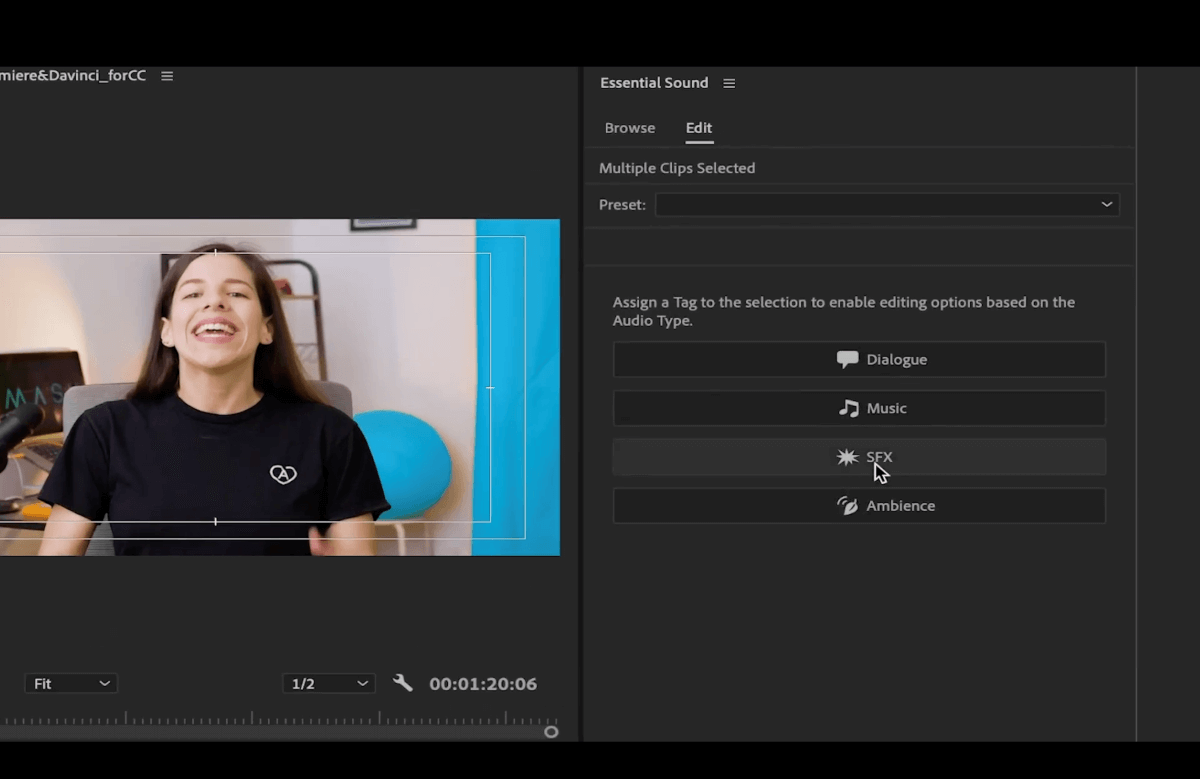
Select Auto-Match to set them all at the same audio level.
Each sound effect is different, and might be stronger or fainter than others, so listen and adjust the volume again with the Audio Gain.
You can also use the bracket shortcuts to increase or decrease the volume. When there aren’t any keyframes selected and you press this shortcut, it will automatically adjust the overall volume of your clip.
The key is to listen to your audio multiple times and watch the decibels bars to make sure everything is in order.
Now You’re a Pro at Mixing Audio in Premiere Pro!
And that’s it! That is how you mix audio in Premiere Pro. By applying these tips, your viewers will have the best experience watching your video.
Each project and audio source is different so make sure to leave plenty of time to work your audio. One way to speed up your process is to use MASV to send and receive large media files.
Maybe you need to send your draft project to a client for review — or hand it off to the next step in your post-production workflow. Or perhaps you need to receive audio and video files from set so you can start mixing. Whatever the case, you can get started with MASV for free (and send 10 GB for free every month!) to experience a super fast, secure and easy way to send your media files.
It’s what audio post houses like Smart Post Atlanta and SoundLounge did, and they haven’t looked back since. Improve your audio workflow with MASV, today!
Transfer Massive Files to Anyone, Anywhere
MASV gives you a 15 TB file size limit, enterprise-grade security, and lightning fast speeds.