Among video professionals, the proliferation of remote work and the growing size of files are making it harder to store and organize the data at your home or office.
- Running out of storage space on your computer is common.
- Backing up takes too long or isn’t done at all.
- Juggling all those external drives is inconvenient.
That’s when setting up and using a NAS can be a great solution. A NAS makes it easy and fast to share large files from your home or office with collaborators.
Learn how to set-up a NAS below.
Send Large Files Now
Use MASV to send large media files right now without any set-up or installation.
What is a NAS?
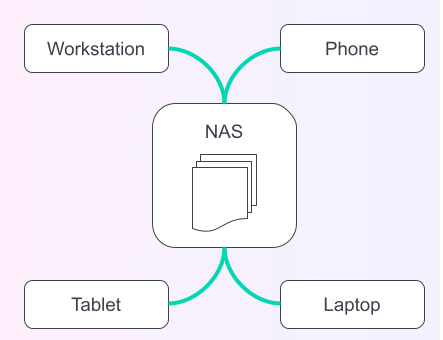
Network-attached storage (NAS) is a device that stores shared files on your local network. It’s a great solution for collaboration. You and your team can use it as a centralized place to organize the files in your projects.

A NAS is just a computer with storage drives on your local network that’s dedicated to storing and sharing files. Your computer and other computers access these files as shared folders.
You probably already use cloud storage. But because it’s on your local network, a NAS has a few advantages:
- It’s faster because data doesn’t have to travel through the internet.
- It’s always available, even when your internet service fails.
- You have more control over file access and other management tasks.
You can set-up network attached storage for more than just file sharing. Some NAS appliances can also handle backups, provide productivity apps, and host virtual machines and containers.
Large File Transfer
Send and receive raw camera footage, high-resolution images, and other large media assets with MASV.
Types of NAS devices
This article focuses on mid-range NAS products. They give a good balance between flexibility, ease of use, and cost. Expect to pay between $1000-$1500 to set-up and use a NAS in this range.
Most NAS manufacturers sell a full range of appliances. The list below gives you an idea of what’s available. Keep in mind that the examples don’t reflect the full range from each manufacturer.
High-end
Dozens of disk drives, either spinning, SSD, or M.2. Rack-mounted. Advanced features for managing data protection, performance, and security.
Needs IT expertise to install, configure, and administer.
Great for:
For enterprise-grade file storage. Supports 100s of users simultaneously.
Examples:
Mid-range
Up to 5 disk drives. All-in-one enclosure about the size of a toaster that you can put on a desk or shelf.
Set up yourself in less than an hour.
Great for:
Media capturing and editing, managing large file libraries, source code repositories, backups. Supports up to 20 users simultaneously.
Examples:
Low-end
1-2 drives. Can be a dedicated device with its own disk enclosure, a WiFi router with a USB socket to plug in a hard drive, or even just an old PC with shared folders.
Great for:
Just file sharing and back-ups in a home or small office. Supports up to 5 users simultaneously. Inexpensive but low performance.
Examples:
Automated Large File Transfer on a NAS
Use the MASV API or Watch Folders to send and receive terabytes of data to and from a NAS.
How to Use a NAS
Mid-range NAS appliances come with a lot of features and use-cases. Use the info below to determine how to use a NAS:
- File sharing — Let your team access files on your NAS.
- Media back-up — store copies of large media files in hot storage.
- Productivity — create a central location to edit documents, chat, sync calendars, etc.
- Virtualization — run virtual machines and Docker containers.
NAS Components
What do you need to set up a NAS? It is a pretty straightforward process. As well as the network attached storage appliance itself, you’ll also need the following:
- Storage drives: This depends on your team’s needs and your NAS appliance’s capabilities. Look for drives that are rated for use in a NAS. Get drives with the same model and capacity.
- Cat-7 ethernet cable: For best performance, connect your NAS to your office network with an ethernet cable rated to handle your network’s speed.
- Power strip with surge protection.
- A good place to put the NAS: Find a place that is free from vibration, dampness, heat, and dust. The NAS also needs to be close to an ethernet socket and a power socket.
- Optional: an uninterruptible power supply (UPS). This gives you the advantage of being able to survive short power outages and gives you a chance to shut down the NAS safely.
Media File Transfer
Fast, reliable, and secure large file transfer of large media files.
NAS Configuration: Step-By-Step
Here’s a generic overview on how to set-up a NAS. Each manufacturer and OS will have their owen specific instructions.
1. Set up the appliance
Follow the manufacturer’s instructions for inserting the drives and attaching the cables. Don’t turn on the appliance yet.
2. Configure your local network
If the NAS manufacturer recommends it, assign a fixed IP address on your local network for the appliance. You can do this with the router for your home or office network. Contact your internet service provider (ISP) or see your router’s documentation.
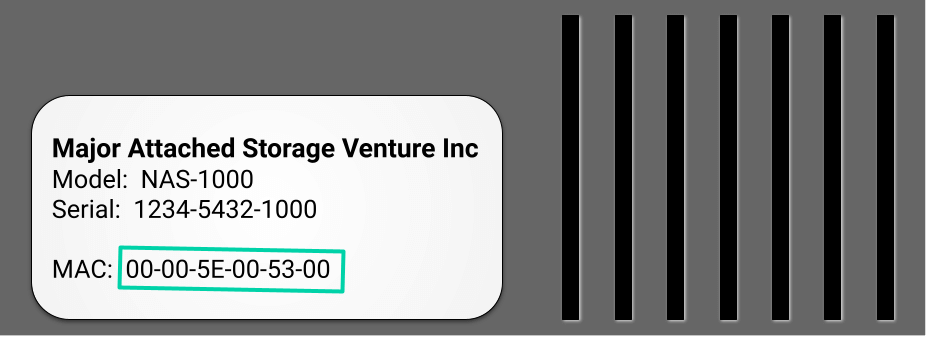
You’ll need the MAC address of the NAS appliance. It’s usually printed on the back of the appliance, along with the model or serial number. A MAC address is 12 digits long, composed of numbers and the letters A-F, sometimes separated by colons into 2-digit groups.

3. Start up the NAS
You’re ready to turn on the appliance! Again, follow the manufacturer’s instructions for starting the NAS for the first time and configuring its features. You can do this from a web browser while logged into your local network. Some manufacturers also have a mobile app you can use instead.
4. Configure Security
At a minimum, change the administrator password and any other security settings that the NAS manufacturer recommends.
5. Configure storage options
Configure the drives for speed, capacity, data protection, or a combination of these. See the manufacturer’s documentation for setting up storage management features.
For example, say you install four 1 TB drives in your NAS.
- For maximum storage you can configure the drives into a single 4 TB folder. While you get maximum capacity, there is no protection against a failed disk. Also, speed is about the same as each drive.
- For better speed and protection, you can mirror the drives. Each drive contains identical copies of your files. While your capacity stays at 1 TB, this is faster for reading but can be slower for writing. Also, your data is protected if up to 3 disks fail.
Most NAS appliances include features for RAID (redundant array of independent disks). There are several levels of RAID. Each level is a trade-off between performance, storage size, and data protection. Some manufacturers offer their own variations of RAID. For a good balance of speed, capacity and data protection for 4 or more disks, consider using RAID 5 or 6.
If you’ll be using the NAS for backup, now is the time to set aside storage for that.
6. Add user accounts, volumes, and folders
For each user in your home, office, or team, create an account on the NAS. Then create volumes or folders for them. By adding user accounts, you can control folder access and storage limits.
7. Set up the computers on your local network
At this point, that NAS is ready to use. Now you can configure the computers in your home or office to access the NAS:
| Platform | Set up |
| Apple macOS | Connect your Mac to shared computers and servers |
| Microsoft Windows | Map a network drive in Windows |
| GNOME desktop | Browse files on a server or network share |
Try MASV for Free
Fast, reliable, and secure large file transfer of large media files.
Transferring Large, Remote Files
Congratulations! Hopefully now, you know how to set-up a NAS. With your NAS set-up and running, you’re ready to share files in your home or office.
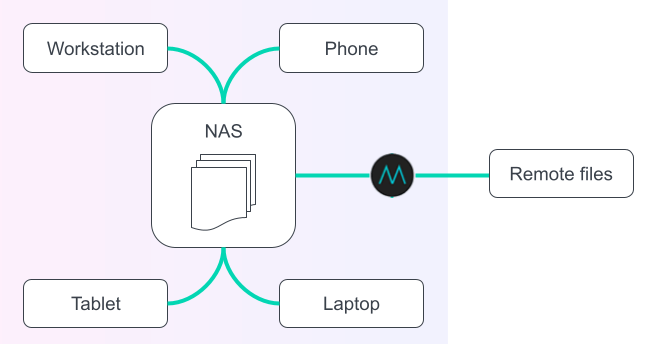
As easy and fast as your new NAS is for your home or office, it isn’t ideal for sharing remote files, especially large remote files. Transferring gigabytes or terabytes of data to and from your NAS takes a long time.
To make large file transfers fast and easy you can use MASV. It’s an excellent complement for your NAS to send and receive large files. Just drag-and-drop files onto MASV’s easy-to-use interface and hit send. It’s as easy as sending an email.
MASV sends file packages of unlimited size reliably, quickly. You don’t even have to zip or compress the files before sending them. MASV sends files securely, too, with ISO 27001 certification. It encrypts your files both in-flight and at-rest.
MASV works with any NAS, too. If macOS, Windows, or Linux can connect to a NAS, then MASV can send and receive files with it.

Automate with MASV Desktop
The easiest way to send files with MASV is with any web browser. You can also take advantage of automation features with the MASV Desktop app. It runs on macOS, Windows, and Linux. For example, MASV can watch folders on your NAS to send to remote locations.

Video production
In a video production workflow, you might need to receive raw footage from remote locations. By putting this footage on your NAS, your team can work on it more conveniently.
You could combine your NAS’s local storage features with MASV’s automation features to make it easier for your crew to send you this footage so that it’s ready for your team to edit, add visual effects, and so on. When you’ve done your editing, correction, and other processing, you can use MASV to send the final product for packaging and distribution.
Backup
MASV is a great tool to implement a 3-2-1 backup policy for your important data:
- Keep 3 copies, 1 primary and 2 backups.
- Store it on 2 different devices.
- Store 1 copy remotely.
Again, combining your NAS and MASV makes this straightforward: You can configure your NAS to set aside some of its storage for backup, giving you a primary and backup. Then you can use MASV to copy your primary data to a remote location. MASV even integrates with many cloud services, including Amazon AWS S3, giving you more flexibility and options for backing up.
Advanced features
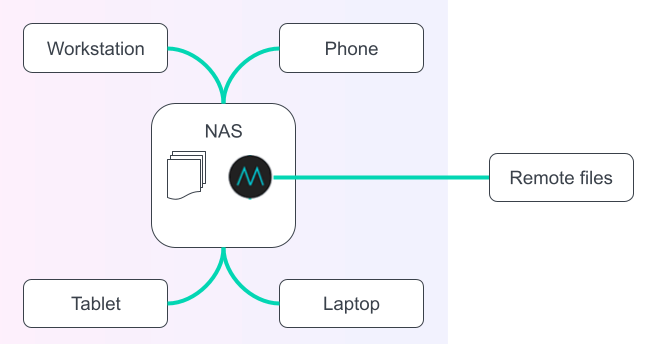
If your NAS supports Docker containers, you can get even more performance with the MASV Transfer Agent. With Transfer Agent running on your NAS, you can receive and send large files with even more performance than the MASV Desktop app.

A network attached storage is an easy and fast way to share files at home or at the office. MASV is an easy and fast way to transfer large remote files to and from your NAS.
Sign-up today and start using MASV for free.
MASV File Transfer
Try the fastest, most secure large file transfer service available today, MASV.