If you are new to the intricacies of a post-production workflow or just need a refresher, you’ve come to the right place.
To help you in your search, we have put together a helpful video post-production workflow template. After all, post-production is where your beautiful footage is transformed into a singular narrative that looks good, sounds great, and tugs at various emotional heartstrings. It’s important to get right.
Read on for a step-by-step breakdown of the vital steps of any good post-production workflow, including tools that might help and workflow tips along the way. 👇
Table of Contents
- What is a Post-Production Workflow?
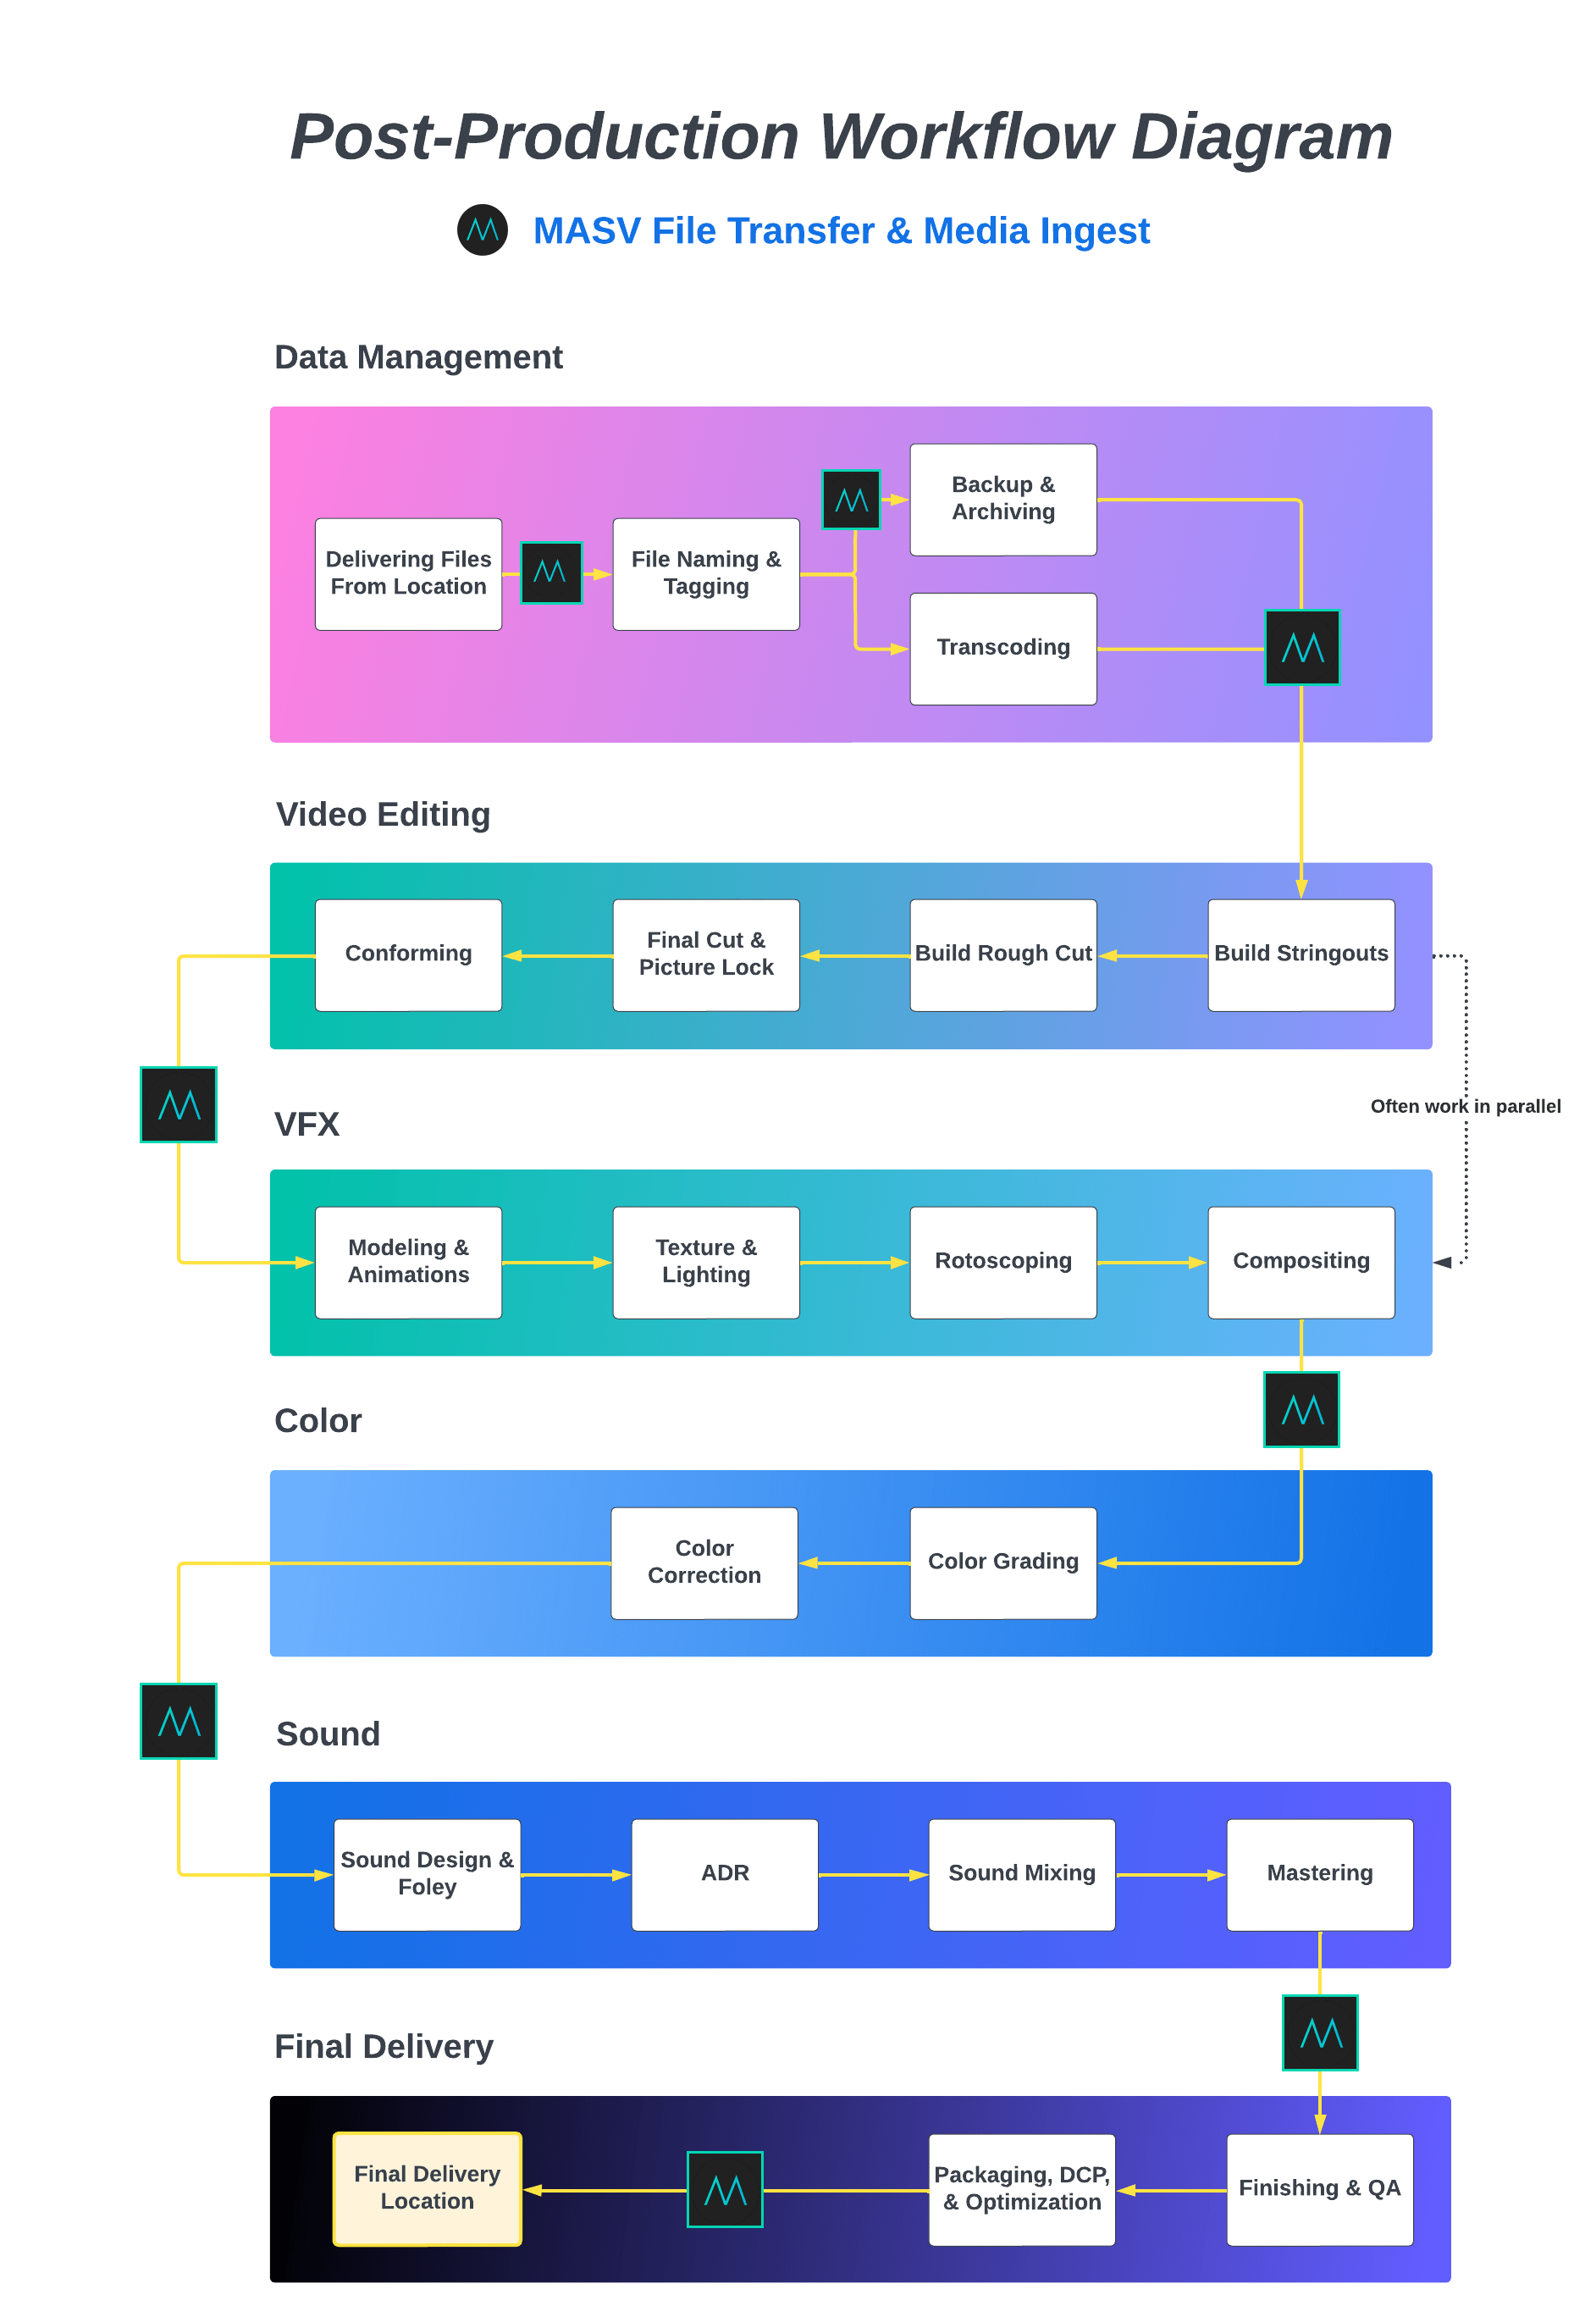
- Post-Production Workflow Diagram
- The Different Stages of a Post-Production Workflow:
-
- Data Management — collect, tag, and organize your raw media
- Video Editing — pull selects, build a stringout, and work towards picture lock
- VFX — create models and animations, layer in footage with plates, adjust lighting
- Color — correct color imbalances, apply grades to every frame
- Sound — recreate sounds, create new sounds, ADR, balance audio levels
- Final Delivery — package and optimize your media for different viewing formats
Large File Transfer for Post-Production Teams
Fast, reliable file transfer for in-house and remote post production teams.
What is a Post-Production Workflow?
The post-production process, also known as the post-production workflow, consists of a series of steps that begin after principal photography has wrapped and continues until the finished video is released to the public.
The steps of a post-production workflow include:
- Data management
- Video editing
- VFX and animations
- Color correction and color grading
- Sound design, ADR, and sound mixing
- Finishing and packaging
Learn more about each phase of a post-production workflow and what it entails below.
Post-Production Workflow Diagram
⬇️ Download Video Post-Production Workflow Diagram
Large File Transfer and Media Ingest
Share media assets between your post-production teams.
The Different Stages of a Post-Production Workflow:
Data Management | Video Editing | VFX | Color | Sound | Final Delivery
1. Data Management
Receiving Files
To begin work on any post-production project, you’ll need files with which to work. That means the production team will need to find a way to get them to you.
Video files can be delivered on a hard drive via courier, but it’s now much more common to receive them via a web-based managed file transfer service such as MASV.
In a typical workflow, the unedited, raw footage — called “dailies” or “rushes” — is sent to post-production team each day. This is usually done by either a Digital Imaging Technician (DIT), Data Wrangler, or Post-Production Assistant.
File management, naming, and tagging
Once footage arrives at the post-production house, staying organized from a file management perspective is crucial. It’s an overlooked step that can save teams hundreds of hours.
To give yourself a head start, ask camera crews in the field to include a shot log with any footage you receive. The shot log can include helpful information attached to each file, such as:
- Scene details
- Camera setup
- Shot take
If your director or director of photography (DP) have shots they particularly like, ask them to indicate that in the shot log. Don’t forget the sound report and circled takes from your director.
You can make your video and audio files more searchable through sensible file naming conventions, such as the international standard of ISO 8601: YYYY-MM-DD.
Project folder naming conventions can also help video editors find clips faster by organizing all your files by scene, sequence, and shot.
Ensure all your collaborators understand how consistency benefits them down the road. To keep everyone consistent, it can be helpful for the post supervisor and editor to develop and distribute a technical specifications sheet.
Backup, storage, and archiving
Once everything organized, it’s time to back everything up into storage. File storage can be on a personal drive, an on-premises shared network, cloud storage, or even located inside a decentralized storage network.
Storage options for post-production houses include a combination of online, nearline, and offline solutions such as:
- Redundant arrays of independent disks (RAID)
- Networked attached storage (NAS)
- Linear Tape-Open (LTO)
- External solid-state drives (SSD) and hard disk drives (HDD)
Some things to consider:
Storage size
Media files have become truly massive in the age of 4K–8K video. Teams receiving files from virtual production stages, in particular, may have to deal with mind-bendingly large files. These large file sizes are difficult to move and chew up storage limits.
💻 Workflow Tip: You can automate file deliveries into cloud storage using a MASV Portal.
A MASV Portal is a secure upload portal that can move files into cloud storage for you. Just connect your preferred cloud storage and any file that gets uploaded to a Portal will automatically appear in the connected storage unit.
MASV has cloud integrations with most major cloud storage providers and media asset management tools.
Download and upload speeds
External drives (along with dongles and cords) are notorious for causing bottlenecks in video transfer speeds. Make sure to choose a storage solution with exceptional read/write speed.
Reliability/backup storage requirements
Schofield’s Second Law of Computing states that if a file doesn’t exist in three places, it doesn’t exist. It’s a good rule of thumb for post-production teams. Always back-up files in at least two other locations.
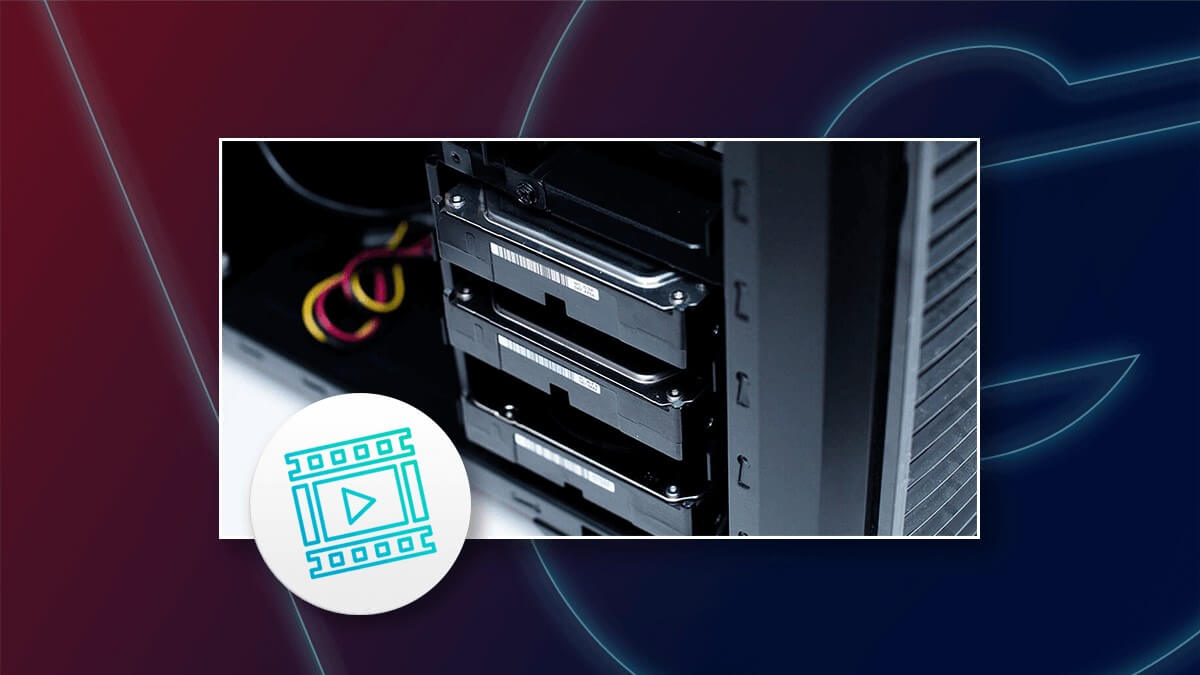
Storage & Backup Workflow for Filmmakers
Read our guide on video storage and backup workflows for production teams.
Rendering and codecs
Raw footage from the field is too big and cumbersome to work with efficiently. You’ll need to transcode that footage by rendering a codec to the original footage, which then converts the footage into lower-resolution files (transcoding).
If the files are being delivering on a hard drive via courier, they don’t need to be transcoded beforehand. Transcoding helps make file transfer over the cloud more manageable.
Oftentimes, DITs or data wranglers will send video proxies over the cloud so the editorial team can get started right away. Meanwhile, the full raw footage is shipped.
There are hundreds of different codecs you can use to compress your files. Even some AI-powered ones. The most common are:
- H.265, H.264
- Redcode Raw
- ProRes
- ArriRaw
- Apple ProRes 422/444
- 422 Long GOP
- MPEG-2.
Editing codecs, on the other hand, include: DNxHD, DNxHR, and ProRes 422/444.
In today’s cloud-based media workflows, it’s common to upload dailies into a review and approval tool like Frame.io for instant feedback.
⚙️ Top Media Asset Management Tools: Frame.io, Iconik, Reach Engine
💻 Workflow Tip: Use MASV to receive contributor assets into a MAM from those without an account (e.g. freelance editor, contract photographer, etc.).
Jump to:
Data Management | Video Editing | VFX | Color | Sound | Final Delivery
2. Video Editing
Once dailies are received, organized, and cataloged, assistant editors must then save these files to the post-production team’s central storage. That’s when the next (arguably most important) stage of any video post-production workflow can begin: Video editing.
Organizing, pulling selects, building stringouts
The next job for assistant editors is to import the right files into the team’s non-linear editing (NLE) software, which is an offline editing software.
Offline editing allows editors to use lower-resolution footage to make their edits. Using offline editing software means the original content is not modified until re-linked to the edited files (more on this later).
- Once files are imported into the NLE after assistant editors scout all clips for the best takes — a process called “pulling selects”. Sometimes assistant editors will further tag and categorize selects based on the lead editor’s preferences. Tagging the correct tape ID is super important later in the online editing and conforming process.
- Assistant editors then arrange selects into a sequence of shots in your NLE timeline, known as a stringout (or assembly edit or KEM roll). A stringout is an extremely rough draft of raw video that hasn’t yet been edited or refined. It shows the video’s basic progression by scene, without music or effects.
- Assistant editors at this time also sync audio, organize files into bins, isolate all usable takes, and perform any extra requests required by the editor to do their job. And that job is to focus on building the story with the director.
Sometimes these assistants are so busy, they have assistants of their own!
The editors then view the stringouts while making notes or adding markers to the timeline.
⚙️ Top NLE Software: AVID, Adobe Premiere Pro, Final Cut Pro, DaVinci Resolve
💻 Workflow Tip: Editors can configure a MASV Portal to automatically download files it receives into a folder on their computer. Files can arrive overnight and be ready in the morning.
Building the rough cut
Rough cuts are the next iteration of video production. Rough cuts ensure the more refined story or video progression makes sense while paring the stringouts down to a manageable length.
Video editors create rough cuts on a scene-by-scene basis, working on each scene individually and then re-inserting them into the master cut.
- The lead editor works with the director’s (or producer’s) notes to include or replace any scenes or takes as required, along with finalizing the best takes.
- Music and critical sound effects are sometimes added at this stage by assistant editors, along with a voice-over (VO) scratch track to ensure the right timing.
- Any pickup scenes filmed after the fact, and placeholders for visual effects (VFX) are added as well.
- Unwanted sounds are removed and all sound usage is approved by the editor before it goes to the director or producer.
The director and producers then review the rough cut for feedback. Once the rough cut has been approved by the editor, director, and producer, it becomes what’s called a first cut.
Fine cut and picture lock
Unlike the rough and first cuts, the fine cut doesn’t focus on the entire film — rather, it focuses on the minute details of each frame and scene. Fine cuts emphasize and strengthen the rhythms and structures identified in the first cut. They sometimes include rudimentary effects.
The fine cut also includes finalized music or music still being worked on by the composer, who at this point has access to the edit.
After more feedback and editing rounds, the final cut — known as picture lock — is approved by the creative team and other stakeholders.
Picture lock is the version where no further editorial changes can be made. It’s sometimes sent out to sound and VFX teams, although in most workflows, the SFX and VFX teams will both have started earlier in the process. In the latter case the editor waits for the fine-tuned VFX/SFX additions before finalizing, while all other departments are notified that no further changes are allowed.
Post-production houses and VFX artists often use collaboration tools to draw, write notes, and make timestamp-specific comments on footage while tagging other collaborators.
⚙️ Top Media Collaboration Tools: ftrack, Frame.io, cineSync, Frankie
Conforming and re-linking original camera media
Editorial teams must then conform the video’s locked version into a format usable for the VFX, color, and audio teams.
While conforming is a way of confirming that your files and related metadata are error-free, the lower-resolution shots used during offline editing must be re-linked with the original, high-resolution footage. This re-linking is a process within conforming known as online editing.
Applying the editorial team’s edits to the original footage allows the VFX, color correction, and audio teams to do their thing. To assist the VFX team, video editors then identify the original camera files for each shot. The latter is another example of where good organization and naming conventions are vital.
Re-linking your files requires finding the precise originals of those files within an ocean of scenes and takes.
💻 Workflow Tip: Use MASV to transfer original media folders; MASV preserves folder structure and file hierarchy for online editing.
The Ultimate File Transfer Tool for Post-Production
Share from set to edit bays, to coloring suites, recording studios, finishing houses and more.
Jump to:
Data Management | Video Editing | VFX | Color | Sound | Final Delivery
3. VFX
Sending the VFX team the picture lock gives them a clearer and more finely-tuned version, but the VFX team should also get a copy of the rough cut. That’s because the rough cut includes those VFX placeholders we mentioned earlier.
In many cases, the VFX team will have started work on the project long before the picture lock stage.
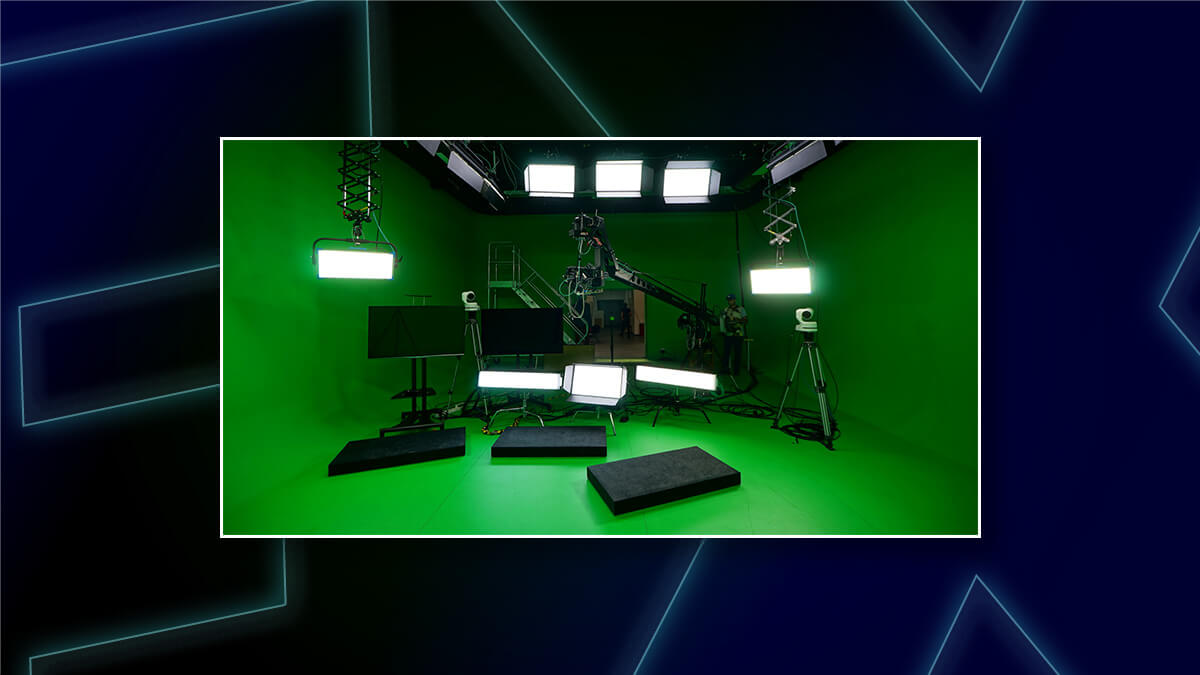
Read our complete breakdown of everything involved in a traditional VFX pipeline below, from storyboarding and reference imagery, all the way through modeling, rotoscoping, composition, and lighting (just to name a few).
VFX Pipeline: A Complete Guide For Video & Media Pros
What is the VFX pipeline, and what does it entail? Use this handy VFX guide when developing your own workflow.
Jump to:
Data Management | Video Editing | VFX | Color | Sound | Final Delivery
4. Color

Once the colorist has received the footage, it’s time for color correction and color grading.
Color work usually takes place either in parallel with the VFX team or when the VFX team is finished, depending on the schedule and workflow. It’s rarely performed before VFX work because it’s usually a better use of a colorist’s time to perform all the color correction and grading in one shot.
Colorists work through a video frame-by-frame to keep things consistent.
Color correction
Refers to fixing consistency issues often originating from the shoot itself. For example, colors looking washed out in one location and vibrant in another.
Color grading
Refers to keeping the production’s color palette to a specific grade required by the director — such as the Netflix show Ozark’s notably dark color scheme.
The process of color grading based on the director’s desired tone means that to ensure visual continuity (and to minimize revisions), colorists must have access to director and DP feedback.
⚙️ Top Color Grading Software: DaVinci Resolve, Colorlab.ai, Magic Bullet, Color Finale, Adobe Premiere Pro, Final Cut Pro
The Ultimate File Transfer Tool for Post-Production
Share from set to edit bays, to coloring suites, recording studios, finishing houses and more.
Jump to:
Data Management | Video Editing | VFX | Color | Sound | Final Delivery
5. Sound Design/Mixing

While audio tracks are separate from video files in the production and post-production process, it’s still important for the audio team to see the video while working on sound design and mixing.
That’s why the sound effects and mixing team works with both video and audio files.
A typical audio post-production workflow looks like this:
- Spotting sessions
- Editorial
- Editorial preview
- Assembly
- Client preview
- Editorial fixes
- Pre-dub
- Final mix.
Many productions often feature separate music, effects, and dialogue editors. Read our full guide on Audio Post-Production Workflows below.

Audio Post-Production Workflow Guide
A deep dive into the audio post-production workflow for film, television, and live event video – from spotting sessions to audio editing and mixing.
⚙️ Top Digital Audio Workstations: AVID Pro Tools, Reaper, Logic Pro, Sequoia Pro, Izotope Neutron
Jump to:
Data Management | Video Editing | VFX | Color | Sound | Final Delivery
6. Final Delivery
You’re almost done! Now you just need to perform a few more final steps before getting your video over the finish line, starting with quality assurance and video finishing.

Video finishing and QA
After hundreds of hours staring at more or less the same video for months, editorial teams must get a fresh set of eyes on the final cut (which, at this point, includes every department).
This process, known as video finishing or quality control, includes checking for visual errors such as bad transitions or gaps, and double-checking any items that may need final color correction or graphics tweaks.
Quality control reviews are also good for spotting problems with the final audio mix or even detecting mistakes originating from the set itself.
After all, it’s better to take a few extra steps at the back end rather than being ridiculed for an obvious mistake you didn’t see during editing.
Packaging and optimization
You’ve created your picture lock; added VFX, color grading, and audio; and finished your project with intense quality assurance and some final tweaks. Now it’s time to package and optimize your media as the final stage of your film post-production workflow.
This is where titles, credits, closed captions, and subtitles for translations into other required languages are added.
💻 Workflow Tip: MASV doesn’t require download recipients or Portal contributors to have an account, which makes working with external vendors (dubbing houses, captioning services, etc.) a breeze.
Otherwise, what you do with your media in this stage depends on where you plan to release it.
Suppose you’re looking to show it off on social media. In that case, some advance research on the right social media specifications for your video (including resolution, aspect ratio, frame rate, bit rate, and video format) is a must.
The same goes for playback on broadcast stations, which have their own specifications and policies on video playback.
If you want to screen your short or feature film publicly, you’ll need to create a digital cinema package (DCP). That’s because DCPs play on those expensive digital cinema projectors preferred by most movie theatres and film festivals.
Building a digital cinema package
DCPs are a collection of video, audio, and metadata files (such as subtitles or captions), with every frame represented by a separate folder. They’re typically encrypted and require a Key Delivery Message (KDM) to ingest and play the content.
Traditional DCPs consist of a heavy-duty case (such as a CRU drive enclosure) with a hard drive and related cables, but modern DCPs are often delivered via satellite or IP-based methods.
Post-production teams and filmmakers can make their own DCPs simply by exporting to DCP in Premiere Pro, Final Cut, Davinci Resolve, or with other tools, or you can use a professional DCP shop.
For the highest quality DCP, start with a DPX or TIFF image sequence (known as a Digital Cinema Distribution Master, or DCDM).
Speed Up Post-Production File Transfer
Share raw media, proxies, and other large assets between editors, colorists, VFX, and more.
Transferring your finished video
You may have noticed a theme emerging throughout all these steps: Unless all your team members work at the same location or use the same storage, you’ll need to transfer many files during a typical post-production workflow.
Post-production teams could always use longstanding enterprise solutions such as Aspera or Signiant to send large files.
But a web-based file transfer solution like MASV provides comparable, enterprise-grade performance, reliability, and security for a fraction of the cost and without having to sign long-term contracts.
MASV’s browser-based transfers are also easier to use than the old-school solutions — for you and your IT team. Aspera and Signiant’s UDP-based file transfer technology often requires technical firewall tweaks and software and plugin installations.
💡 Read More: How to Determine the Best File Transfer Tool?
Get started with MASV today get free transfer credits every month. When you sign-up, you also get access to:
- Fast, stable, and efficient transfers of large data — send and receive file packages of unlimited size.
- Custom upload Portals to receive large files from contributors.
- Easy integrations with popular cloud storage and collaboration tools.
- Watch Folders to automatically upload, download, and back-up large files.
- Security controls like password-protection, user permissions, download limits, file expiry — and the security backing of an ISO 27001 certification.
- Custom acceleration features like Multiconnect and 10Gbps optimization.
- And a File Transfer API to integrate with your custom delivery workflow.
Your Search is Over. Share Files of Any Size Today.
Transfer large files for free with MASV.
